One bowl, one jug and a whisk… You don’t need much more to put these muffins together and as an added bonus, they are so chocolatey, that you will not miss an icing for it. The recipe makes 12 regular sized muffins but may be doubled for 24.
500ml flour
160ml cocoa powder
125ml sugar
10ml baking powder
a pinch of salt
250ml chocolate chips
330ml milk
80ml vegetable oil
2 eggs
5ml vanilla
Preheat your oven to 200℃.
Line a muffin tin with paper cups.
Sift the flour, cocoa powder, baking powder and salt together into a bowl.
Add the sugar and mix through.
Add half the chocolate chips.
Whisk the milk, oil, eggs and vanilla in a jug with a wide mouth.
Stir this wet mixture into the dry mixture, taking care not to over mix.
Spoon the batter into the prepared muffin tins and sprinkle the rest of the chocolate chips over.
Bake for 20 – 25 minutes.
You may serve whenever you like as these muffins don’t need additional icing and is quite tasty when slightly warm.
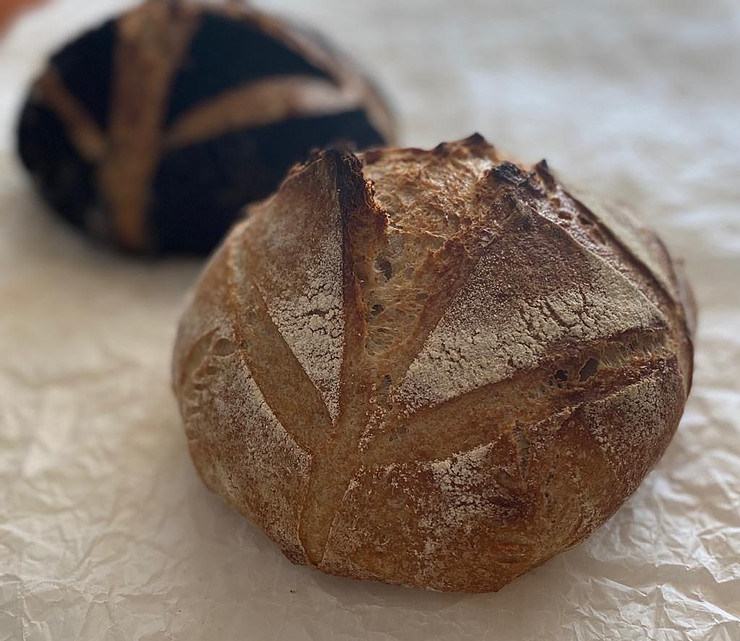
I am by no means a Master Baker but when it comes to eating sourdough bread, I know what I like: crusty but not hard, nicely salted and tangy enough so that I know what I eat.
I have baked many, many sourdoughs and I honestly can not taste the difference between those that take three days to make and the one I am about to give you the recipe off. To me, it ticks all the boxes as far as satisfaction and taste goes and as far as time goes, this method makes sense in my life!! I do the mixing in the afternoon and the baking the next morning, which works out just perfect. After all, food and the process of creating it should add joy to your life!
100g active sourdough starter
300g water
15ml salt
400g bread flour
Add your starter, water and salt to a bowl and leave to stand for ten minutes or so.
Stir the mixture every now and then during this time.
Add the bread flour.
Stick your hand in the bowl and sqish the water and flour between your fingers by grabbing some in your hand and then making a tight fist. Keep going until all the ingredients are incorporated and you have no big lumps in the dough.
Cover the bowl with a tea towel and set aside for 30 minutes.
Now, wet your hands to stretch and fold the dough. With the bowl in front of you, start at the top: push your hand underneath the dough, grab some of it and stretch it up as far as it will go. Relax it and fold it over the top of the dough, towards you. Do the same, but in reverse, with the dough closest to you and then proceed to do both the left and right sides, until you have stretched and folded the dough from four different directions.
Cover the bowl with a tea towel and leave to rest for another 30 min.
Repeat this process of stretching and folding 3 – 4 times. You will feel the dough becoming stronger each time you stretch and fold!
Cover the dough after the last folding session and put it somewhere cool in your kitchen, for 12 – 18 hours.
The dough is ready to be shaped once it has increased in volume and you can see air bubbles in it.
Transfer the dough to a work surface dusted with flour and shape your bread. Carefully transfer it to baking paper and slash it/decorate with a lime or sharp knife.
Take hold of the edges of the baking paper and transfer the bread to a dutch oven, put on the lid and leave for about an hour.
Preheat your oven to 250℃.
Place the dutch oven in the preheated oven and bake for 30 minutes, with the lid on.
Turn the oven temperature down to 220℃ , take off the lid of the dutch oven and bake the bread for another 20 minutes.
Remove the dutch oven from the oven and remove the bread from it.
We have had an exceptionally cold winter. Some days the heavens opened up and soaked the earth and everything on it and on others, the mountains were covered in snow and we huddled inside around the fire, hands either clamped around a cup of hot chocolate or that well deserved glass of red at the end of the day. And then, with the first few rays of sunshine making their appearance, we were outside, making believe that summer is on its way in Stellenbosch!
I have to say, there is something about food and fresh air. Eating al fresco affects the senses and makes the food taste fresher and somehow better and sitting around a table with your loved ones, a glass of wine in hand and a simple meal in front of you, makes life seem complete.
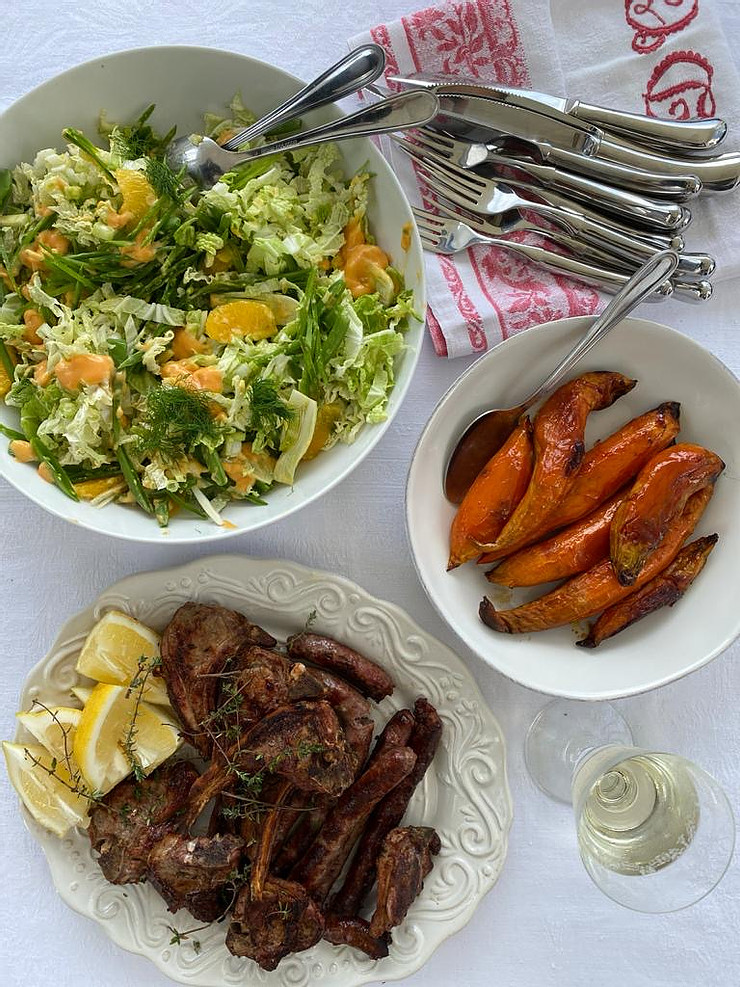
So the food was a bit of a throw-together-from-the-fridge kind of meal. I marinated lamb chops in some white wine and thyme and we cooked it on an open fire. Without going into the story behind it, we always have sausage with chops.
We had orange sweet potato that was glazed with butter, honey, brown sugar and a pinch of salt. Simply poured over the sweet potato and roasted in the oven until soft and caramelised.
The salad was shredded bok choy, finely sliced fennel bulbs, orange segments and fresh sugar snap peas.
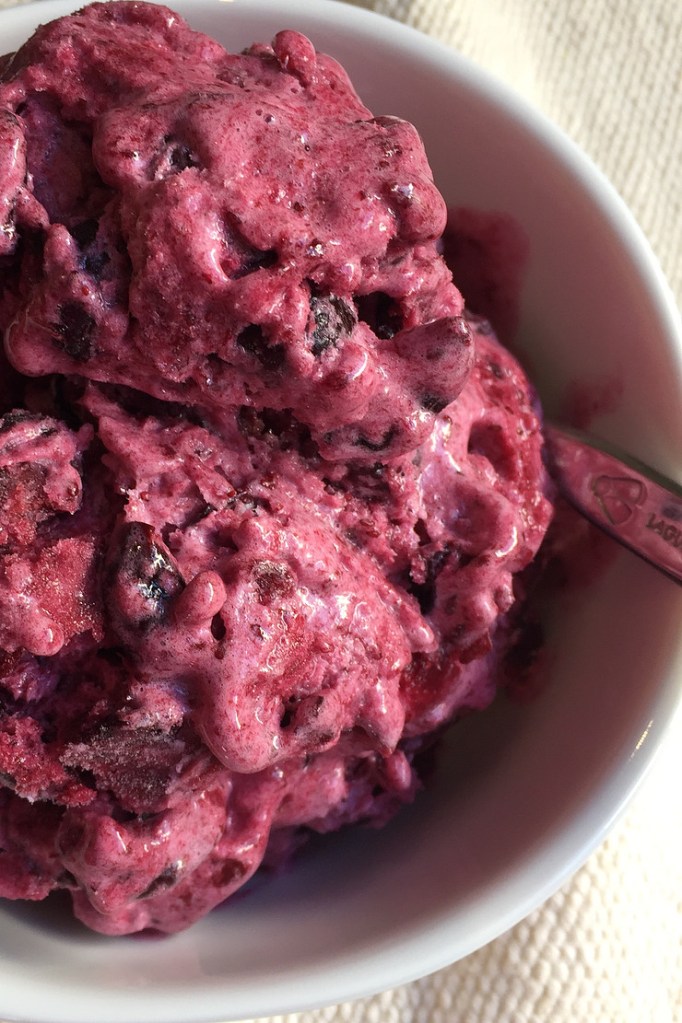
We ended the meal with a simple blueberry sorbet of which I include the recipe. (Find in the recipe section under No-machine Blueberry Sorbet).
Add the blueberries and granulated sugar to a small saucepan, over medium to low heat. Stir occasionally as you want the berries to burst and release their juice.
Once there is enough liquid in the saucepan, turn the heat down to low and simmer the mixture for about 15 minutes.
Take off the heat and allow to cool completely.
Spoon the cold blueberry mixture into a container with a lid and place it in the freezer for one hour.
In the meantime, add the egg whites to a clean mixing bowl and beat with an electric beater until soft peak stage.
Add a teaspoonful of the caster sugar and beat for about 30 seconds to incorporate. Keep going, adding small amounts of sugar and beating, until you have a glossy meringue and have used all the caster sugar.
Take the berry mixture out of the freezer (after the one hour) and stir through the icy/crystal mixture. Now add the meringue you have made to the container and stir the berry-meringue together. Replace the lid and place back into the freezer.
Take the container out after 20 minutes and give the mixture a good stir. Place it back into the freezer. Repeat this process TWICE more.
Now freeze the mixture undisturbed for another 2 hours.
When you are ready to serve, take the container from the freezer and let it stand in the kitchen for about 10 minutes before scooping out the sorbet.
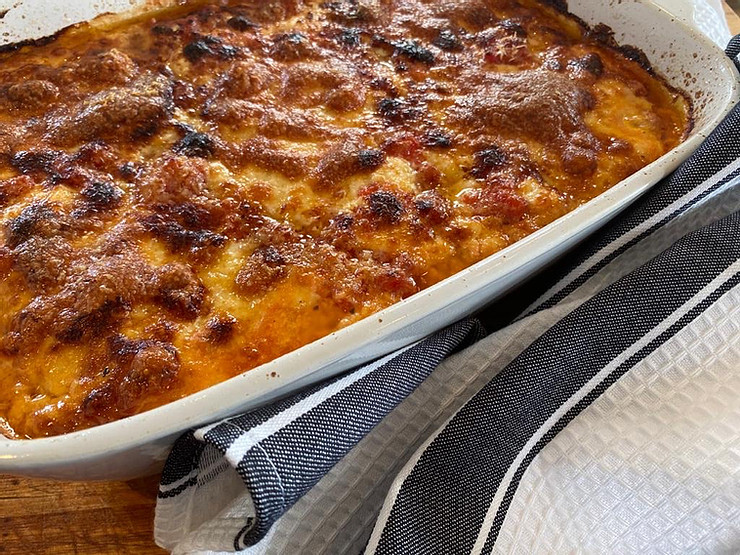
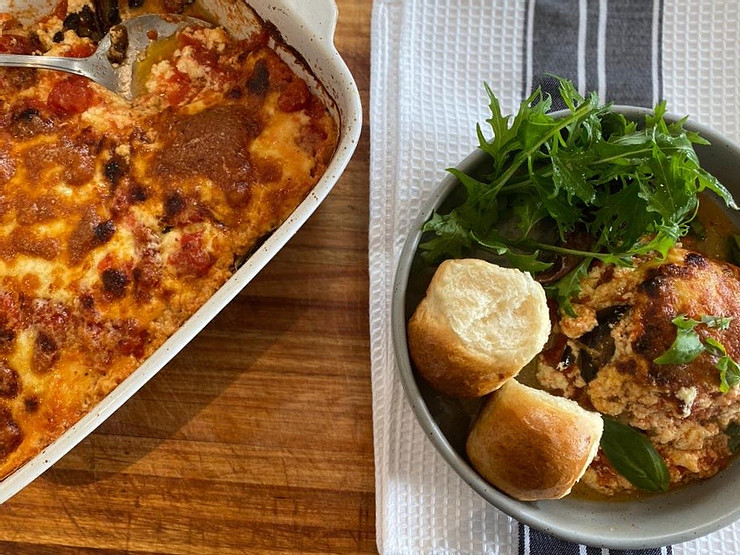
This cheesy bake is the perfect vegetarian dish for cold winters days. This recipe serves eight as a main, served with a roll or some fresh crusty bread to mop up the juices and a fresh salad to cut through the richness.
2 large Aubergine, cut into 1cm thick slices (If you are in doubt about the size of the Aubergine, use 3!)
300g Ricotta cheese (see my recipe for Homemade Ricotta)
300g Mozzarella cheese, grated
50g Parmesan cheese, grated, plus extra for grating on top
1 egg, beaten
150ml cream
2 tins chopped tomatoes
5ml mixed, dried herbs
15ml sugar
10ml salt
Preheat your oven to 200℃.
Slice the aubergine into 1cm thick slices and if you like, salt them. If you have salted, leave to stand for 30 minutes, rinse and dry. I don’t always salt my aubergine and the heavens have not descended upon me!
Put a frying pan onto medium heat, add a generous slug of vegetable oil and fry the aubergine slices, turning them as necessary, until they are soft and golden brown. Keep going until all the slices are done. Add more oil as necessary.
Now, mix the ricotta, grated mozzarella and parmesan in a mixing bowl.
Whisk the egg and cream together and add this mixture to the cheese mixture. Stir through.
To make the tomato sauce, empty the two cans of chopped tomato, dried herbs, sugar and salt into a small saucepan on medium heat.
Simmer the tomato mixture until most of the water has evaporated and you are left with a thick sauce.
To put the final dish together, I use a 18cm X 28cm ovenproof ceramic dish.
Start off by spooning about a third of the tomato mixture into the dish and then spreading it evenly.
Layer half of the cooked aubergine slices onto the tomato sauce. It is perfectly alright if the aubergine overlaps or forms a double layer in places.
Spoon half of the cheese mixture onto the aubergine and, with a fork or your fingers helping, spread the cheese to get as good a covering as possible.
Now repeat the process with another third of the tomato sauce, the rest of the aubergine and then the rest of the TOMATO SAUCE.
Finally, round it all off with a last layer of cheese on top.
You may grate some extra parmesan on this layer as it gives a wonderful golden finish to the melanzane.
Bake for 40 minutes until steaming hot and fragrant.
These lemon slices are not regular lemon bars as they have a very thin layer of citrus sitting on top of a shortbread-like base. I love the combination of the shortbread texture and the smooth zing of the lemon topping that leaves your palette woken up and refreshed! I prefer having mine without icing sugar dusted on top, but of course it is up to you to decide how you want to serve yours.
For the base:
250ml butter, cubed
125ml caster sugar
500ml flour
2,5ml salt
Preheat your oven to 180℃.
Grease and line a shallow baking tin that measures more-or-less 23 X 33cm.
Blitz together the butter, sugar, flour and salt, in a food processor.
Spread the mixture evenly over the base of the baking tin and compact it by pressing down with the back of a spoon.
Bake the base for 20 minutes.
For the topping:
35ml caster sugar
62ml flour
4 eggs
the zest of 3 lemons
180ml lemon juice (the juice of about 3 lemons)
Blitz together the sugar and flour in a food processor.
With the machine running, add the eggs, lemon juice and lemon zest and blitz until the mixture comes together.
Pour this mixture onto the warm biscuit base and bake for 20 – 25 minutes, until set.
Place the baking tin on a cooling rack and allow to cool completely.
Refrigerate for a minimum of 2 hours.
Lift the lemon-shortcake out of the baking tin and slice into squares or fingers.
This is a 100% rye bread and, as rye bread do, requires 24 hours to develop its full flavour after baking. In my household that never happens…we slice the bread as soon as it has cooled down enough and it is absolutely delicious!
This bread keeps well and makes a great sandwich.
1kg rye flour
35ml malt vinegar (or any other vinegar if you don’t have malt)
15g instant yeast
25g salt
±800ml lukewarm water
Mix all the dry ingredients in the bowl of a stand mixer fitted with the dough hook.
Add the water, with the machine running, to form a kneadable dough and knead on low speed for about 3 minutes.
Turn the speed up to medium and knead for another 4 minutes.
Transfer the dough to a lightly oiled mixing bowl, cover with a clean tea towel and leave it for about an hour and a half, until it has doubled in volume.
Transfer the dough to a work surface, lightly knock out the air and portion and shape into two small breads. You may bake the breads in small bread tins or shape them into rounds and bake on a baking sheet lined with baking paper.
Cover the shaped bread with a tea towel and prove for an hour.
Preheat your oven to 180℃.
Bake the bread for 40 – 50 min.
Remove from the oven and transfer to a cooling rack.
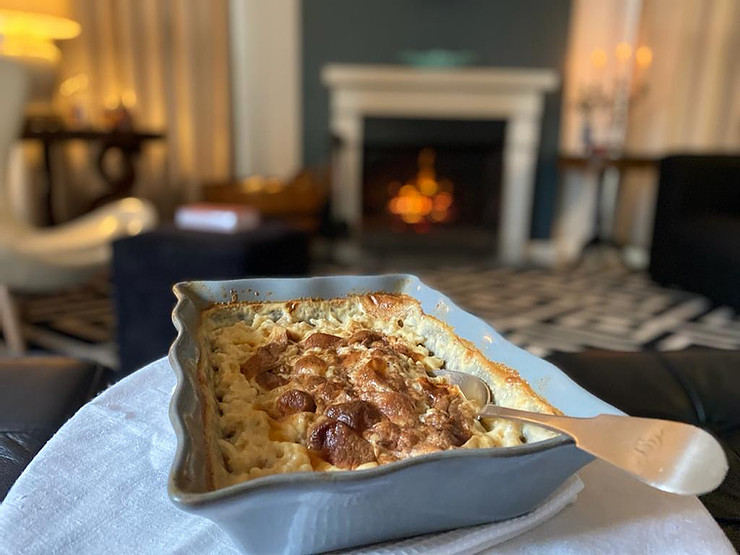
Rice pudding is one of my favourite winter desserts. It is warm, comforting and fabulously moreish!
This pudding is baked in the oven and requires no effort at all.
30ml butter, melted
180ml Arborio rice
83ml sugar
2,5ml ground cinnamon
2,5ml salt
620ml milk
250ml cream
Preheat your oven to 160℃.
Melt the butter and pour it into a ceramic dish of more or less 20 X 27cm. Rather use a smaller dish than a larger one, as long as it is at least 8cm deep.
Add the rice, sugar, cinnamon and salt to a mixing bowl and give it a stir.
Mix the milk and cream in a jug with a wide mouth and pour over the rice mixture.
Mix everything together and pour the mixture into the buttered ceramic dish.
Bake for 30 minutes and then open the oven door and stir the mixture around in the dish. It will still be very liquid and if you try to remove the dish to stir it, the chances are very big of you spilling milk and rice in your oven!
Close the oven door and allow the mixture to bake undisturbed for another 45 minutes, until beautifully golden.
This is the famous 41-cloves-of-garlic roast leg of lamb. Yes, forty one! The recipe was given to me by a friend of our French neighbour who e-mailed me the recipe, as well as very precise instructions on how to carve the leg at table!
This is a free translation: A leg of lamb should always be carved at table. the ritual ceremony adds an important dimension to the pleasure taken in the meal. To carve, hold the leg end with the other end resting on the platter. Carve away from yourself, at a sharp bias, nearly parallel to the bone, lifting off thin slices, first from the rounded, fleshy part of the leg, then from the leaner muscle to the other side and, finally, slice off small pieces of meat from the leg end. Each has a different flavour and degree of doneness. Serve a slice of each to each guest.
Whether you’ll be following the carving instructions or not, do pour yourself a good glass of red and start cooking this most delicious lamb dish!
1 leg of lamb
15ml dry white wine
15ml olive oil
41 cloves of garlic: 2 cloves cleaned; two whole bulbs of garlic (which is more or less 40 cloves)
750ml of dry, red wine
Mirepoix: 2 carrots, 1 onion, 1 celery stalk or one leek; everything chopped finely
Slice 2 cloves of garlic into slivers. You want about 8 – 10 pieces.
Trim off any superficial fat from the lamb. With a small, sharp-pointed knife, cut several deep slits in the leg, on the bias and with the grain. Open up each slit with your finger and insert a sliver of garlic.
Mix together two teaspoons of salt, the white wine and olive oil. Rub the leg all over with this mixture, cover and leave to marinate at room temperature for one hour or so.
Meanwhile prepare the mirepoix: Warm some oil in a saucepan over very low heat. Add the carrot, onion and celery. Sweat while stirring occasionally for about 30 minutes.
Add the red wine to the mirepoix and bring to the boil. Reduce the heat and simmer until reduced by two thirds or about 250ml. Pass the mixture through a sieve, pressing the vegetables with a spoon to extract all the liquid. Pour the mixture back into a clean saucepan and set aside for later.
Preheat your oven to 220℃.
Put the lamb into a roasting tin, slice off the top of the garlic bulbs, drizzle with oil and place it in the roasting tin with the lamb and into the oven for 20 minutes.
Cover the roasting tin with aluminium foil and turn the temperature down to 160℃ for two hours, by which time it will be off-the-bone tender.
Remove the roasting tin from the oven, remove the leg and cover and keep warm.
While the leg is resting, squeeze the soft, roasted garlic into a saucepan with the red wine reduction, add the pan juices from the lamb, scraping out all the little bits and pieces in the pan and bring to a simmer until you have a sauce consistency that you are happy with.
Place the lamb on a serving platter and pour the sauce into a warmed bowl.
Serve with roast potatoes and caramelised carrots.
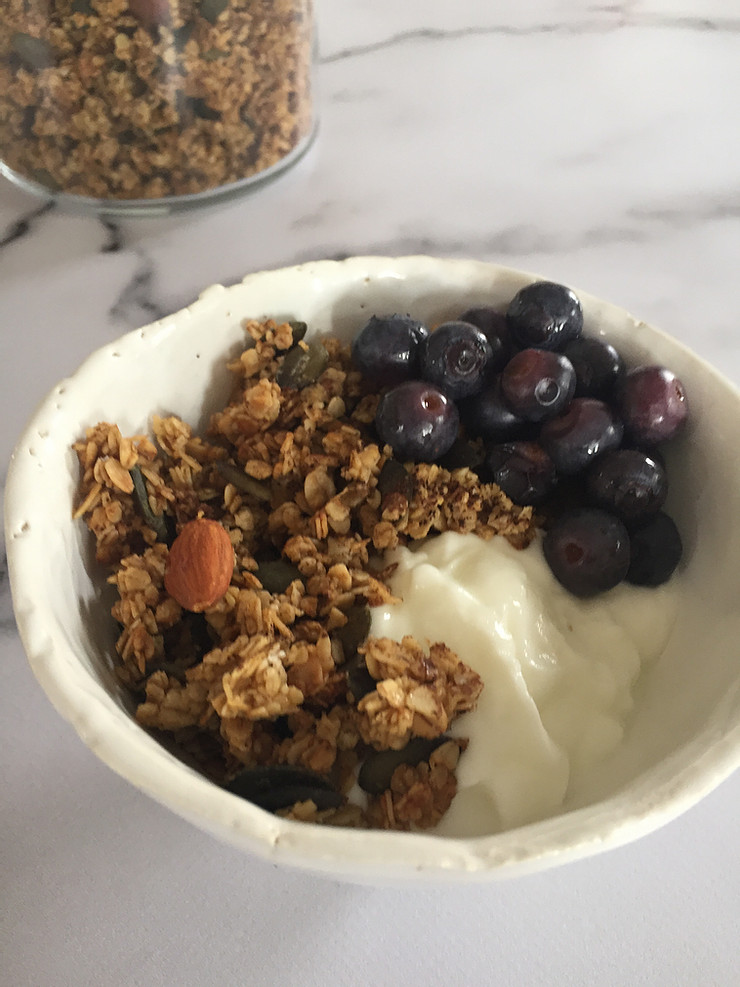
This granola is delicious as is but at the same time makes for the perfect base to add whatever else you wish to it. The coconut oil makes the granola crisp but you may replace it with olive oil if you are not keen on the sweetness.
The granola will keep for two weeks in a glass jar.
4x 250ml oats
250ml Almonds or any other nut you may prefer
125ml pumpkin seeds
2,5ml ground cinnamon
125ml melted coconut oil
125ml honey
5ml vanilla extract
180ml dried fruit like raisins or chopped, dried apricots, or chocolate chips
Preheat your oven to 160℃ and line a roasting tin with baking paper.
Combine all the dry ingredients.
Combine all the wet ingredients and pour it over the dry ingredients. Mix together with your hands so that all the dry ingredients are lightly covered in the wet.
Bake the mixture for 12 minutes. Open the oven and give it a good stir before baking for another 10 – 15 minutes, until golden brown.
Cool the granola completely before stirring through the dried fruit or chocolate chips.