Salted Caramel Sauce

This salty, sweet and buttery sauce is such a crowd pleaser!. Make it a part of your culinary repertoire and serve it with cupcakes, ice cream, in a jar as a gift, drizzled over baked apple or pear, on cheesecake, pancakes or elevate banana bread by generously pouring it on before slicing the bread.

200g sugar

90g butter, cubed

120ml cream

5ml salt

Add the sugar to a medium saucepan and place it on medium heat so that it can melt and caramelise.

Do not stir the sugar as it will crystallise.

As it starts melting you may tilt the pan from side to side so that the sugar melts more evenly, but DO NOT stir at this stage.

Once the sugar has melted completely, add the butter. The mixture should bubble up at this stage.

Stir the butter with a small whisk until completely melted. If it looks as though the mixture wants to seize, whisk it vigorously. Keep whisking until it comes back together….it will!

Start adding the cream very slowly while whisking continuously. Be patient in adding the cream – too much at once and the mixture will also seize.

Once all the cream has been incorporated you should turn down the heat slightly and allow the mixture to boil for one minute, without stirring at all.

Remove the caramel sauce from the heat and add 2,5ml salt as a start. Taste, beware it is extremely hot, and adjust the salt to your liking.

Pour the sauce into a clean container and leave it to cool. The caramel will become thicker as it cools.

I love serving Salted Caramel with my Whole Orange Cake…..absolute heaven!!!

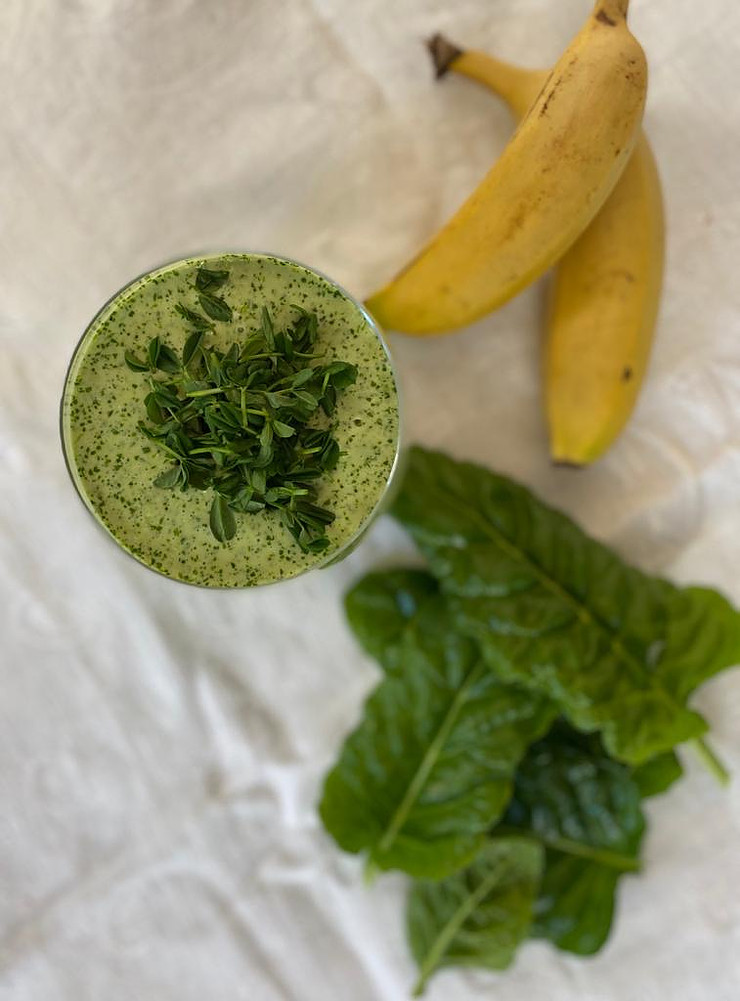
Micro-green Juice

This nutrient-rich drink is a firm favourite in my household. It is a concentrated boost of all the healthy must-haves and takes only two minutes to whip up!

The following quantities will make two drinks:

1 can coconut milk

2 ripe bananas

a handful of young spinach leaves

one cup of tightly packed micro-greens

Add all the ingredients to a liquidiser and blend.

Enjoy with your feet up ….!

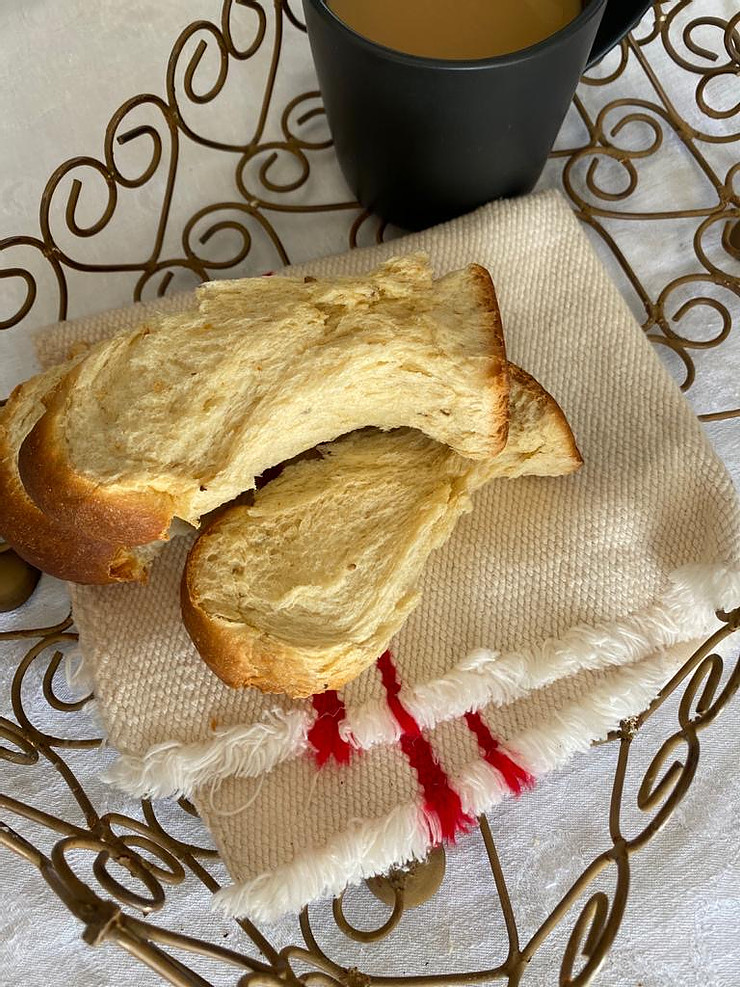
Aniseed Rusks

These Aniseed Rusks are such a traditional South African staple and one of my favourite rusks to keep my kitchen stocked for that early morning or in-between snack. I knead the dough by hand because of the large volume – it literally is too much for any machine kneading!

2,5kg flour

250ml sugar

4eggs, lightly beaten

30g instant yeast

30ml salt

250g butter

1 can condensed milk

750ml water

15ml aniseed seeds

Cut the butter into cubes.

Pour the water into a saucepan and bring to the boil. Turn off the heat.

Add the cubed butter and stir the mixture so that the butter may melt.

Add the condensed milk, sugar, salt and eggs and give the mixture a good stir with wooden spoon.

Pour about 100ml lukewarm water into a small bowl and sprinkle the yeast on top. Stir so that the yeast dissolves.

Pour onto the rest of the mixture, mix through and cover. Allow to stand for one hour.

Add the flour and aniseed to the yeast mixture and knead the dough until it is smooth and springy to the touch. It should take about ten minutes, which will give you an excellent workout!

Cover the dough with damp tea towel and allow to proof for one hour or until doubled in size.

Knock the dough down.

Prepare two large bread tins by greasing it with soft butter.

Now, pinch off a piece of dough that is about the size of a golf ball. Pack the “balls” tightly together and keep going until all of the dough has been utilised.

Cover the bread tins one more time, with a damp tea towel.

Preheat your oven to 170℃.

Bake the rusks for one hour.

Remove from the oven and allow to cool on a cooling rack.

Once the rusks are cooled you may break them up and place them lying down, on a baking sheet.

Preheat your oven to 50℃ and dry the rusks for about three hours.

Allow to cool before packing into a glass jar.

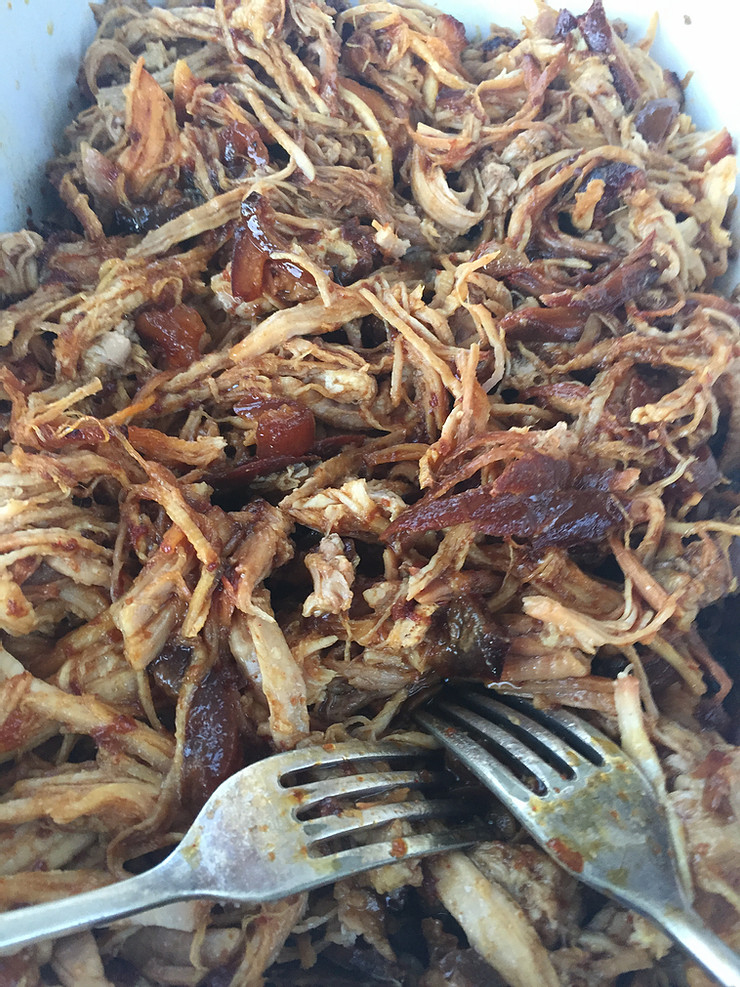
Smokey & Sweet Pulled Pork

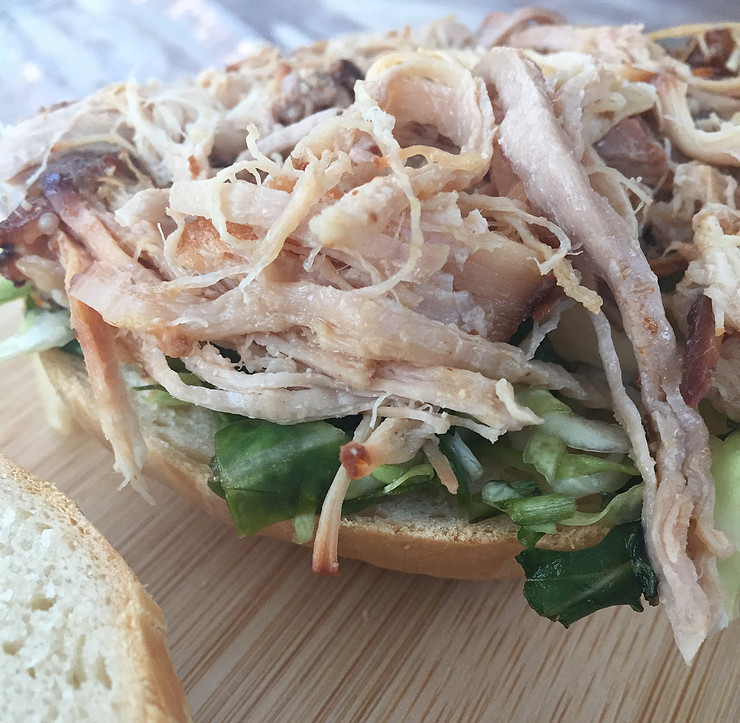
Few things are as easy to eat as a fresh roll with juicy pulled pork belly. This may be the easiest cooking you have ever done and the results are over-the-top delicious!

3kg pork belly, deboned and skin removed

15ml sweet smoked paprika Spanish paprika

salt

1,5litre apple juice

Preheat your oven to 150℃.

Put the pork on a work surface and generously salt it all over.

Sprinkle the smoked paprika over the meat and then rub/massage it all over the meat.

Place the belly in a roasting tin and pour in the apple juice.

Cover and seal the roasting tin with aluminium foil and place it in the oven to cook for at least 7 hours. This is ideal to do overnight.

Once the meat is done, remove from the oven and take the meat from the roasting tin.

Pour the cooking juices and what is left of the apple juice into a saucepan and place it on a medium high heat. Allow to simmer until the liquid has reduced and concentrated. This should take about 20 – 30 minutes.

In the meantime, take two forks and pull the meat from the belly apart.

Spoon the reduced cooking liquid over the pulled meat and mix through.

Serve with an apple and coleslaw salad on a fresh roll.

Homemade Fruit Rolls

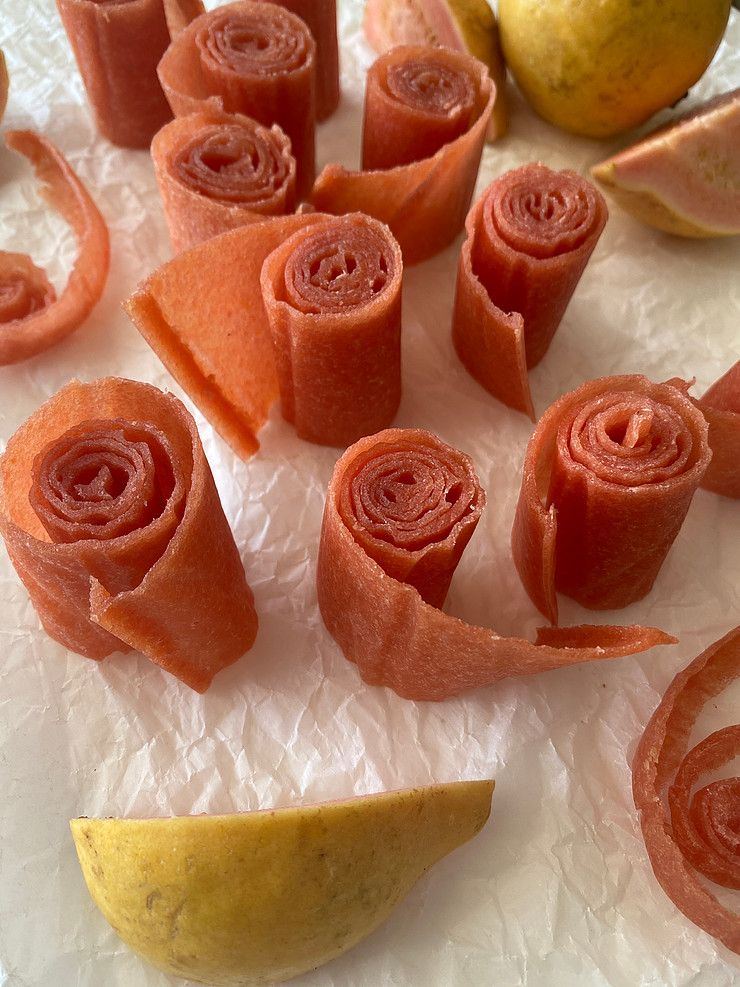
Fruit Rolls or Fruit Leather is a naturally sweet treat that is not only delicious but provides a nutritious, high-energy snack. You don’t need tens of kilograms of fruit to make these rolls and it can be made from most fruits: guava, apples, pears, quince, apricot, peach, strawberries, bananas and even combinations of different fruits.

There is no set recipe as it depends on your taste and what you prefer but with as little as two kilograms of fresh fruit, you can make your own additive-free rolls.

Wash the fruit, take out any pips and cut the fruit into chunks.

Place the fruit in a saucepan and add as little water as possible. If it is a fruit with a high water content like a strawberry, cover the base of the saucepan only. When working with banana you may add half a cup of water. Remember: you can add water later on, but it is always more difficult to “take water out”.

Put a lid on the saucepan and simmer the fruit gently for 15 – 20 minutes, until soft. If you feel that your mixture is very dry, this is the time to add a small amount of water.

You may now add the cooked fruit to a blender or use an immersion blender. Blitz it up and then taste whether you want to add sweetness and/or acid to it, depending on how sweet it is naturally.

If you are working with apples, pears or quince, you may wish to add ground spices like cinnamon or nutmeg. It is up to you….the end product should suit YOUR taste. A squeeze of lemon not only prevents discolouration, but often brightens the taste and freshness of the fruit.

Your goal at this stage is to have a mixture that is silky smooth and lump and pip-free and most importantly, tastes delicious!

Now, prepare a large baking sheet or tea tray by lining it with parchment paper.

Pour the fruit mixture onto the tray and spread it as evenly over the entire surface in an even thickness. You don’t want it to be thicker than 3-4mm.

Preheat your oven to 50℃ and place the baking tray on the middle rack of the oven. Leave to dry for 8 – 12 hours.

The fruit is ready when the surface is smooth and no longer sticky to the touch.

Remove from the oven and allow to cool completely.

Cut into strips and roll OR roll the entire length and cut into portion sizes.

Wrap in soft plastic and store in a dry container in a cupboard.

Falafel

One of my favourite eateries is L’as du Falafel, in the Marais District of Paris. The cue that stretches around the corner during lunchtime is a sure indicator of its popularity amongst the local French crowd. Whenever we go to this simple Middle Eastern eatery we get our pita-filled, perfectly fried falafel and walk down to the Place de Vosges where we find a shaded spot on the grass to eat like true locals. Believe me …. you will never forget this meal!

Falafel is plant-based, vegan fritters that are often served with hummus, tahini or smoked garlic sauce. It originated in Arabic countries and was traditionally made with fava beans. Falafel became the most popular street food in Israel when it was made with a chickpea-base and loaded into pita breads with vegetable pickles.

There are many recipes available but I prefer falafel made from chickpeas and deep-fried in oil, opposed to baking it in the oven.

One can of chickpeas will give you more-or-less 15 falafel, which leaves you with 5 falafel per person, in a decent sized pita bread. Feel free to double or triple the recipe.

1 can chickpeas, drained, patted dry with a clean tea towel and left to dry for 30 minutes or so

1 onion, grated

30ml parsley, finely chopped

5ml baking powder

10ml ground cumin

2,5ml garlic, minced

45ml flour

salt and pepper

Falafel can be made in a food processor, a blender, a hand blender or by hand. I make mine by hand as I love the unevenness in texture.

If you are using an electric appliance, simply add all the ingredients and pulse to break it up. You DO NOT want a paste. The mixture should be dry and crumbly.

When making by hand, add all the ingredients to a mixing bowl and smash the chickpeas with a potato masher. Give the mixture a good mix-through.

Place the mixture in the refrigerator for about 30 minutes, so that it can firm up.

Line a baking sheet with baking paper.

Use a 15ml measuring spoon and scoop up some of the mixture. Roll in a ball and place on the lined baking tray. Keep going until all the mixture has been utilised.

Heat some vegetable oil in a heavy based saucepan and bring it to about 170℃.

Place about seven Falafel balls into the oil and fry until beautifully golden.

Keep warm and fry the rest in batches.

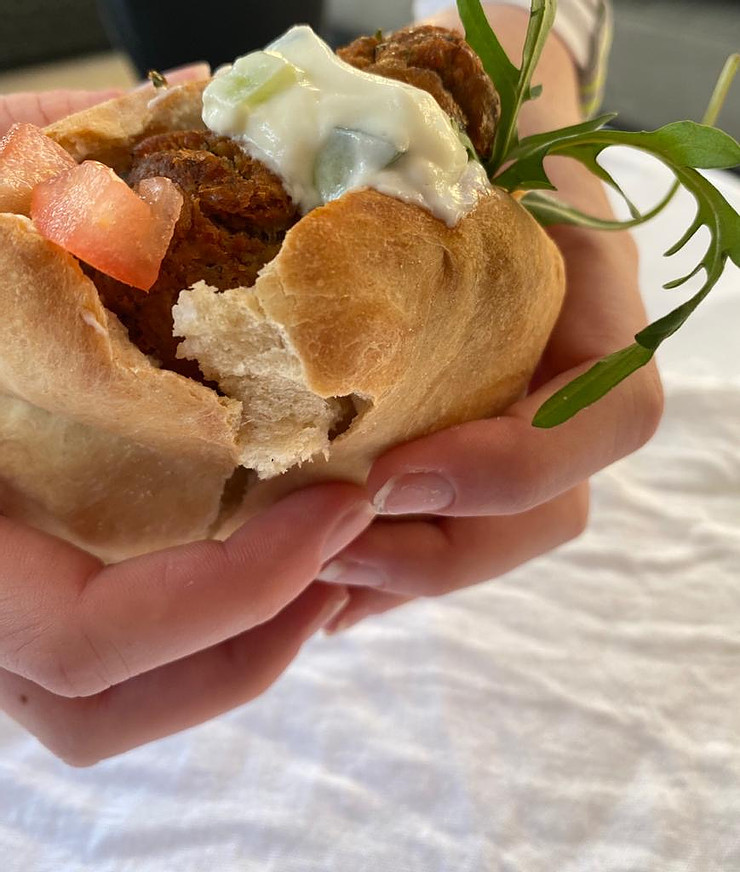
Serve warm in a pita bread, salad and a sauce of your choice.

PS: I know this is very unusual but I serve mine with Greek Tsatziki sauce…..it is delicious!!!

Super Microgreen Hummus

It has been found that micro greens contain forty times the level of nutrients than their mature counterparts. These tiny gems are rich in antioxidants and high in potassium, zinc, iron and magnesium. Adding them to a batch of hummus will boost your energy levels and set you up for a nutrient-filled, high-energy day.

1 400g can of chickpeas

60ml Tahini

1 clove of garlic, minced

the juice of one lemon

5ml salt

60ml vegetable oil

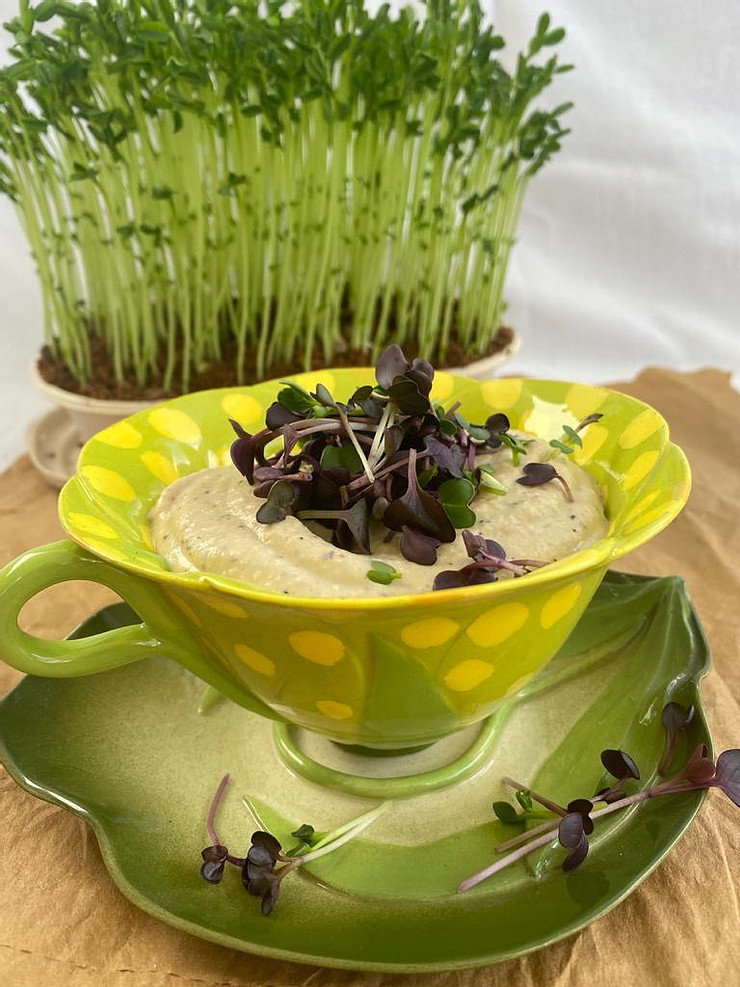
a generous bunch or two of microgreens (I used radish and it is delicious!)

Drain the chickpeas.

Add all the ingredients, except the micro greens, into the jug of a blender and blitz together.

Once you have a smooth, creamy mixture you may add the microgreens.

Blitz for as short a time as possible – you JUST want to chop and incorporate the herbs.

Enjoy as a dip for crudities or as a snack on a wholewheat cracker.

Shakshuka-Inspired Spinach

I’m not a great fan of breakfast but I do love grazing my way through a good brunch. This is more of a throw-together than a recipe, which makes it perfect for lazy mornings when the time for breakfast has come and gone, but the hunger remains.

The dish was inspired by Armand Aucamp’s Shakshuka recipe which can be found in his book, Nude. (See more about the book in the COOK & BOOK section). Shakshuka is a tomato-based dish with various spices and eggs poached in the sauce. This recipe does away with the tomato sauce and utilises spinach and chorizo instead.

You will need the following, adapted according to the number of people you want to feed:

1 onion, sliced

1 sweet pepper, sliced

1 chorizo sausage, casing removed, sliced

a large bunch of spinach

a handful of rosa tomatoes

9 eggs

two discs of feta cheese

Preheat your oven to 180℃.

Put a large cast-iron pan onto medium heat. Add some oil and sauté the onion, sweet pepper and chorizo.

Tear the fresh spinach leaves in half and fill the pan with as much of it as you can. Push the leaves down into the pan until it wilts slightly.

Break the eggs on top of the spinach, scatter the tomatoes over and crumble the feta on top.

Season with salt and pepper and place in the oven until the eggs are just set.

Serve warm with flatbread or a crusty sourdough.

Herb-Crusted Rack of Lamb

This is such an easy way to prepare lamb that it may just become your fall-back on a busy day or even when you are having friends over for a stress free dinner.

For 6 people you will need

2 racks of lamb, French trimmed

2 cloves of garlic, minced

about 75g fresh breadcrumbs

a handful of rosemary leaves

a handful of parsley

a handful of mint

30ml Dijon mustard

Take your meat out of the refrigerator at least one hour before cooking.

Preheat your oven to 180℃.

Add the garlic, breadcrumbs, rosemary, parsley and mint to a small food processor and blitz until finely chopped and incorporated. Add about 30ml of oil to bring the mixture together. Put aside.

Put a few drops of vegetable oil in your hand and rub it all over the meat, season with salt and pepper.

Put a heavy bottomed frying pan onto a high heat.

Sear the lamb in the pan, turning to brown all over.

Take the lamb from the pan and allow to cool slightly so that you don’t burn your fingers when handling it.

Liberally rub the mustard all over the meat.

Now take a handful of the herb and breadcrumb mixture and coat the meat with it. This is almost like playing with mud….. It’s the same action: pat the herb mixture on thickly, but evenly, making sure all of the meaty parts are covered.

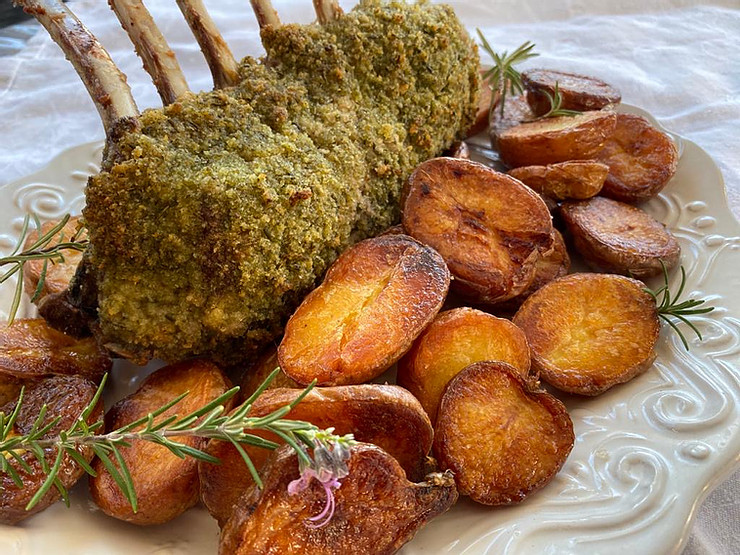
Gently put the rack of lamb onto a roasting tray and cook for 25 minutes, until the crust is crisp and lightly browned and your kitchen smells like heaven.

Take the meat from the oven and rest for 10 minutes before carving.

Serve with golden, roasted baby potatoes and a crisp glass of wine.

Traditional Melkkos

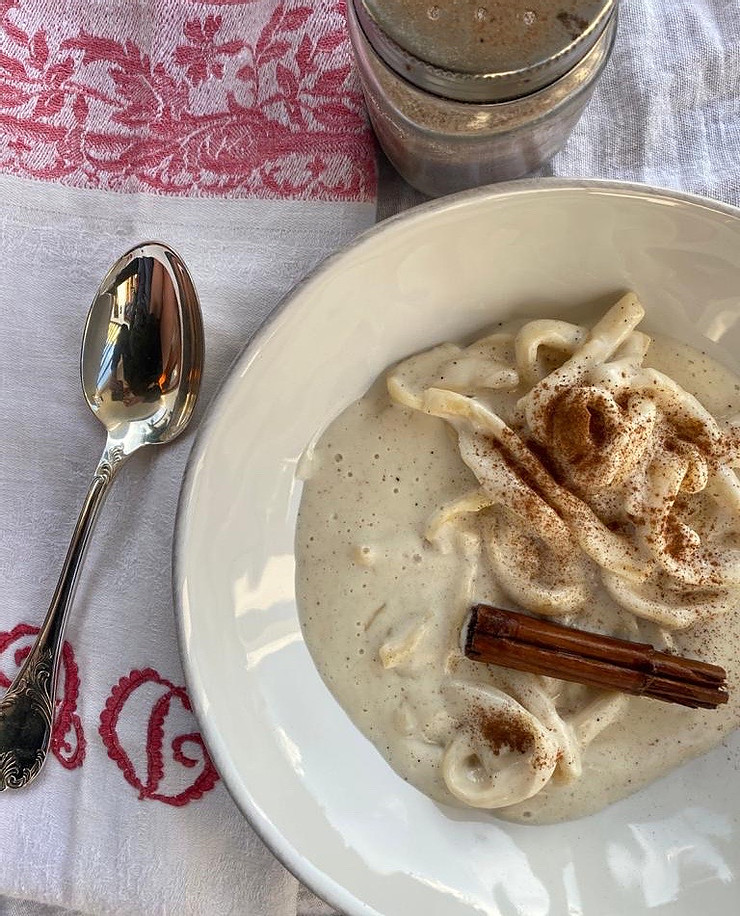
The word melkkos directly translates to milk food. It may be so named as it probably evolved from the Malay dish Boeber, that is traditionally eaten to break the fast at the end of Ramadan. It is comforting and nourishes body and soul. It is an emotive food, it is warming and completely satisfying.

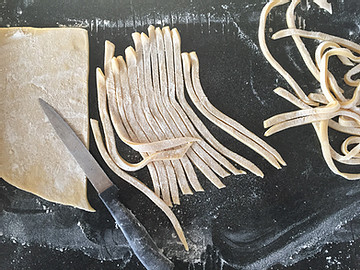
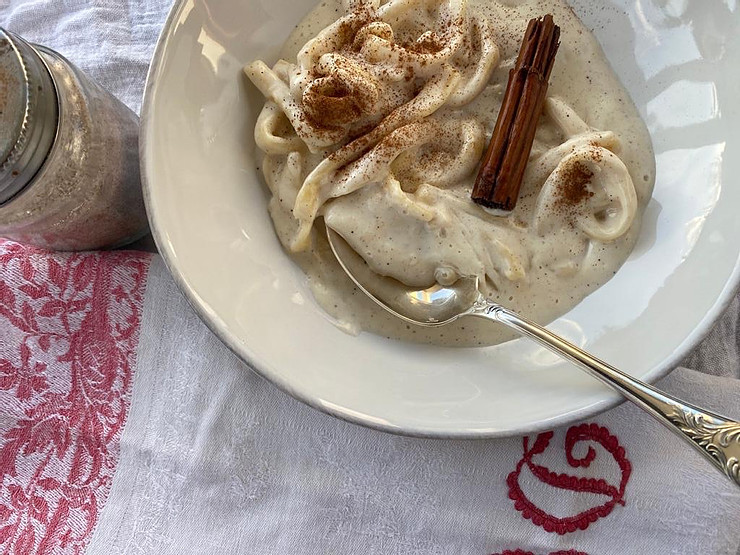
I make melkkos with “snyseltjies” which resembles Tagliatelle pasta. A simple dough from eggs and flour is rolled out thinly, cut by hand into strips no wider than half a centimetre and boiled in cinnamon flavoured milk. Served with sugar and extra cinnamon, this is my idea of winter pampering on a plate!

This recipe feeds six hungry people.

4 eggs

5ml salt

750ml cake flour

2 – 3 litres milk

2 cinnamon quills

ground cinnamon and sugar, to serve

Break the eggs into a mixing bowl, add the salt and give it a good whisk.

Add the flour to the eggs and mix together to form a kneadable dough.

Turn the dough out onto a floured surface and knead for 2 -3 minutes. You want a soft, smooth dough.

Shape into a disk, cover in plastic wrap and put aside to rest for 15 minutes.

Pour two litres of milk into a large, heavy bottomed saucepan, add the cinnamon quills and place on high heat. You want to bring the milk to boiling point …. do not leave it!

Dust a working surface and roll the dough to a 3 -5 mm thickness.

Cut into strips not wider than 0,5cm. Dust the strips with flour so that they do not stick together. Don’t worry about being too liberal with the flour as the extra flour will thicken the milk, adding to the lusciousness of the final dish.

Add all the strips to the boiling milk and give it a light stir with a wooden spoon.

Turn the heat down and simmer the melkkos for twenty minutes until the dough strips have absorbed some of the milk and are beautifully fat and puffed up.

Serve steaming portions with extra milk, sugar and ground cinnamon.