Hi and welcome to my blog! My name is Karen and I love cooking simple, uncomplicated, flavourful food. My cooking is inspired by seasonal ingredients, punchy flavours, an awareness of sustainability and of course by the likes and dislikes of my family and friends that sit around my table as well as you, the virtual guests around my table!
I am a chef, recipe developer and food stylist and generate my own content. I am also completely addicted to recipe books, of which I have an extremely large collection but the essence of my food is about celebrating life and all the fabulousness that we can add by creating good food.
Thank you for reading my blog. Please keep on giving me feedback and may your kitchen, as mine, be filled with joy and the best tasting food!
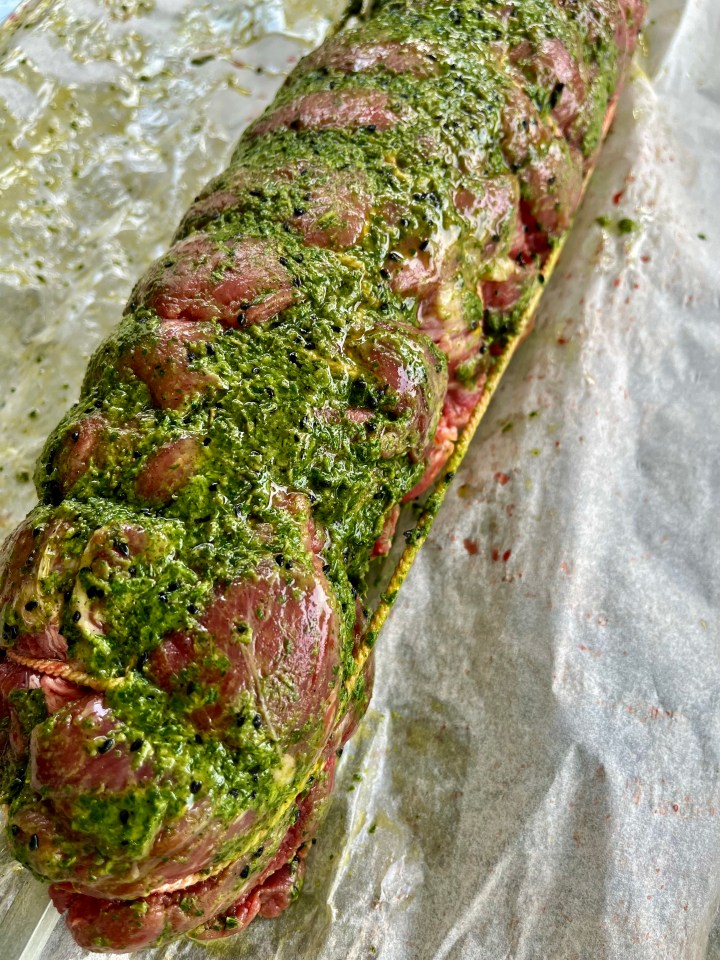
1 whole beef fillet 125ml thyme leaves 4 cloves of garlic 10ml onion salt or sea salt 60ml vegetable oil 30ml red wine vinegar
Blitz together the thyme, garlic, onion salt, vegetable oil and vinegar with a stick blender. You are looking for a very thick paste. Set aside. Dry the beef fillet and tie it up. Rub the herb paste over the fillet. Cook on a rotisserie over medium-warm coals for 1 hour 15 minutes. Cover the cooked fillet with aluminium foil and leave to rest for 15 minutes. Slice into portions and serve.
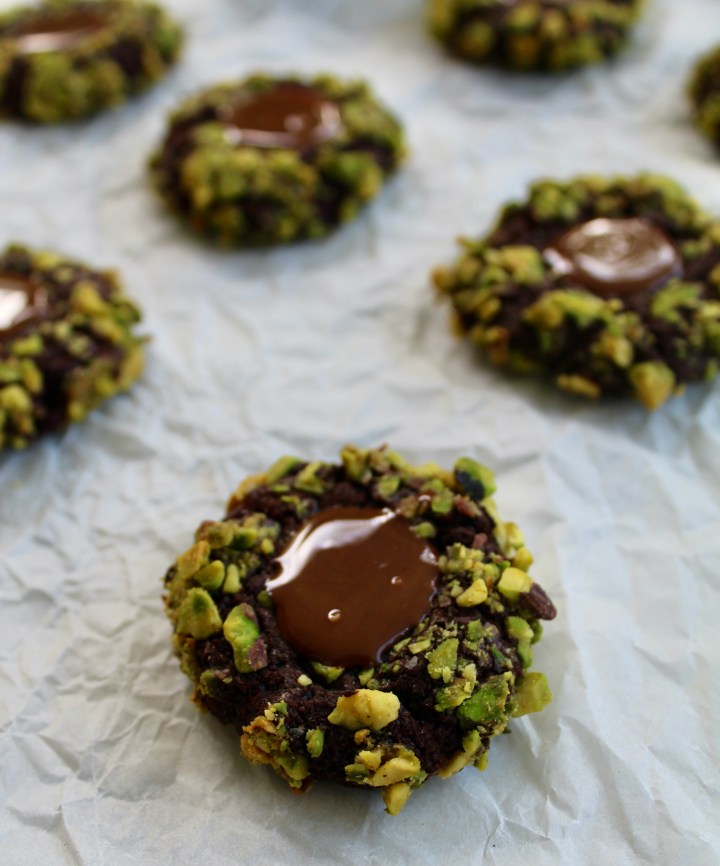
Preheat your oven to 180℃ and line a baking sheet with baking paper. Add the butter and sugar to the bowl of a stand mixer fitted with the paddle attachment and cream together. Add the egg yolk, milk and vanilla and mix together. Stir in the flour, cocoa powder and salt until combined. Wrap the dough in plastic wrap and chill in the refrigerator for at least an hour. Add the egg white to a small bowl and whisk until frothy. Chop the pistachio finely (I do mine in a food processor) and place it in a shallow bowl. Scoop up about 15ml of dough and roll it into small balls. Now roll each ball in the egg white and then in the chopped pistachio. Place the balls on the prepared baking sheet. Use the back of a 2,5ml measuring spoon to make an indentation in the centre of each dough ball. Bake the biscuits for 12 minutes. Remove the baking sheet from the oven and immediately re-press the indentations you made. Set aside to cool completely. Add the chocolate and cocoa butter to a heatproof bowl set over a saucepan of simmering water and allow to melt. Stir every now and then until smooth and glossy. Remove from the heat and stand the bowl for about 30 minutes. Spoon the chocolate into the indent in each biscuit and set aside to allow the chocolate to set – preferably overnight. Makes about 25 biscuits.
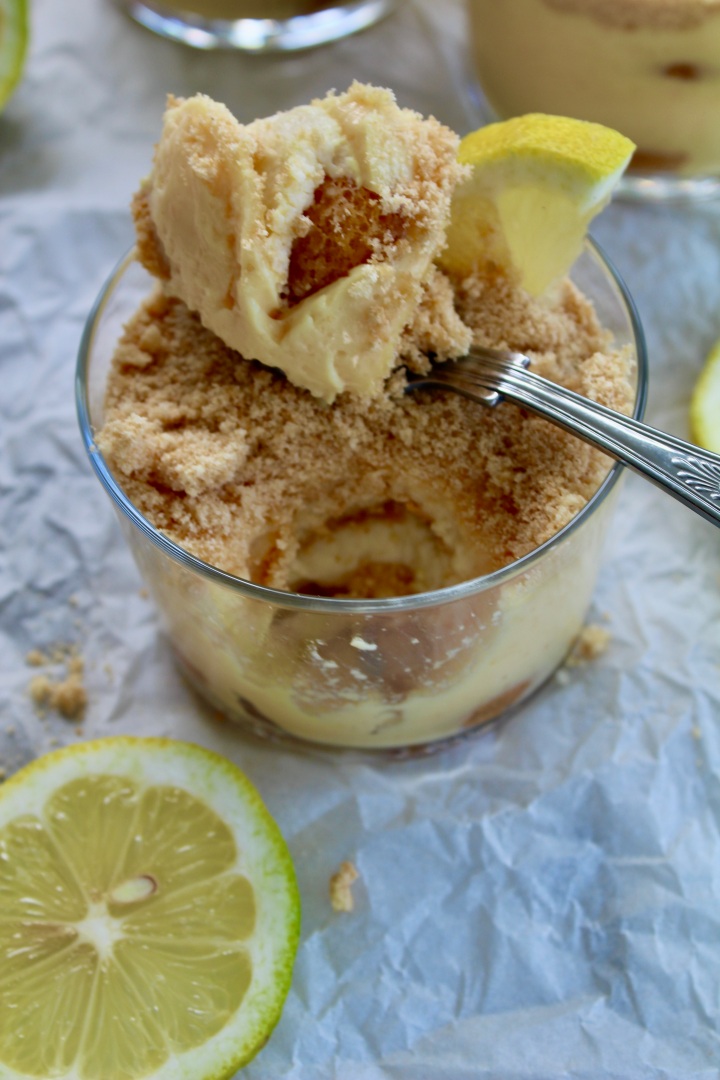
These custard pots are easy to make and can be kept in the refrigerator until ready to serve. Makes 12.
2 packets finger biscuits 1 can condensed milk 125ml lemon juice 90ml sugar 135ml custard powder 200ml + 800ml milk
Line up 12 ramekins or serving glasses. Break/cut the finger biscuits in half and place 2 halves in each ramekin, “lining” the bottoms. Set aside. Add the condensed milk and lemon juice to a mixing bowl and stir together until the mixture amalgamates. Set aside. Add the sugar and custard powder to a mixing bowl and make a slurry by slowly pouring in the 200ml milk, while whisking. Pour the 800ml milk into a saucepan and bring to the boil. Pour in the the custard and sugar slurry and whisk vigorously. Whisk until the custard is thick and smooth and starts to bubble. Remove from the heat. Scoop about 60ml of the very hot custard on top of the finger biscuits in the ramekins. Now scoop about 60ml of the condensed milk mixture on top of the custard layer and shake the ramekins slightly so that the mixture spreads and covers the custard layer. Repeat the finger biscuit, custard and condensed milk layers. Bash 12 finger biscuits until very fine and divide equally among the ramekins. Place the custard pots in the refrigerator for a minimum of 4 hours.
This is without doubt one of the craziest ideas to READ about, but surprisingly satisfying and pleasing in a very old fashioned way. That statement in its own is somewhat out of the ordinary but please try this idea for a quick delicious side dish to smoked and salty meat dishes … you may just have a new favourite recipe!
1 large tin/can of peach halves 100g mature cheddar cheese, grated 60ml mayonnaise 60ml sour cream 125ml feta cheese, crumbed a handful of basil leaves, chopped a handful of pistachio or pine nuts fresh lettuce to serve
Drain the peaches from the syrup. Hold the peach in your hand with the rounded side facing upwards and make a shallow horizontal slice so that the peach can sit on it – cut away as little as possible. Arrange some fresh lettuce on a serving plate and place the peach halves randomly, with the hollow facing upwards. Fill each peach cavity loosely with grated cheddar cheese. Add the yoghurt, sour cream, finely crumbed feta and chopped basil to a small bowl and stir together. Spoon a generous dollop of the dressing onto the cheese in the peach cavity. Scatter the pistachios/pine nuts over the salad and serve with the extra dressing on the side.
This salad goes surprisingly well with any smoked, cured or salty meat dishes that need that boost of natural sweetness.
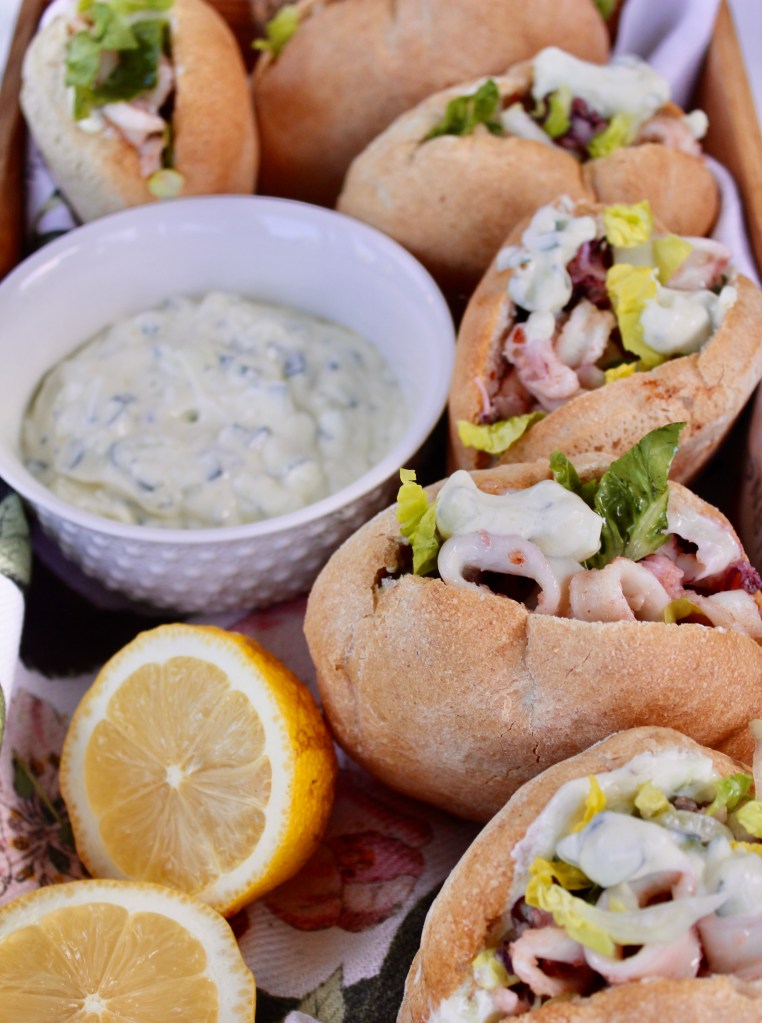
These calamari filled pita breads are the perfect casual weekend food for entertaining friends and family!! Serve them with a crisp, cold chardonnay and kick back Greek style!!
Lemon-Yoghurt Sauce: 125ml yoghurt 1 clove garlic, minced 5ml dijon mustard 45ml lemon juice a handful of basil leaves, torn
1 kg calamari rings, washed and dried 45ml sunflower oil 1 lemon salt and pepper
about 2 cos lettuce, shredded
Pita Bread – If you want to bake your own fresh pita bread you can go to the SEARCH goggle on this block to find the recipe
For the Sauce: Add all the ingredients to a small bowl and mix well. Cover with plastic wrap and set aside to infuse at room temperature.
Place a heavy-bottom pan over high heat and wait 2-3 minutes for the pan to get hot. Turn the heat down slightly, more high than medium-high, add the oil to the pan and then the calamari rings. Stir the calamari around for 2 minutes, NO MORE!, and immediately remove the pan from the heat. Squeeze the lemon onto the calamari while it is still sizzling and season generously with salt and pepper.
Hold the pita bread upright (on the seam) and make an incision about a third of its circumference. Lightly push two fingers in and wiggle them around to separate and open the inside of the bread, so that you have a large pocket. Scoop a spoonful of the lemon sauce into the cavity and smear it around with the back of the spoon. Place a thin layer of the shredded lettuce on the bottom of the pocket, then a layer of calamari and then a layer of the sauce. Push all of this down with the back of the spoon so that you will have enough space for a repeat of layers.
Serve the calamari pitas with the leftover sauce on the side.
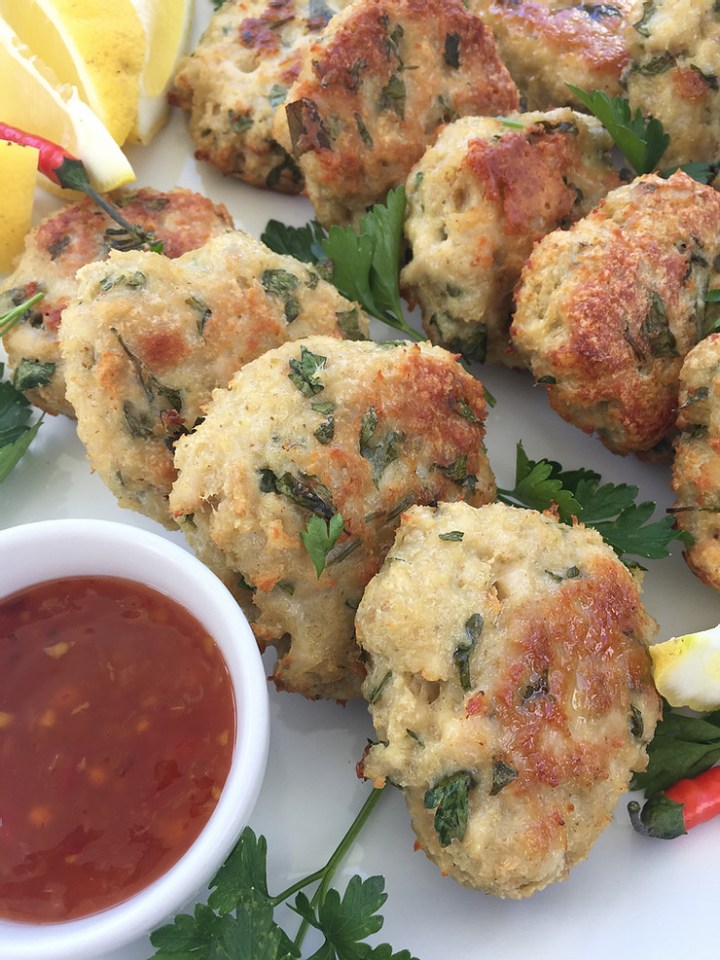
These lean chicken cakes are filled with all the popular Thai flavours. If you are not fond of heat, simply leave out the chillis and if 16 chicken cakes are too many, cool them down and freeze. I like to serve these cold with plenty of freshly squeezed lemon but they are equally delicious when warm, served with sweet chilli sauce. If you make the cakes larger and flatter, you may serve them on a hamburger roll with all the trimmings.
9 chicken breasts
60ml green curry paste
180 ml coconut milk
90 ml cornflour
3 eggs
90ml fresh coriander leaves
10ml salt
2 green chillies, finely chopped (you may leave out the chillies if you do not like the heat)
750ml fresh breadcrumbs
Preheat your oven to 180℃.
Pour a very thin layer of vegetable oil into two baking trays and set aside.
Cut the chicken breasts into chunks and add them to the bowl of a food processor. Mince.
Add the green curry paste, coconut milk, cornflour, eggs, coriander, salt and green chillies and pulse to mix thoroughly.
Now scoop the mixture into a large mixing bowl and add the breadcrumbs. Mix until evenly incorporated.
Scoop up the mixture with a large tablespoon and shape into a cake. Place on the baking tray and keep going until all of the mixture has been utilised.
Bake the cakes for 12 minutes, flip them and bake for another 12 minutes.
You may serve the chicken cakes warm with sweet chilli sauce or cold with plenty of lemon juice.
This is one of the best salad dressing you will ever make AND you can keep it in your refrigerator!! Delicious when drizzled onto seafood!
62ml lemon juice 1 clove garlic, minced 5ml Dijon mustard 1,2ml salt a pinch of ground black pepper 7,5ml honey 62ml olive oil 5ml thyme leaves, chopped
Add the lemon juice, garlic, mustard, salt, a pinch of black pepper and honey to a small bowl and whisk together. Drizzle in the oil while whisking. Keep going until all the oil is incorporated and the mixture has emulsified. Add the thyme leaves and stir through.
Store left-over dressing in a glass jar, in the refrigerator.
4 egg whites, room temperature 220g caster sugar 5ml white vinegar 250ml ladies finger biscuits, chopped (or any other plain biscuit) 250ml almond slivers 160g chocolate of your choice; I used De Villiers Nut Butter with no added sugar
Preheat your oven to 150℃ and line 2 baking trays with baking paper. Add the egg whites to the bowl of a stand mixer fitted with the whisk attachment and whisk on high speed until medium peaks form. Add one tablespoon of sugar at a time, with the mixer running. Wait 30 seconds before adding the next tablespoon of sugar and continue until all the sugar has been added. Whisk on high speed for 2 more minutes. Add the vinegar and whisk 2 minutes more. Take the bowl from the mixer and add the biscuits and almonds. Fold through. Add the chocolate to a heatproof bowl set over a saucepan of simmering water and allow to melt completely. Spoon a tablespoon of the meringue mixture onto the prepared tray and flatten slightly with the back of a spoon. Spoon a teaspoon of the melted chocolate on the meringue and swirl it into the top. Now reduce your oven temperature to 120℃ and place the trays in the oven. Bake for 30 minutes. Turn off the oven, without opening the door and leave the meringue inside for another 30 minutes. Remove the trays from the oven and leave the meringue on it until completely cold – another hour or so.
Store the meringue biscuits in an airtight container.
This tart is makes for the perfect summer dessert when served with a scoop of ice cream and extra passionfruit pulp drizzled on top. It is so easy to make, you only need to take out a mixing bowl and a whisk!!
4 eggs 250ml milk 5ml vanilla 125g butter, melted 250ml caster sugar 125ml passionfruit pulp and extra for drizzling once you serve 125ml flour 250ml desiccated coconut
Preheat your oven to 170℃ and spray a 24cm tart tin with cooking spray. Add the eggs, milk, vanilla, butter, sugar, passionfruit pulp, flour and coconut to a mixing bowl and whisk together. Pour the batter into the prepared tin and bake for 50 minutes. Cool the tart for 10 minutes before refrigerating for at least 2 hours. Dust with icing sugar and drizzle with passionfruit pulp.