Meatballs with Saffron and Corn Polenta

Meatballs with Saffron and Corn Polenta

I find making meatballs therapeutic. I love mixing the raw ingredients together and squashing it through my fingers like mud and I feel oddly proud when I make it into beautiful round balls (mine are far from perfectly round but nevertheless, I like to think so and the exact shape isn’t really important to me).

This recipe makes a large batch of meatballs and is one of my fall-backs when my children’s friends unexpectedly stay for dinner. When I make these for the six of us, I make eighteen large meatballs and with the rest of the ingredients I make tiny cocktail ones, which I then serve up with pre-dinner drinks on the verandah the next evening. If I have enough of the small meatballs I freeze them and add them to a pasta sauce at a later stage.

For the meatballs:

1kg beef mince

1 large onion

1 sweet pepper

3 cloves of garlic

20ml salt

10ml smoked paprika

5ml mixed spice

5ml nutmeg

125ml breadcrumbs

a good handful of fresh herbs, chopped

2 large eggs

Chop the onion and sweet pepper into very small pieces and add it to a mixing bowl with the mince.

Crush the garlic cloves and add to the mixture as well as the paprika, mixed spice, nutmeg breadcrumbs and chopped herbs.

Break the eggs into a small bowl and give them a quick whisk before adding to the rest of the ingredients.

Mix everything together (this is the mixing I do with my hands – try it, its wonderful!).

Preheat your oven to 180℃.

Pour a thin layer of oil into a roasting tray.

Scoop up some mixture with a dessert spoon and roll the meatballs between the palms of your hands. Place on the roasting tray and keep going until you have utilised all of the mixture.

Bake the large meatballs for 30 – 35 minutes and the small ones, if you are making them, for 15 – 20 minutes.

For the saffron and corn polenta:

750ml chicken stock

250ml polenta

10ml salt

a pinch of saffron threads

62ml butter

1 tin of corn kernels

Pour the chicken stock into a saucepan and bring to the boil.

In the meantime, make a slurry with the polenta and some cold water.

Add the saffron threads to the boiling stock and slowly pour in the slurry while whisking continuously. Once the mixture is smooth and lump-free, turn down the heat to a low simmer and put a lid on the saucepan.

Leave to simmer for 25 – 30 minutes, stirring occasionally.

Take the polenta from the heat, add the butter and the corn kernels and give it a good mix.

Serve straight away.

I like to serve this dish with oven roasted tomatoes. Simply drizzle Roma tomatoes with olive oil, balsamic vinegar and a sprinkling of salt and roast at 180℃ until wrinkled and bursting with juice and flavour.
Real Bread

Real Bread

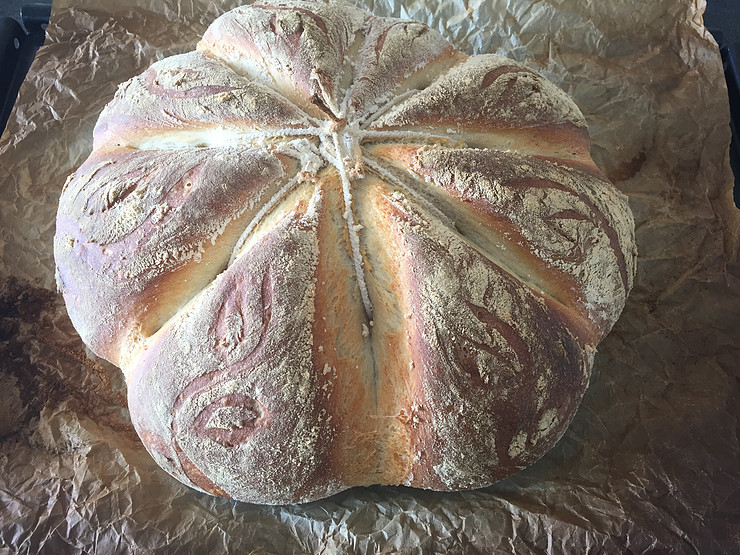
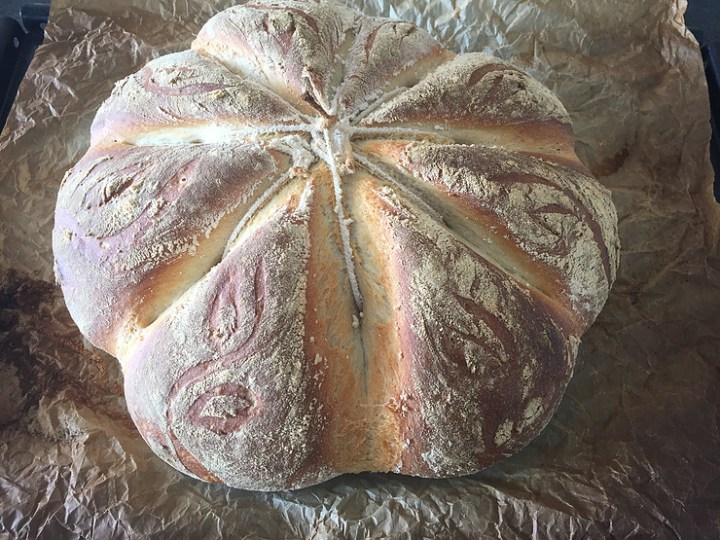
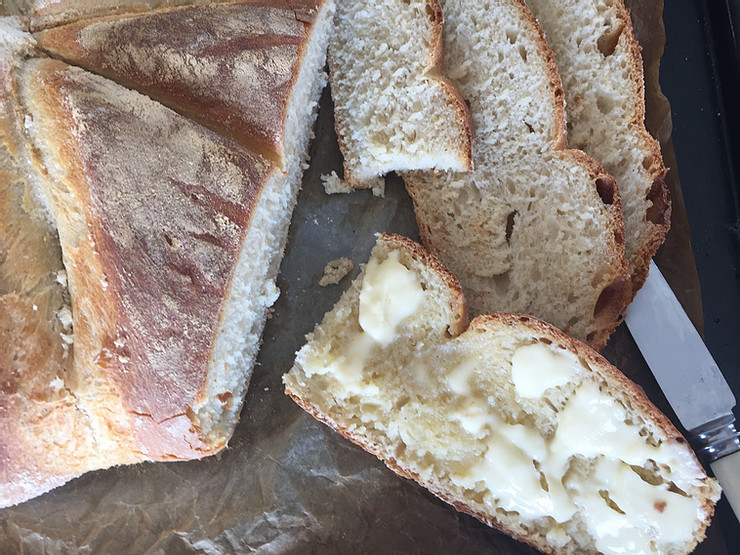
I thought about naming this bread, Rustic bread, but in my heart of hearts I would have felt cheated. This to me, is real bread. It is my personal favourite of all the different breads I bake and quite frankly, it is the only bread I would bake, had I been alone in my house!

I make this bread in my stand mixer with the dough hook as it is a large quantity and the dough is very soft.

1kg bread flour

15g instant yeast

15ml salt

± 700ml lukewarm water

Fit your stand mixer with the dough hook.

Add the bread flour, yeast and salt into the mixing bowl and turn the mixer onto low speed.

Add most of the water in a steady stream and then have a look to see whether the mixture needs all of the water. It might be that the dough needs some extra water to come together into a kneadable dough.

Knead on medium speed for 3 – 4 minutes and be sure to watch the mixer – they tend to “walk” off the counter space when left alone!!

Lightly oil a large, clean mixing bowl and place the dough in it. Wrap with a damp tea towel and put in a warm place to prove for an hour or so. I put my dough into a drawer next to my oven and it works like a charm!

Once the dough has almost doubled in size, take it out of the mixing bowl and knock it down and shape your bread.

Place it onto a baking sheet lined with baking paper, cover loosely with a tea towel and let it prove for another 30 minutes to become puffy.

Preheat your oven to 250℃.

Place the bread into the heated oven and bake for 10 minutes.

Without touching or opening the oven door, turn down the oven to 220℃ and bake for a further 25 minutes.

Remove your bread and let it cool on a cooling rack.

I enjoy making different shapes of bread. Simply tie the dough up ever so lightly, before the final 30 minute rest

Lemon Meringue Pie

Lemon Meringue Pie

Call it retro, old fashioned, whatever you like, but lemon meringue pie is easy and quick to make and hits all the right spots between sweet and tangy.

The recipe makes one large pie if you are using a loose-bottomed cake tin or you can split it between two small pie dishes so that you have one to take to the neighbours

For the biscuit base:

300g digestive biscuits (or any other dry biscuit)

170g butter, melted

Break up the biscuits, add them to a plastic bag and smash them to smithereens.

Melt the butter in the microwave oven and mix the crumbed biscuits into it.

Transfer the mixture to your pie tin/s and press firmly to evenly coat the bottom and about 4cm up the sides.

Place the biscuit base into the refrigerator so that it can cool down completely and set.

For the filling:

2 tins of condensed milk

250ml lemon juice

the yolks of 6 eggs

Decant the condensed milk into a mixing bowl.

Add a small splash of the lemon juice and mix it into the condensed milk with a spatula or spoon. Keep adding and mixing until all the lemon juice is incorporated and you have a smooth mixture. If you add all the lemon juice at once, keep mixing, it will eventually come together.

Give the yolks a mix with a fork so that they break up and add them to the mixture, once again stirring until incorporated.

Take your biscuit base from the refrigerator and pour the condensed milk mixture into the base.

For the meringue:

Preheat your oven to 180℃.

Now, when you make the meringue with six egg whites you will have a very large quantity. You have two options: make the full recipe and save half of it in the refrigerator for tomorrow evening’s sago and meringue pudding or half the recipe; i.e. use only three egg whites and half the quantity sugar.

6 egg whites (or 3 if you decide to go half)

1ml cream of tartar, this stays the same

250g caster sugar (or 125g if you go half)

Add the egg whites and cream of tartar to the mixing bowl of a stand mixer fitted with the whisk attachment.

Turn the mixer onto a low speed so that the whites froth up.

Once they are frothy, turn the mixer to medium speed and beat the whites until they only just start forming soft peaks.

Keep the mixer running and add one teaspoon of sugar. Wait for 20 – 30 seconds before adding the next teaspoon of sugar. This is important as you want to incorporate every grain of sugar into the whites before adding more sugar.

Once you have incorporated about half the sugar, you may add two teaspoons of sugar every 30 seconds, as the meringue mixture should now be stable. Put on your favourite record and breathe while attempting this as it is the only way of achieving a stable, glossy meringue that will hold its peaks.

Once all the sugar has been incorporated you should be left with a mixture that forms a stiff peak and has a beautiful sheen to it.

Scoop the meringue into a piping bag and decorate your pie or simply heap the meringue onto the pie to cover the entire surface.

Place in the preheated oven and bake for 15 minutes.

Take the pie from the oven and allow to cool completely before serving.

Lockdown Quiche

Lockdown Quiche

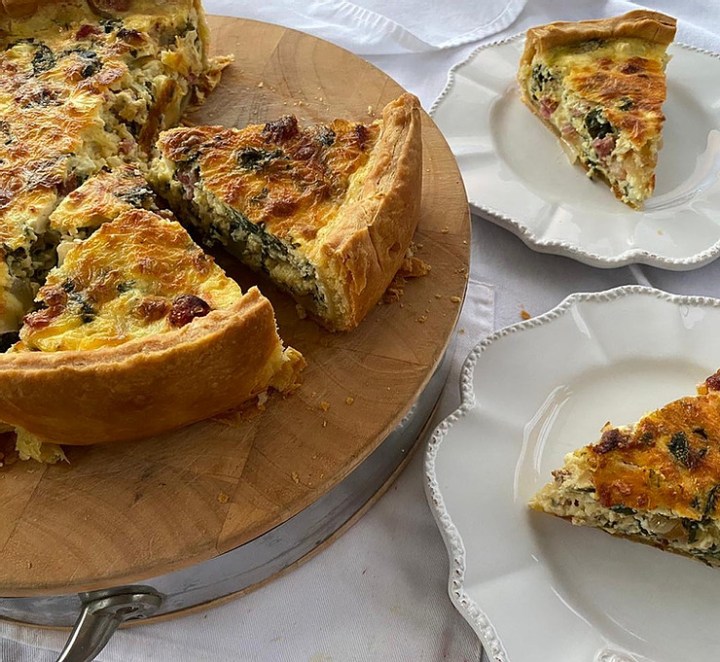
Quiche is my go-to when I have bits and bobs of ingredients in the fridge: cheese, bacon, smoked meat and even leftover roasted veg. This is a basic recipe for you to utilise all those scraps and produce a delicious, healthy meal for lunch.

The recipe makes one large quiche which I bake in a loose-bottomed cake tin or two standard sized quiche, in fluted tins. You can feed eight hungry people if you add a salad and a fresh loaf.

For the pastry:

Make one batch of the recipe for Sour Cream Pastry.

Preheat your oven to 220℃.

Lightly dust a work surface with flour. Roll the pastry to a thickness of 3mm and line the bottom and sides of a greased loose-bottomed cake tin. If you have pastry left, wrap it in plastic wrap and store in the refrigerator to make tomato tartelettes tomorrow!

Pierce the bottom of the pastry with the tines of a fork so that the steam can escape while the pastry is cooking.

Now line the pastry case with baking paper and fill it with dried beans or rice so that it is an even layer, covering the entire area.

Bake the pastry for 10 minutes, remove from the oven and take out the baking paper with the beans and immediately put it back into the oven for a further 10 minutes.

Remove the pastry shell from the oven and allow to cool.

Turn down your oven to 180℃.

For the filling:

2 onions, sliced

250g bacon or chorizo sausage

250ml cheese: mozzarella, cheddar, feta or a combination of what you have, grated or cut into small cubes

500ml of what’s left in your fridge: mushroom, courgette, sweet pepper, roasted butternut, roasted mix veg, smoked chicken, spinach, kale

Heat some oil in a frying pan and fry the onion and bacon until the onion is soft.

If you are going to add something like mushroom, courgette, sweet pepper or spinach that is not yet cooked, you can add it to the pan now to cook it down. A minute or two will do as the entire quiche will be baked in the oven.

Take off the heat and allow to cool.

Spoon the cooled mixture into the cooled pie shell.

Sprinkle the cheese over the mixture.

For the custard:

250ml sour cream or fresh cream or a combination of milk and cream cheese, well mixed

4 eggs

salt and pepper

a pinch of mustard powder or smoked paprika

Whisk the eggs together and add the sour cream.

Season with salt, pepper and mustard powder and give the mixture a good whisk to combine.

Pour over the filling and bake at 180℃ for 30 – 40 minutes or until the quiche is a beautiful golden brown.

Serve at room temperature.

Sour Cream Pastry

Sour Cream Pastry

This sour cream pastry is one of the most versatile pastries to make. It is perfect for quiche, tomato tartelettes, chicken pie and quite frankly, any savoury dish you need a pie crust for. It will keep in the refrigerator for 3 – 4 days if you wrap it tightly in plastic wrap.

750ml cake flour

2,5ml salt

250g butter

250ml sour cream

Combine the flour and salt by sifting it together.

Cut the cold butter into small cubes , add to the flour and rub the butter into the flour mixture with your fingertips until it is the size of peas. At chef’s school we were taught to lift hands and mixture up above the mixing bowl, so that air is incorporated into your pastry and it is short and light.

Add the sour cream to the mixture and mix together to form a firm dough.

Knead the dough three or four times, just to bring it together, and fold it over onto itself for three or four times. You want the butter to disperse evenly throughout the pastry without warming/overworking it.

Wrap the pastry with plastic wrap and refrigerate it for thirty minutes or overnight.

If you want to pre-bake the pastry for a pie shell, you should bake it at 220℃.

The baking time will depend on what you are making, but usually you will line the pie dish with pastry, line the pastry with baking paper and add dried beans/rice and bake for 10 minutes. Then empty the shell of the beans/rice and baking paper and bake for a further 10 minutes

Energy Treats

Energy Treats

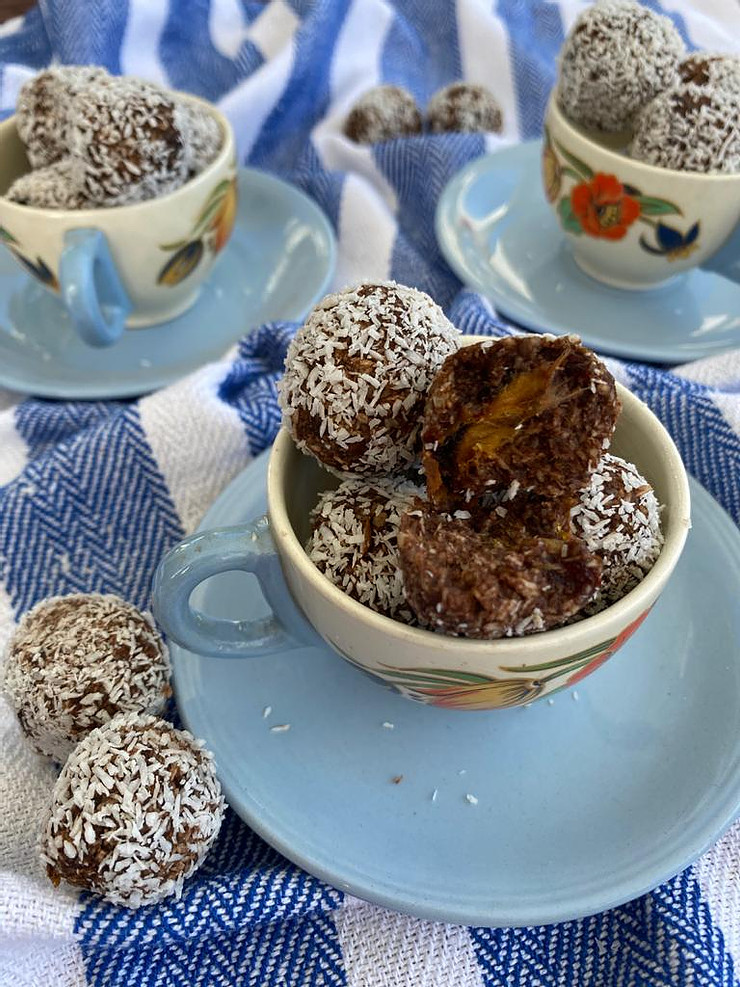
These energy balls are a healthy mid-afternoon treat and will keep your energy levels right up there where you need it. Apart from having no sugar, it is also vegan, vegetarian, dairy-free and gluten-free. Makes about 20 balls, depending on the size.

8 Medjool dates, pitted

100g almond meal

30ml cocoa powder

45g desiccated coconut, plus extra to roll the balls in

Line a baking tray with baking paper.

Place the dates in a small bowl and cover with boiling water.

Leave to soak for 30 minutes so that the dates can soften.

Drain.

Add the almond meal, dates, cocoa powder and coconut to a food processor and blitz together until combined.

The mixture should be sticky but if it is too thick, add 1 – 2 tablespoons water and blitz again.

Wet your hands to prevent the mixture from sticking to it. Roll heaped teaspoons of the mixture into balls. Place on the baking paper and refrigerate for 30 minutes to firm up.

Take the balls out of the fridge and lightly roll each in some extra coconut, to coat the outside.

Store the energy balls in a glass jar and keep it in the fridge.

Will keep for 2 – 3 days.

Focaccia

Focaccia

This flat Italian yeast bread is the star of the bread show as far as I’m concerned. It is soft and chewy at the same time, cradling olive oil into it’s dimples and ever ready to soak up whatever flavours are added to it. Traditionally a focaccia has rosemary, olive oil and salt as a topping but this need not be so. It is absolutely delicious with tiny, sun-ripened tomatoes, herbs, pesto, caramelised onion, roasted veg, cheese and olives and if you have a sweet tooth, chocolate, fruits and nuts.

I like to make what I call a filled focaccia: two rounds of bread, stacked upon each other, with the centre filled to capacity with whatever filling I have around on that particular day. Apart from being perfect picnic food this makes a wonderful meal with a salad or two added on the side.

Basic focaccia dough:

500g flour

10g dry yeast

340ml lukewarm water

10g sugar

10ml salt

20ml olive oil

Pour the lukewarm water into a jug and sprinkle the yeast on top.

Add the sugar, salt and olive and give the mixture a really good stir.

Add your flour to the bowl of a stand mixer fitted with the dough hook.

Turn the machine onto low speed and add the yeast mixture while the engine is running.

Once the mixture comes together as a dough, turn the machine onto medium speed and knead for 4 minutes, until you have a smooth and elastic dough.

Lightly oil a mixing bowl and place the dough into it. Cover with a damp tea towel and leave to prove for an hour or until almost doubled in size.

Preheat your oven to 180℃.

Knock the dough back by kneading it by hand for 2 minutes.

Divide the dough in to equal pieces and roll each piece into a circle shape with a rolling pin.

Push the tips of your fingers into the dough circles so that it forms indents or dimples.

Drizzle olive oil over the discs of dough and scatter with coarse salt and rosemary.

This is the time to add whatever filling you want to the one disc that will make out the bottom part of your filled focaccia.

Place one disc on top of the other.

Leave to prove until puffy.

Chicken Piccata

Chicken Piccata

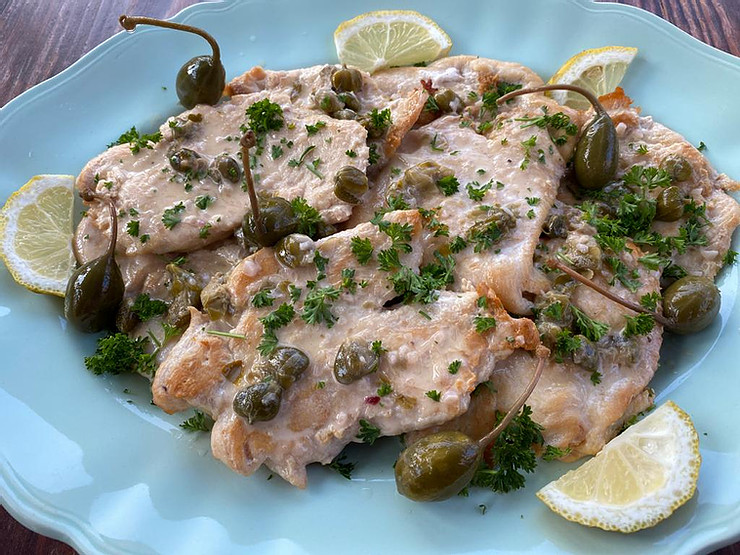
This Italian dish is an easy, quick, delicious meal, loved by my entire family. The traditional veal scaloppini is easily replaced with chicken and is sensational when smothered in this very basic piccata sauce. To me the marriage of lemon, capers and butter represent pure indulgence. Paired with a crisp chardonnay and shared on the patio on balmy evenings, this is one of those meals that leaves me grateful and at peace with the world…

4 skinless chicken breasts

125ml flour

30ml olive oil

30ml butter

For the sauce:

62ml butter

25ml flour

125ml white wine

62ml lemon juice

62ml chicken stock

45ml capers

30ml parsley

Pound the chicken breasts to an even thickness with a rolling pin. If you have really big breasts you may cut them horizontally to have thinner pieces. The idea is for the meat to be the same thickness so that it cooks evenly and quickly in a pan.

Season the 125ml flour with salt and pepper and dredge the chicken breasts in it.

Add the olive oil and butter to the pan.

Fry the chicken for 2-3 minutes per side, remove from the pan and keep warm.

To make the sauce:

Melt the butter and flour in the pan that you used to fry the chicken.

Whisk together in the saucepan while cooking for about 2 minutes.

Add the chicken stock while whisking continuously.

Once blended, add the lemon juice and white wine.

Stir in the capers and parsley and season to taste with salt and pepper.

Return the chicken to the pan and heat the scallopini in the sauce.

Serve warm with pasta or buttery mashed potatoes.

The addition of a salad and a crusty bread, makes for a perfect meal.

Carrot and Pineapple Cake

Carrot and Pineapple Cake

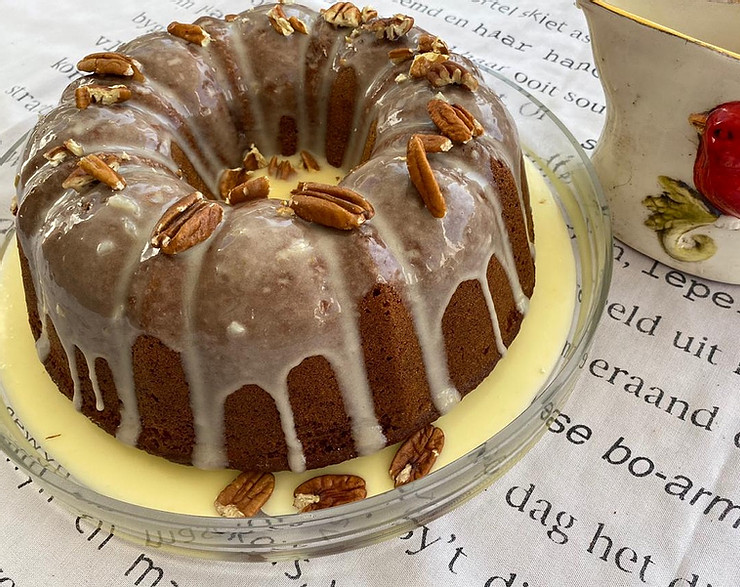
This recipe is from a handwritten recipe book I bought many years ago at a church bazaar in a town called Smithfield, which is located in the true South African platteland. I have often wondered who the owner of the book was; this person with the neat, clear print and an obvious love for food. The pages are yellow and quite brittle and in some places there are traces of oils spilled onto the paper. The book and its many recipes tell a story of a life lived around food; as nourishment and a daily necessity, of preserving the abundance of the vegetable garden, and a life filled with cooking and baking in order to bring joy to others. This carrot and pineapple cake represents the author of this special book. It is filled with nourishment, deliciousness and one of the very best cakes I have ever eaten. Bake it as an ode to the mysterious writer of this very special book. May you enjoy preparing and eating it as much as I do.

625ml cake flour

10ml baking powder

7,5ml bicarbonate of soda

15ml mixed spice

5ml salt

375ml brown sugar

310ml sunflower oil

62,5ml smooth apricot jam

4 eggs

500ml grated carrot

1x 440g tin of crushed pineapple, drained (or 250ml of fresh pineapple, blitzed and drained)

125ml pecan nuts, roughly chopped

Preheat your oven to 190℃.

Sift the cake flour, baking powder, bicarbonate of soda, mixed spice and salt into a bowl.

Beat the sugar and oil in a stand mixer with the paddle attachment, until well blended.

Add small amounts of the apricot jam to the mixture while running the machine on a medium speed.

Add the eggs one by one. Once the eggs are incorporated, run the mixer on high speed for about 2 minutes.

Add the carrot, pineapple and nuts and mix well on a low speed.

Take the bowl from the mixer and sift the dry ingredients over the wet mixture. Fold the two mixture together with a spatula until well blended.

Grease a 28cm tube cake tin and sprinkle with dry breadcrumbs to coat the inside surface.

Pour the mixture into the prepared tin and bake for 45 minutes. Test the cake to see if its done by inserting a wooden skewer into the centre. If the skewer comes out clean the cake is done, if not, put the cake back into the oven for another ten minutes or so.

Once you have taken the cake from the oven, allow it to firm and cool in the cake tin for 10 minutes before turning it out onto a wire rack to cool.

This cake is moist and fresh and needs nothing more added to it, however, I do sometimes make a mixture of icing sugar and lemon juice to pour over it. Feel free to add a classic cream cheese icing if you wish and a sprinkling of pecan nuts to round it off.

Chocolate Tart

Chocolate Tart

I’m not saying anything….just try it!

For the base:

300 – 350g chocolate biscuits (Romany Creams if you want a brown/chocolate base and if you don’t have it or don’t mind the base not being chocolate, something like Tennis Biscuits or Digestives)

80g butter, melted

Break up the biscuits and put them into a plastic bag. Take a rolling pin and bash them into very fine crumbs. (This is great to get rid of your frustrations but you may also blitz the biscuits and melted butter together in a food processor if you are lucky enough not to be frustrated… you know, with lockdown, etc)

Add the biscuit crumbs into the bowl with the melted butter and mix thoroughly.

Scrape the mixture into a 24cm tart tin, with a removable base.

Spread it evenly so that there is enough to go up the sides of the tin and then press it all down into a uniform crust. Refrigerate the base while you prepare the filling.

For the filling:

500g mascarpone

300g dark chocolate, or half milk chocolate and half dark chocolate

Beat the mascarpone in a stand mixer with the paddle attachment, to soften it.

Break the chocolate into small pieces and put it in a glass bowl.

Place a small saucepan over a low heat and fill it to about 5cm depth with water. Turn on the heat and bring to a gentle simmer.

Now place the glass bowl with the chocolate on top of the saucepan and gently melt the chocolate. You may stir the chocolate every now and then.

Turn the mixer with the mascarpone onto a low speed and slowly add the melted chocolate.

Scrape the mascarpone-chocolate filling into the cold tart base and place back into the refrigerator for two hours.

Decorate as you wish or celebrate the fabulous simplicity of tastes!