Old Fashioned Guavas in Syrup

Old Fashioned Guavas in Syrup

These guavas in sugar syrup take me back to barefoot days as a child and even looking at them, leaves me thinking retro! They are however delicious with custard and convinces one to sneak down the stairs late at night and dip into the jar in the fridge….

About 12 large, ripe guavas

250ml sugar

500ml water

Wash and peel the guavas.

Pour the water into a saucepan and add the sugar.

Turn on the heat and stir the mixture continuously until all the sugar has dissolved.

Bring to the boil, turn down the heat and allow the water and sugar to simmer for 10 minutes.

Add the guavas to the sugar syrup and simmer for another 10 minutes.

Turn off the heat and allow the fruit to cool in the syrup.

You may now serve the guavas with some of the syrup and custard or ice cream.

If you want to preserve the rest, simply spoon the fruit into clean, cold glass jars, fill up with sugar syrup in which you cooked it and seal.

Keep in the fridge for up to 4 weeks.

Peanut Butter Spinach

Peanut Butter Spinach

This is my take on Chef Lesego Semenya’s spinach dish in his book Dijo. Read about this brilliant young chef by clicking on the section Cook & Book on this blog

200g baby spinach

50g butter

200ml sour cream

45ml peanut butter

salt and pepper

a handful of peanuts or cashew nuts

Bring some water to the boil in a saucepan. Add the spinach for 15 seconds! Yes, you only want it to wilt!

Drain the spinach in a sieve and pat dry with kitchen paper to get rid of excessive moisture.

Melt the butter in the same saucepan and add the spinach to it. Stir for a minute or so.

Add the sour cream and peanut butter and stir to incorporate all the ingredients.

Season with salt and pepper and allow the sauce to thicken while stirring.

Remove from the heat, scatter the peanuts or cashews over the spinach and serve.

Coxinha

Coxinha

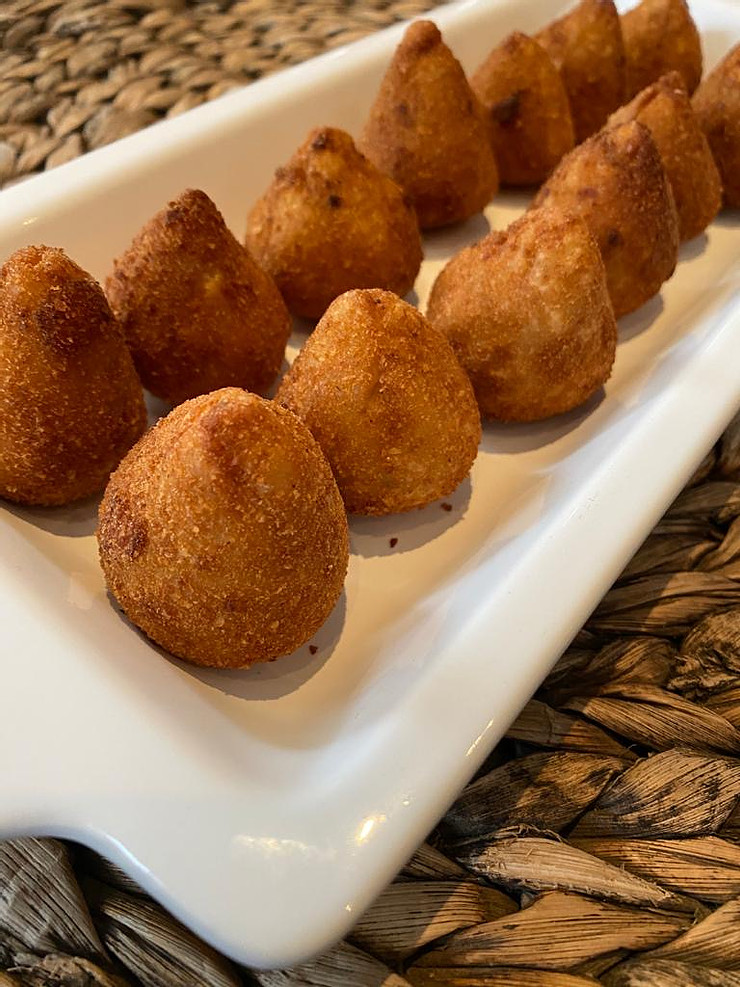
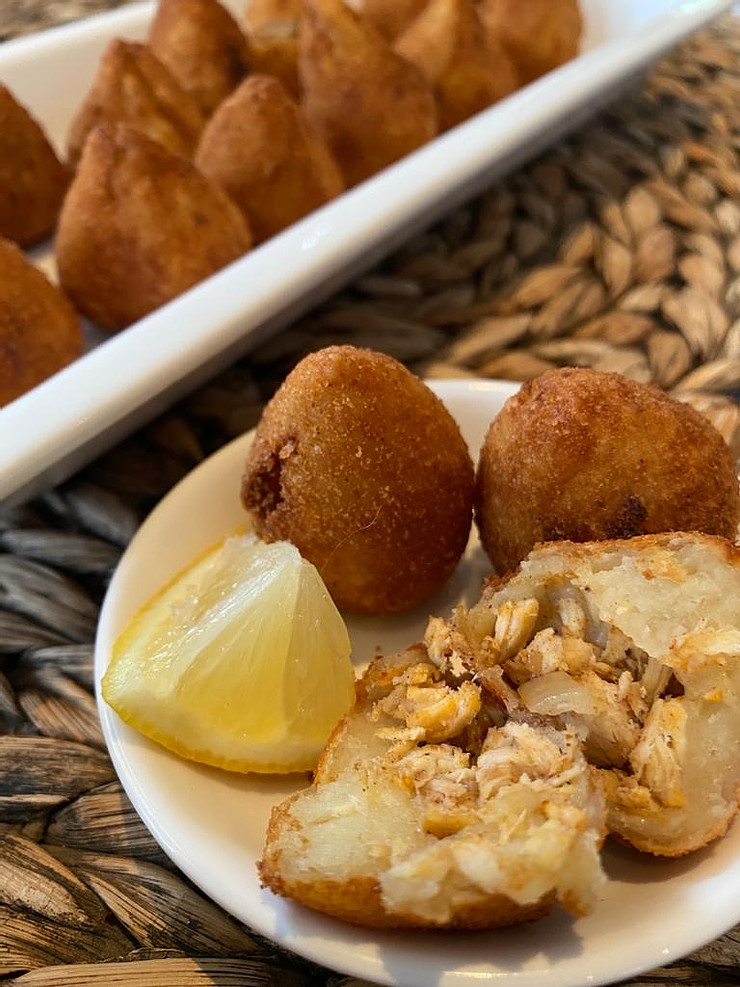
Coxinha are delicious chicken croquettes that you can find in almost every bar and casual eatery in Brazil. It is the Portuguese word for “little chicken thigh” although these canapés are pear shaped and often served in portions the size of an average pear. I prefer the tiny coxinhas.

To me these are the perfect winter canapé, eaten in front of the fireplace with a glass of wine and good company. They are extremely more-ish and deceptively easy to pop into your mouth, but then again, that is what evenings in front of the fireplace is for, isn’t it?

3 chicken breasts

1 litre stock, water and instant stock is fine in this case

1 small onion

3 cloves garlic, minced

30ml vegetable oil

375ml milk

50g butter

450g cake flour

a small handful fresh parsley

salt and pepper

Pour the stock into a large saucepan, immerse the chicken breast and cook until done.

Cool slightly and chop the chicken into small pieces.

Fry the onion and garlic in the oil until soft and set aside.

Pour 375ml of the cooking stock into a measuring jug and discard the rest.

Pour the 375ml stock back into the saucepan, add 375ml milk as well as the butter. Heat the mixture and allow the butter to melt.

Beat the flour, a little at a time, into the liquid and cook, stirring continuously, until the mixture comes together and pulls away from the sides of the saucepan.

Turn the dough out onto a plate until it is cool enough to handle, but as warm as possible. Do not let it become too cool as you need the steam/heat to help create the elasticity in the dough.

Knead the dough by hand for 10 minutes. It should be smooth and elastic.

Pinch off lumps of dough and roll it into a ball. Flatten the ball in the palm of your hand by pushing it into a circle with you thumb.

Add the cooked onion and garlic to the chopped chicken and season with salt, pepper and herbs.

Spoon a teaspoon full of the chicken mixture into each flattened ball, which now resembles a shell, bring up the edges all around and pinch the dough together to form a seal.

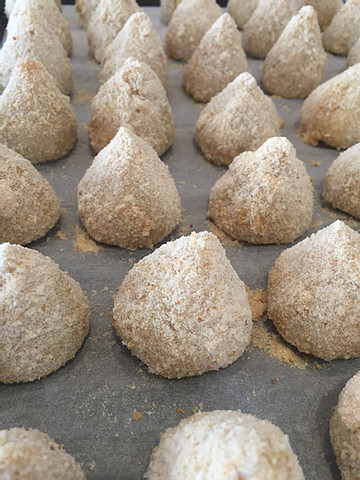
Shape each bundle into a small pear shape and place on a lined baking tray.

To fry:

2l vegetable oil

250ml milk

200g very fine breadcrumbs

1 egg

Beat the egg with the milk and pour the mixture into a shallow dish.

Add the breadcrumbs to another shallow dish.

Now proceed by first dipping a coxing into the egg mixture, then covering it in breadcrumbs and then leaving it to stand on a lined baking tray.

Heat the oil to 180℃ . The oil is ready when you drop a piece of dough into it and it immediately sizzles and turns brown

Deep fry about 5 croquettes at a time for approximately 5 minutes or until they are a beautiful golden colour.

Keep the fried coxinhas warm in an oven at 100℃ while you fry the rest.

Serve warm.

Chocolate-Almond Cake

Chocolate-Almond Cake

Chocolate and almond is a match made in heaven. This cake is very nutty, not too sweet and like a cloud on your palette, as it is served slightly warm. A true winter winner and sensational in every sense of the word!

You may replace the almonds with pecan nuts, hazelnuts or as I’ve done, half almond and half hazelnut.

250g butter

250g muscovado sugar or any dark brown sugar

4 eggs

45ml espresso

250g cake flour

15ml baking powder

200g almonds (or nuts of your choice), roughly chopped

250g dark chocolate, chopped into chunks, about the size of a hazelnut

Preheat your oven to 180℃.

Grease and line a 23cm loose-bottomed cake tin with baking paper.

Beat the butter and sugar in the bowl of a stand mixer fitted with the paddle attachment, until light and fluffy.

Add the eggs one at a time, beating well in between each addition.

Stir in the espresso.

Sift the flour and baking powder together in a separate bowl. Add the flour with a spoon while the machine is running on low speed, until everything is incorporated.

Keep some of the chopped almonds and chocolate aside to put onto the cake later.

Stir the rest of the chopped nuts and chocolate into the cake batter.

Spoon the mixture into the prepared cake tin and smooth the top with the back of the spoon.

Sprinkle the almonds and chocolate that you kept separate over the top.

Bake the cake for 50 minutes or until a skewer comes out clean when inserted into the centre of the cake.

Remove from the oven and allow to cool in the cake tin.

Serve the cake slightly warm.

If the cake is completely cold, preheat your oven to 100℃ and warm the cake in the oven for 10 minutes.

Traditional Bobotie and Tomato Sambal

Traditional Bobotie and Tomato Sambal

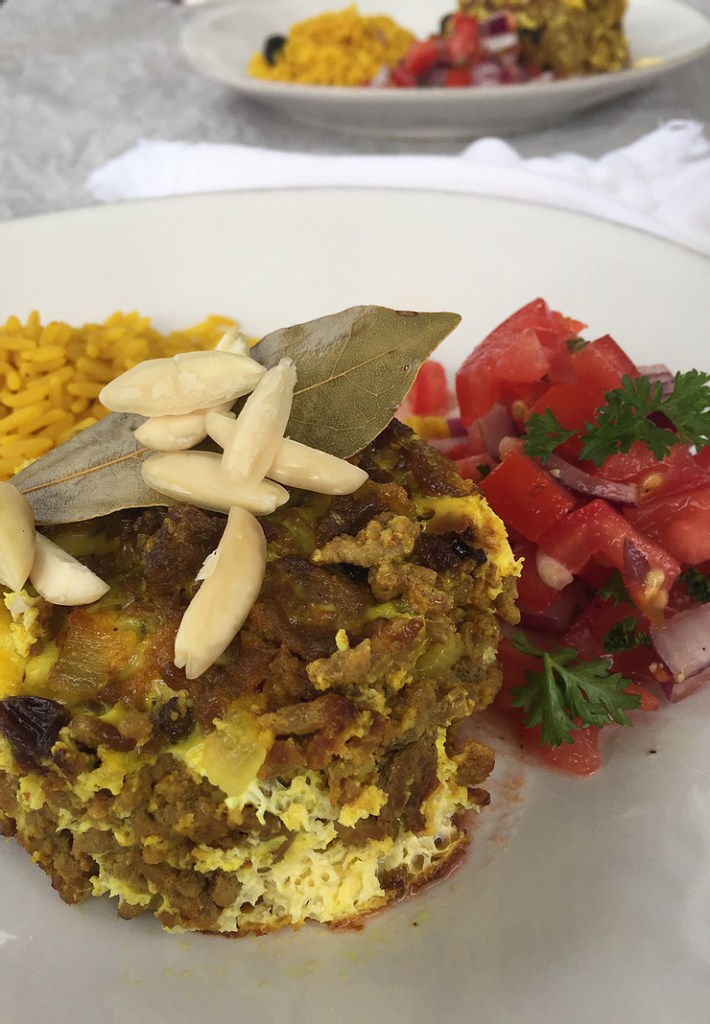
Bobotie is one of the most popular, traditional South African dishes. It consists of spicy beef mince baked in a savoury custard and eaten with sambals. Sambals were an economical way of adding flavour to an otherwise bland dish and usually has some sort of spice or acid going in it. Serve the bobotie with turmeric rice, fruit chutney and tomato sambal.

30ml oil

2 onions, chopped

1kg beef mince

2 slices white bread

250ml + 125ml milk

3 eggs

30ml mild curry powder

10ml salt

15ml turmeric

45ml lemon juice

125ml raisins

60ml chutney

4-6 bay leaves

Preheat your oven to 180℃.

Add the oil and chopped onion to a saucepan and fry the onion until caramelised. Spoon the onion into a mixing bowl and set aside.

Brown the minced meat in the same saucepan. Spoon that into the mixing bowl with the onion, once done.

Pour 250ml milk into a small bowl and soak the bread in it. Add this to the minced meat mixture.

Lightly beat two of the eggs and add them as well.

Add the rest of the ingredients, except the bay leaves and mix through.

Spray a casserole dish of about 18cm x 28cm, spoon the mixture into it and push the bay leaves into the mince in a random pattern. Cook in the oven for 20 minutes.

Whisk the 125ml milk and remaining egg together and pour the custard over the bobotie once it has cooked for 20 minutes.

Immediately put it back into the oven for another 15 minutes or until golden on top.

For the tomato sambal:

3 tomatoes

2 red onions

15ml lemon juice

15ml sugar

15ml olive oil

fresh parsley, chopped

Chop the tomatoes and onions and add to a small bowl.

Whisk together the lemon juice, sugar and olive oil and pour over the tomato and onions.

Season with salt and pepper and chopped parsley.

Mushroom Sauce

Mushroom Sauce

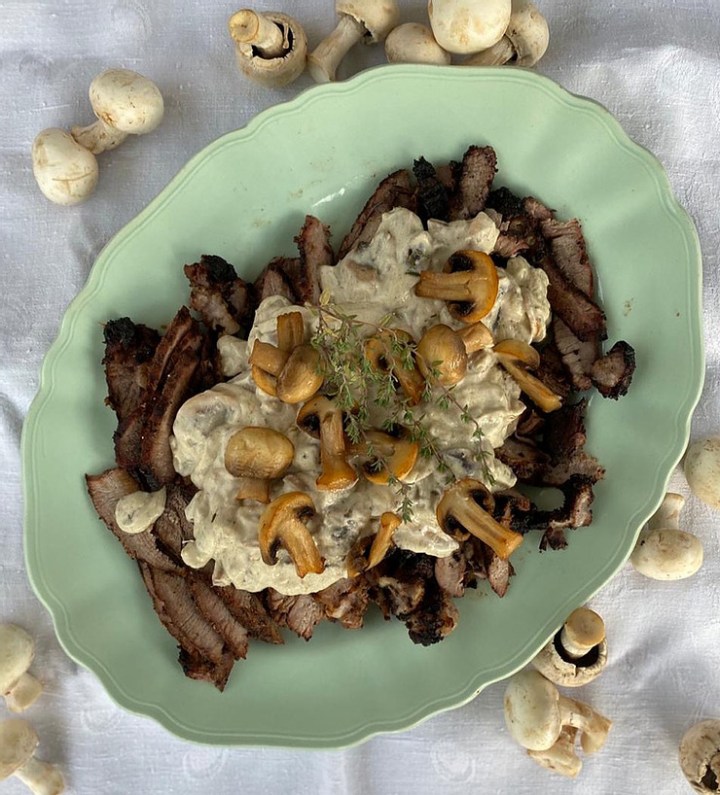
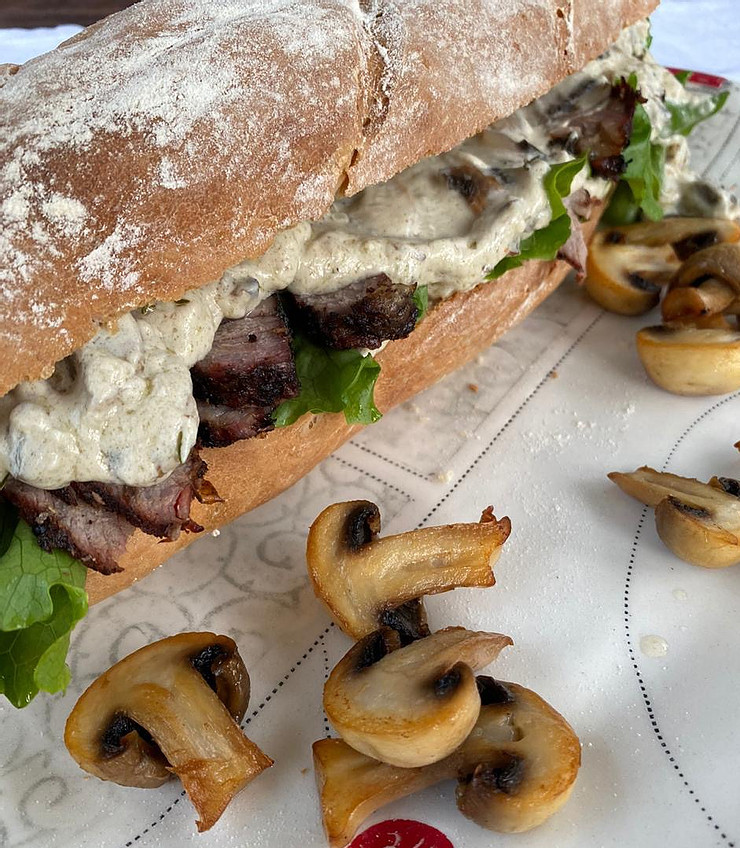
There are few things as delicious as a rump steak or a Côte de boeuf that has been perfectly cooked, but believe me, this mushroom sauce elevates what you know as delicious, into pure taste heaven!

Antonio Carluccio, “the godfather of Italian gastronomy” explained the art of cooking mushrooms many years ago when he said that an extremely hot pan boosts the taste of these fungi. I agree completely. The extra hot pan sears the mushrooms, caramelises it and concentrates that incredible, delicious umami yumminess! Do not let the heat scare you … it’s only cooking after all…

200g mushrooms; I use whatever kind I have

30ml butter

30ml olive oil

a small bunch of thyme

1 garlic clove, minced

250ml cream

Clean the mushrooms and slice them.

Heat a saucepan until it is quite hot.

Add the butter and olive oil at the same time and immediately add the mushrooms.

Move the mushrooms around while they sizzle and sing for a good 2 – 3 minutes.

Now, turn the heat down to medium and allow some time for the pan to cool down from the high heat. This is important because you do not want to burn the garlic when you add it to the pan.

Add the garlic to the mushrooms and stir the mixture around for a minute or so.

Add the cream and the thyme and allow the sauce to simmer for 2 minutes. If you cook it for too long it will split!

Season the sauce with salt and pepper and serve warm

Crumpets or Flap Jacks

Crumpets or Flap Jacks

There is a certain tranquility to a Sunday morning… It’s as though everyone in the family wakes up to a more relaxed pace, lingers a bit longer over coffee and breathes in the well deserved break from the usually hectic week at their own unique pace…

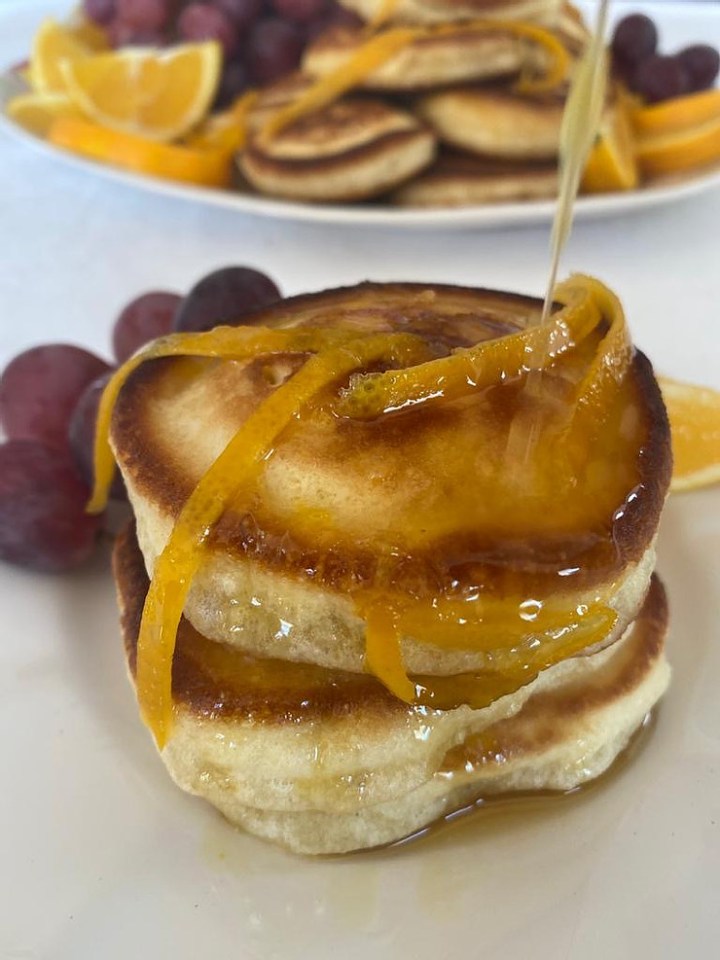
Crumpets are the perfect solution for a late breakfast and I love the orange-honey syrup that adds the sweetness to provide that pick-me-up after waking up and the lingering bitterness of the zesty orange

For the crumpets:

62ml sugar

1 egg

125ml milk

15ml vegetable oil

250ml flour

10ml baking powder

1ml salt

Add the sugar and egg to a mixing bowl and beat together with a whisk.

Add half the milk and the vegetable oil to the mixture and mix together to incorporate.

Sift the flour, baking powder and salt together in a separate bowl. 

Add these dry ingredients to the egg mixture and mix through.

Gradually stir in the rest of the milk to form a smooth batter. Stir only until blended.

Heat some oil in a frying pan and fry spoonfuls of the batter over medium heat, until golden. Flip the crumpet and cook on the other side until done.

For the orange-honey syrup:

100ml honey

rind and juice of two oranges

Add the honey to a small saucepan. 

Grate the rind of two oranges into the saucepan and add the juice of both oranges.

Turn the heat onto medium and stir until the orange juice and honey have blended.

Allow the mixture to simmer for about 20 minutes. Take off the heat and allow to cool.

Serve the crumpets with generous amounts of the orange-honey syrup and fresh fruit of your choice.

Gorgonzola and Apple Tart

Gorgonzola and Apple Tart

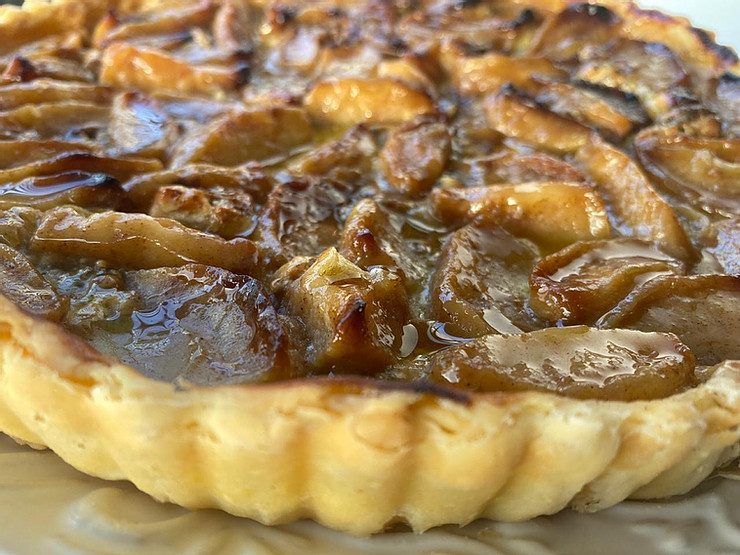
I love this tart! It is my winter go-to when I want to serve a cheese platter either as a canapé or as a cheese course, but at the same time want something warming and soothing. It also makes for a fabulous lunch, served slightly warm with a crunchy salad on the side.

If blue cheese is not your thing you can easily replace it with goats cheese.

1 quantity store bought puff pastry

8 Granny Smith apples, peeled and cored

100g butter

15ml dark brown sugar

5ml ground cinnamon

200g gorgonzola cheese, or goats cheese

Preheat your oven to 200℃.

Grease or spray a round pie tin of ±26cm in diameter.

Slice the apples into quarters and then half each quarter.

Melt the butter in a large pan over medium heat.

Add the sugar and cinnamon and stir.

Now add the apple slices and cook for about 7 minutes until the apples are softened but still firm. Stir the apple while it cooks so that the butter and sugar coats it. Allow to cool slightly.

Roll out the pastry on a floured surface and line your pie tin.

Break up the gorgonzola and dot the cheese evenly over the uncooked tart base.

Arrange the apple slices on the base as well, drizzle with the buttery juices from the pan and bake for 35 minutes.

Serve slightly warm.

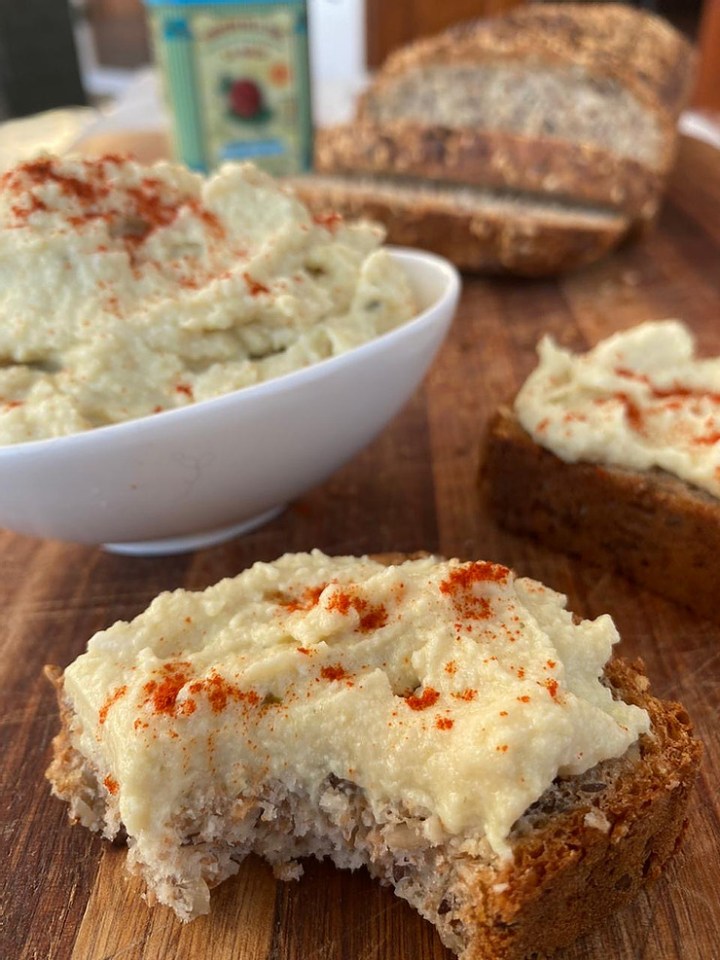
Cauliflower-ricotta Spread

Cauliflower-ricotta Spread

An alternative, nutritious spread in every sense of the word!

1 small cauliflower head, broken into florets

250ml vegetable or chicken stock, a cube will do

150g ricotta cheese

juice of half a lemon; add half of the half and taste before adding more!

salt, pepper, smoked paprika

Pour the stock into a small saucepan, add the florets and bring the liquid to a simmer.

Cook the florets until tender.

Remove the cooked cauliflower from the stock but keep the liquid for now.

Add the cauliflower, ricotta, lemon juice, salt, pepper and a pinch of smoked paprika to a blender.

Add about 50ml of the stock to the blender and blitz the ingredients together until it has a creamy consistency. Add some more stock if you need it.

Taste the mixture and adjust the seasoning and the amount of smoked paprika to your taste.

Makes about 375ml of nutrient packed cauliflower spread.

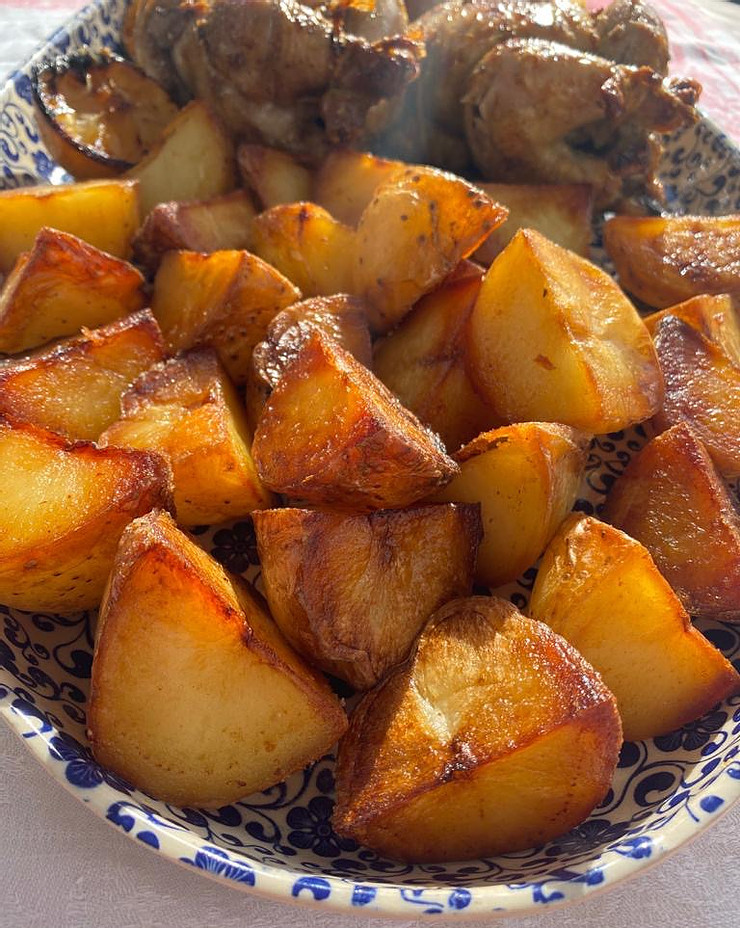
Perfect Pan-roasted Potatoes

Perfect Pan-roasted Potatoes

These potatoes are somewhere between roasted, fried and crunchy on the one hand, and a heavenly mashed, potato-like pillow of fluffiness on the other, combined into one mouthful of deliciousness. I know, this sounds completely exaggerated and to top it off, it is one of the easiest dishes you will ever cook!

Small waxy potatoes

Salt

Vegetable oil

I use a cast iron pan to cook my potatoes but any heavy bottomed pan will do. 

Wash and dry your potatoes and cut them into quarters.

Pour 0,5 cm of vegetable oil into your pan.

Now sprinkle a generous amount of salt evenly on top of the oil.

Place the potatoes cut-side down into the pan and turn the heat to medium.

Time the potatoes – they have to stay UNTOUCHED in the pan for a full 10 minutes. Do not turn or flip them, even if you are convinced that they’re burning.

Once a full ten minutes have expired you may turn the potatoes onto the other cut-side. Repeat the above process of frying without moving the potatoes around in the pan, but for 5 minutes, not ten.

Once your potatoes are beautifully browned, turn the flame to the lowest setting and cover the pan with a tight fitting lid or aluminium foil. 

Allow to cook for 20 minutes.

Take off the lid and test the potatoes by inserting a sharp knife.

Serve and enjoy immediately.