2 tins of coconut milk 100ml milk 250ml tapioca a pinch of salt 83ml sugar 83ml butter 4 eggs 5ml vanilla 6 fresh guavas 83ml coconut shavings
Preheat your oven to 180℃ and grease a 18cm X 28ccm ovenproof dish. Pour the 2 tins of coconut milk and the 100ml of milk into a saucepan and bring to the boil. Add the tapioca and salt to the milk, turn the heat down to low and gently simmer for 25 minutes. Stir the mixture every now and then to prevent the tapioca from clotting and sticking to the saucepan. Remove the saucepan from the heat and stir in the sugar and butter. Add the eggs and vanilla to a mixing bowl and whisk together. Pour the egg mixture into the tapioca while stirring. Pour the mixture into the prepared baking dish. Peel the guavas and randomly press them into the tapioca. Place in the oven and bake for 45 minutes. Sprinkle the warm dessert with coconut shavings and serve with pouring custard.
Who can say no to a homemade pie? This is a rich and meaty steak pie and definitely one of the ultimate winter comfort foods! Easy to make and freezes well if you need some “food insurance” for later. This recipe makes 2 pies that will feed 6 adults, each.
1,5kg chuck or braising steak, de-boned and cubed 3 onions, finely chopped 2 medium carrots, finely chopped 2 cloves of garlic, creamed 50g tomato paste 30ml Worcestershire sauce 500 – 750ml water 2 rolls ready-made pastry Egg-wash: 1 egg and 15ml water whisked together
Cover the bottom of a large heavy-base saucepan with oil and heat over medium-high heat. Season the meat with salt and add the cubed meat in batches, to brown. Keep the browned meat aside. Add the onions, carrots, garlic and tomato paste to the same saucepan and fry for 2 -3 minutes on medium heat. Spoon the meat into the saucepan with the vegetables, add the Worcestershire sauce and enough water to almost cover the meat. Bring to a boil. Turn the heat down to a slow simmer and cook for 2 – 3 hours. The meat should be very tender and the sauce should be thick and intensely flavoured. Taste the sauce and adjust the seasoning if necessary. Take the saucepan from the heat and allow to cool slightly. Preheat your oven to 200℃. Spoon the steak mixture into two pie dishes and set aside. Dust a work surface with flour and roll the pastry to a thickness of 3mm. Cut out a circle that is 2cm larger in diameter than that of your pie dish. Wet the rim of the dish with water and place the pastry over the filling. Lightly push the pastry onto the rim of the dish, to secure. Cut a slit into the pastry to allow the steam to escape during baking. Brush the pastry with the egg-wash, place in the oven and bake for 20 – 25 minutes, until golden. Serve warm.
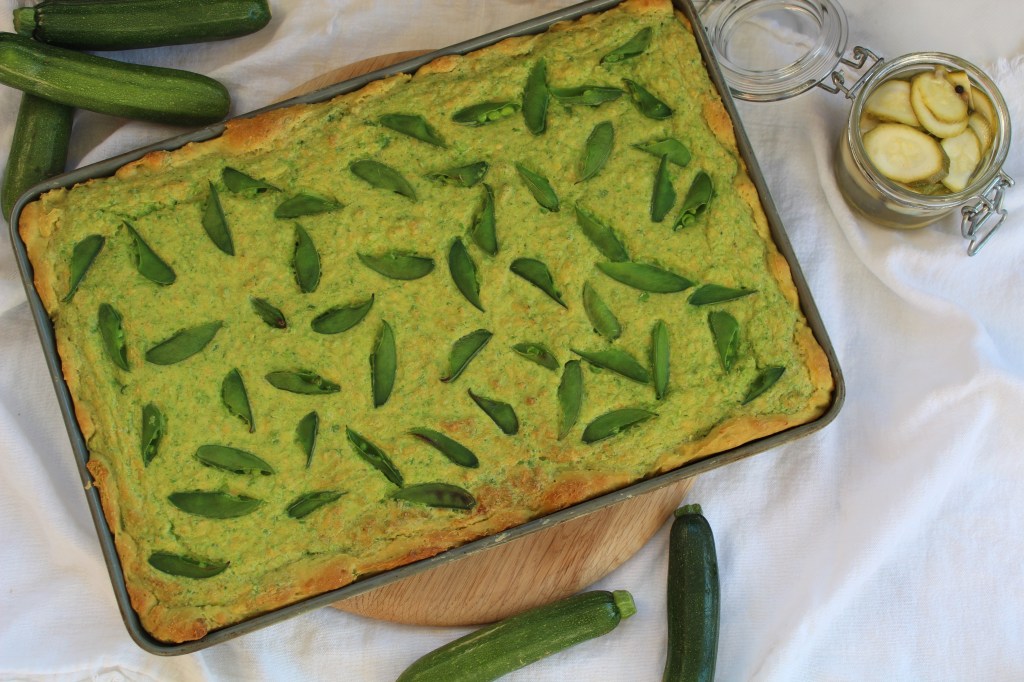
This is a delicious and healthy meal based on Jamie Oliver’s avocado pastry recipe. The quick pickle elevates this plant-based dish from good to absolutely fabulous!
2 medium avocado pears 400g self-raising flour ice water 6 eggs 5ml salt 400g frozen peas, defrosted 140g cheddar cheese, grated 200g sugarsnaps, halved
Quick Pickle: 500ml vinegar 500ml water 83ml sugar 30ml salt 10ml mustard seeds 10ml whole black peppercorns 4 cloves of garlic, cracked 2 bay leaves 12 zucchini
Start by making the pickle: Slice the zucchini into coins/strips and place it in a glass bowl. Add the rest of the ingredients for the pickle to a saucepan. Place over high heat until tiny bubbles appear at the edges. Remove the saucepan from the heat and pour the pickle onto the prepared zucchini. Set aside until cold. (The pickle may be bottled at this stage and stored in the refrigerator).
Preheat your oven to 180℃ and spray a 38cm X 25cm oven tray with cooking spray. Scoop the flesh from the avocados into a food processor and add the flour. Pulse at high speed until the mixture resembles coarse, wet sand. Add a very small amount of ice cold water to the mixture while the engine is running. The mixture should come together into a ball. Line the prepared baking tray with the avocado-pastry by pushing it about 2cm up the sides of the tray as well as covering the bottom as evenly as you can. The pastry is too wet to roll – be patient in pushing/spreading it out as evenly as you can. Set aside. Add the eggs, salt, defrosted peas and cheddar cheese to the bowl of your food processor and blitz on high speed. Pour this mixture onto the avocado-pastry and scatter the fresh sugarsnaps on top. Bake the flan for 30 minutes. Remove from the oven and immediately cut into portions. Serve a portion of the flan with a generous amount of zucchini pickles on top.
This is the perfect make-ahead dessert when entertaining as it needs to rest in the refrigerator for 24 hours before baking. With its crunchy outside top and soft, squidgy inside it is best served in small portions as it is very rich. Leftovers are equally good when cold!
10 slices white bread, 0,5cm thick 160g dark chocolate, chopped 75g butter 450ml cream 60ml dark rum 110g caster sugar a pinch of cinnamon 3 eggs extra pouring cream for serving
Grease a 18cm X 28cm ovenproof ceramic dish. Remove the crusts from the bread slices and then cut each slice into 4 triangles. Set aside. Add the chocolate, butter, cream, rum, sugar and cinnamon to a heatproof bowl set over a saucepan of barely simmering water. Stir the mixture every now-and-then until the butter and chocolate has melted and the sugar has dissolved. Remove the bowl from the heat and give it a good stir to amalgamate the ingredients. Put aside. Add the eggs to a large mixing bowl and whisk together. Pour the chocolate mixture over the eggs in a thin stream while whisking continuously. Remember: pour slowly, whisk quickly. Spoon a 1cm layer of chocolate mixture into the base of the baking dish and arrange half the bread triangles in overlapping rows on this chocolate layer.
Pour half of the remaining chocolate mixture as evenly as you can, over the bread. Arrange the rest of the triangles on top of this layer, finishing off with a layer of chocolate.
Gently press down the bread with a spoon so that it gets covered evenly with the liquid as it cools. Cover the dish with plastic wrap and allow to cool completely. Place the dish in the refrigerator for 24 hours.
Cooking the pudding: Preheat your oven to 180℃. Remove the plastic wrap and bake the pudding for 35 minutes. Allow to stand for 10 minutes before serving with pouring cream, custard or ice cream.
Soybean is a complete protein and really delicious when mixed in a salad with crunchy vegetables. I have used black soybeans in this salad but any soybean can be used.
250ml soybeans, cooked according to packet instructions baby spinach, finely chopped purple cabbage, finely shredded pomegranate seeds feta cheese, crumbled
Dressing: 30ml lemon juice 15ml red wine vinegar 5ml mustard 5ml garlic, minced 15ml honey 60ml olive oil
Add all the dressing ingredients to a small bowl and whisk together until amalgamated. Add the salad ingredients to a platter or bowl and drizzle the dressing over.
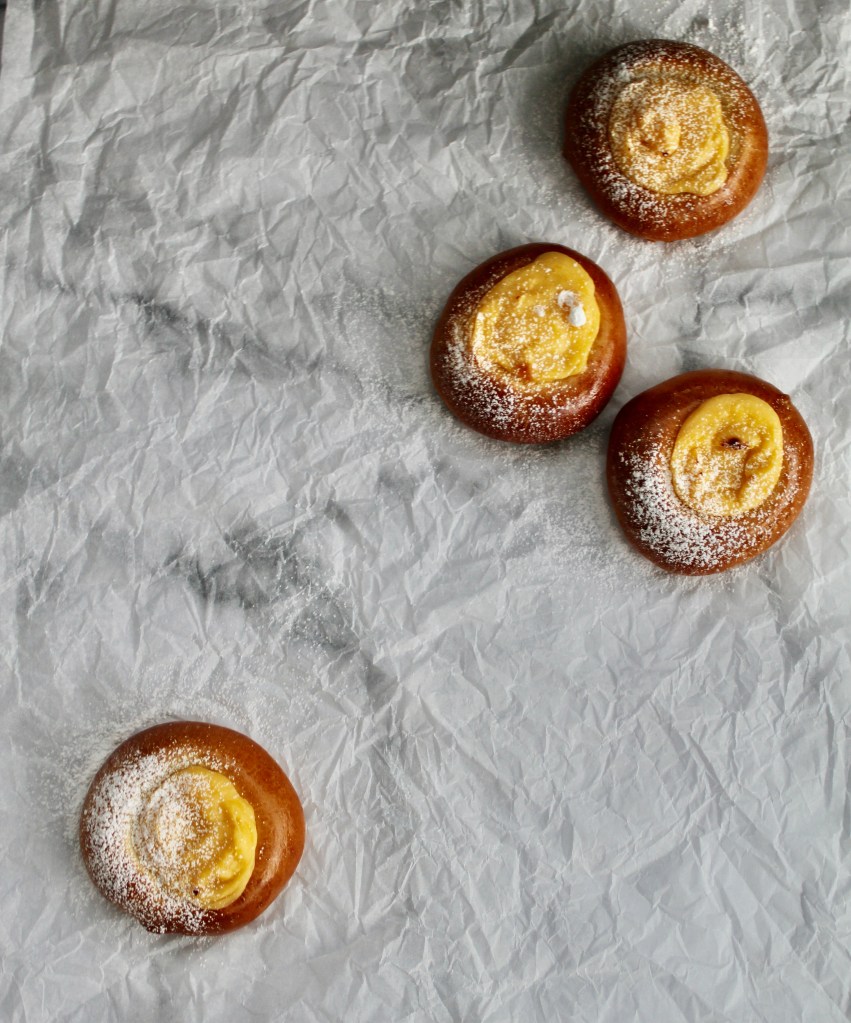
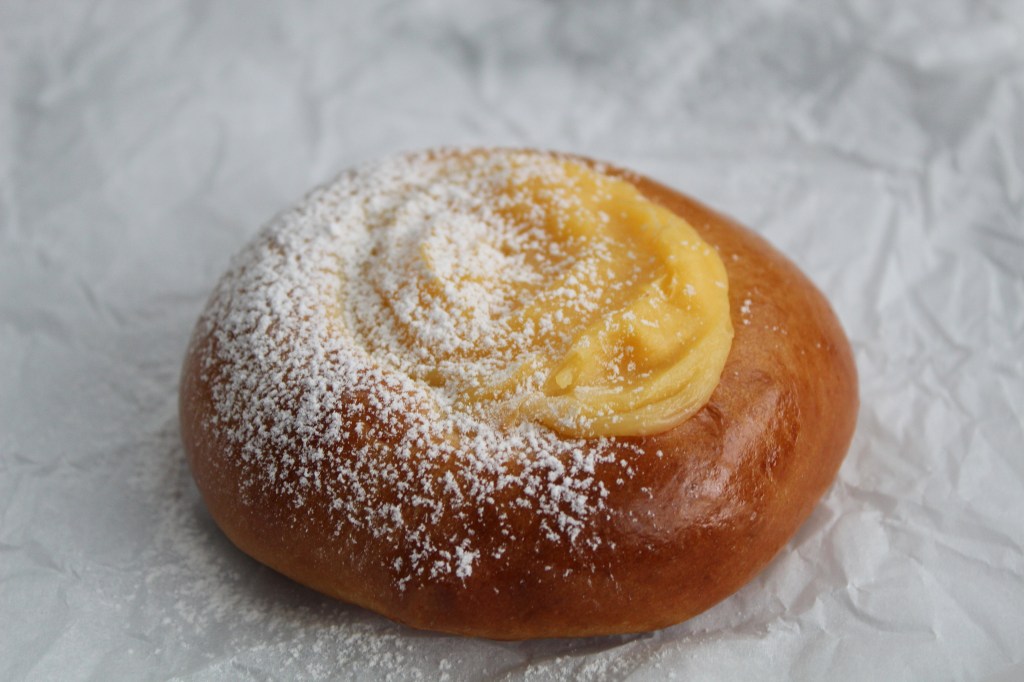
Who can say no to an espresso and pain à la crème on a sidewalk in Paris? I assure you, you might be in your own home but your tastebuds will be fooled into believing you were there….
For the buns: Line a large baking sheet with baking paper and put aside. Add the flour and salt to the bowl of a stand mixer fitted with the dough hook. Warm the milk until tepid and pour it into a mixing bowl. Add the butter, instant yeast and sugar to the milk and stir until the sugar has dissolved. Turn the mixer on to a low speed and add the liquids. Mix/knead for about 3 minutes. The dough will be very sticky! Turn the mixer to medium speed and knead for another 6 minutes. You are aiming for a soft, smooth, elastic dough. Divide the dough into 10 equal pieces – weigh them on a scale, they should be around 60g each. Roll each portion into a ball and place on the prepared baking sheet. Flatten the dough ball slightly with your hand. Now make an indent with a small cup/glass, pushing down onto the dough. Spray some plastic wrap with cooking spray and cover the buns lightly. Set aside in a warm place for 90 minutes.
For the crème pâtissière: Add the corn flour to a small bowl and pour a small amount of milk in to the bowl while stirring. You want to make a slurry, which is basically a runny, pourable paste. Put aside. Add the egg yolks and 50g caster sugar to a mixing bowl. Stir the corn flour slurry into the egg mixture. Set aside. Pour the milk into a small saucepan and add the other 50g caster sugar. Place the saucepan on medium heat and stir until the sugar has dissolved. Take the saucepan from the heat as soon as tiny bubbles start to appear around the edges of the pan. Drizzle the warm milk mixture into the egg mixture while whisking vigorously. Pour slowly, whisk quickly! Now pour the mixture from the mixing bowl, back into the saucepan and place it on a medium-low heat. Stir continuously until the mixture has thickened. Allow to cook for 30 seconds before removing it from the heat. Add the vanilla and stir to mix. Pour the crème pâtissière into a shallow bowl and place some plastic wrap directly on the surface. This will prevent a skin from forming while the custard cools down. Place in the refrigerator and allow to cool completely.
Preheat your oven to 180℃. Take the same cup/glass that you used to make the indents in the buns, and press down onto the exact same area again. Brush the buns with egg wash. Whisk the cold créme pâtissière to soften it. Spoon about 20ml or more if you can, of crème pâtissière into each round indent you have made. Bake the custard buns for 20 minutes. The custard filling will rise up as it bakes but do not panic, it will fall back on itself once it cools. Cool the buns to room temperature. Sieve with icing sugar and serve with coffee.
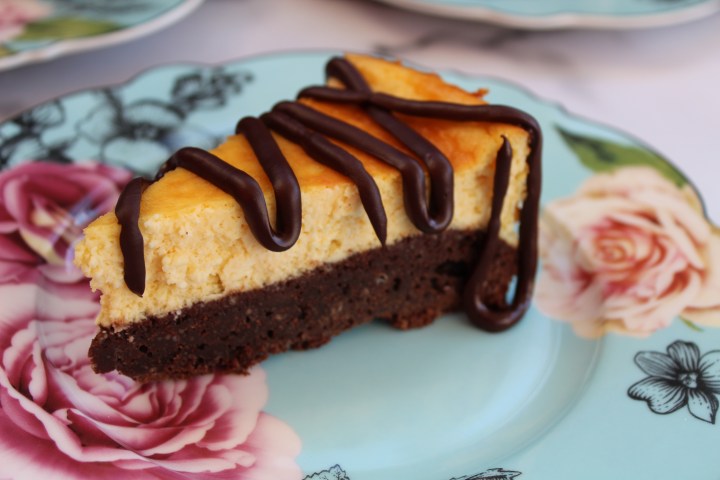
The best of two worlds!! A delicious chocolatey brownie base with a velvet baked cheesecake topping!
For the brownie base: 115g butter 115g dark chocolate, chopped 200g caster sugar 2 eggs 50ml milk 115g flour
For the cheesecake topping: 500g cream cheese, room temperature 125g caster sugar 3 eggs 5ml vanilla 125ml Greek yoghurt
Preheat your oven to 180℃ and grease a 22cm loose-bottom cake tin. Add the butter and chopped chocolate to a heatproof mixing bowl and place it over a saucepan of barely simmering water. Stir every now and then until melted. Remove the bowl from the head and add the sugar. Whisk until the ingredients are amalgamated. Add the eggs and milk and whisk to mix. Add the flour and stir through until the mixture is just blended. Scrape the mixture into the prepared cake tin and even it out with a spatula. Place in the oven and bake for 25 minutes. Remove and set aside. Lower the oven temperature to 160℃. Add the cream cheese, sugar, eggs and vanilla to the bowl of a stand mixer fitted with the paddle attachment. Beat together on high speed until you have a smooth mixture. Scrape the bowl down once or twice in between mixing. Remove the bowl from the mixer and add the yoghurt. Stir the yoghurt through the cheesecake mixture. Pour the mixture onto the baked brownie base. Place in the oven and bake for 55 minutes.
Remove the cake from the oven and place it on a cooling rack to cool completely. Cover with plastic wrap and refrigerate for a minimum of 4 hours, but preferably overnight. Run a knife around the edge of the cake before removing the sides of the cake tin. Cut into slices and drizzle with melted chocolate to serve.
Preheat your oven to 190℃ and spray an oven-proof dish or casserole of about 18cm X 28cm. Set aside. Add all the sauce ingredients to a mixing bowl and whisk together until the sugar has dissolved. Put aside. Cut the chicken in to 2 – 3 cm chunks, season with salt and pepper and toss together in a mixing bowl. Sprinkle the cornstarch over the chicken and mix to coat all the pieces. Heat about 3cm of vegetable oil in a saucepan. Whisk the eggs in a small bowl. Dip the chicken pieces in the egg and fry the pieces in batches, in the oil, until golden. Place the fried chicken into the prepared oven-proof dish. Keep going until all the chicken has been fried. Pour the sauce over the chicken and cook in the oven for 40 minutes. Give it a stir once or twice during cooking time. Serve the sweet-and-sour chicken on steamed rice or noodles, with a sprinkling of sesame seeds.
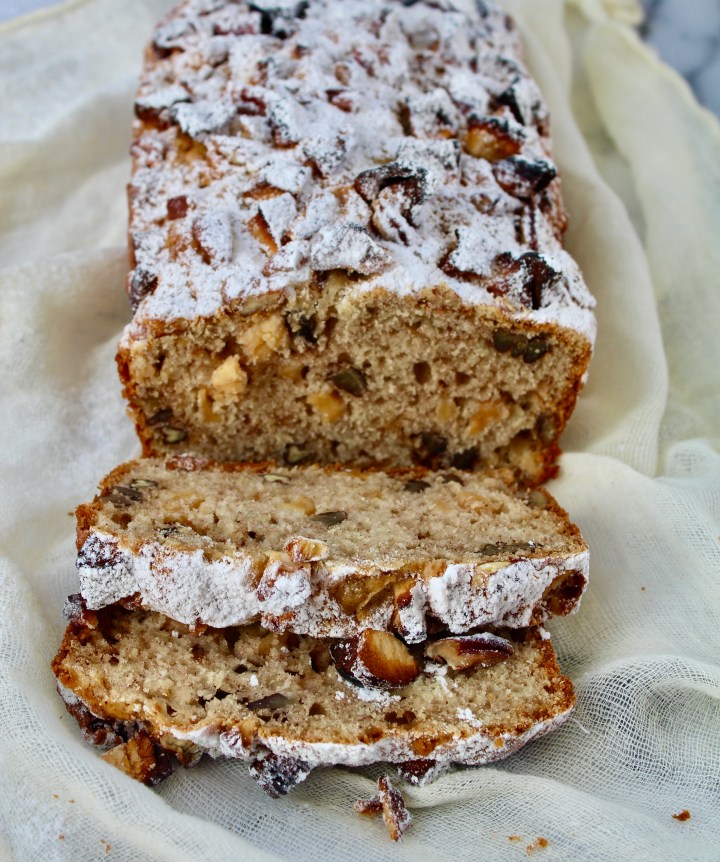
Preheat your oven to 180℃ and line a 23cm X 13cm loaf tin. Add the flour, sugar, baking powder, bicarbonate of soda, salt and cinnamon to a mixing bowl and mix together with a whisk. Add the buttermilk, egg and vegetable oil to a wide-mouth jug and whisk together until blended. Pour the liquid ingredients into the dry ingredients. Stir until all the flour has been incorporated and you are left with a shaggy, wet batter. Add the chopped apple and nuts and stir through. Scrape the batter into the prepared loaf tin and pat it into the corners. Place the loaf in the oven and bake for 50 minutes. Remove from the oven and allow the loaf to cool in the pan for 15 minutes before removing. Place on a cooling rack to cool completely. Dust with icing sugar and serve.
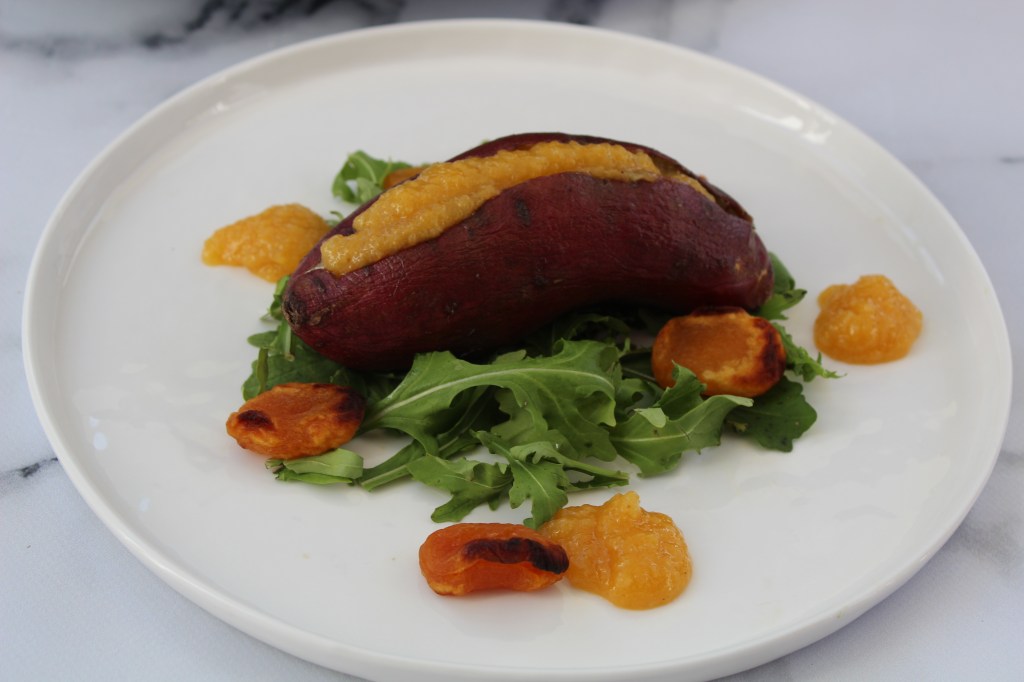
This simple apricot sauce transforms a baked sweet potato into a well-balanced, tasty meal. Easy, quick and utterly delicious!
6 – 8 medium sweet potatoes 250g dried apricots 125ml honey 30ml apple cider vinegar 2,5ml ground ginger 2,5ml ground coriander a pinch of salt
Preheat your oven to 180℃ and line a baking sheet with baking paper. Place the sweet potatoes on the baking sheet and bake for about 40 minutes, until soft. Remove from the oven and keep warm. Turn your oven onto the grill setting. Add the apricots to a mixing bowl and sprinkle lightly with olive oil. Mix through so that all of the apricots are covered in oil. Spread out on a baking sheet lined with baking paper and grill until very lightly charred. Keep an eye on them, they burn quickly! Add half the apricots to a liquidiser. Add the honey, vinegar, ginger, coriander and a pinch of salt and blitz to a purée. Taste the sauce and adjust to your liking. Adjust the thickness to your liking by adding more apricots for a thicker sauce. Make a slit in the baked sweet potatoes and spoon the sauce over it. Serve on rocket leaves and the rest of the whole roasted apricots.