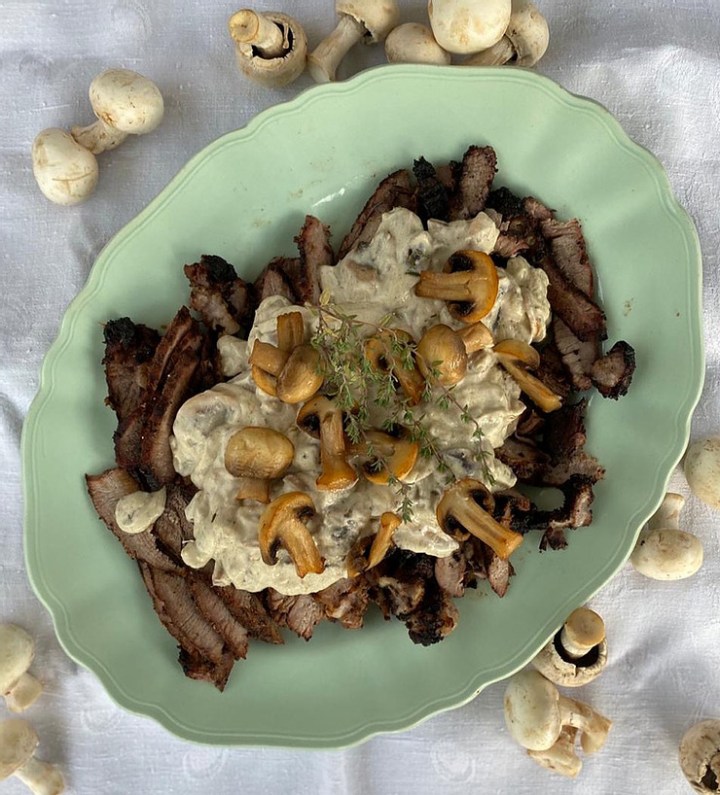
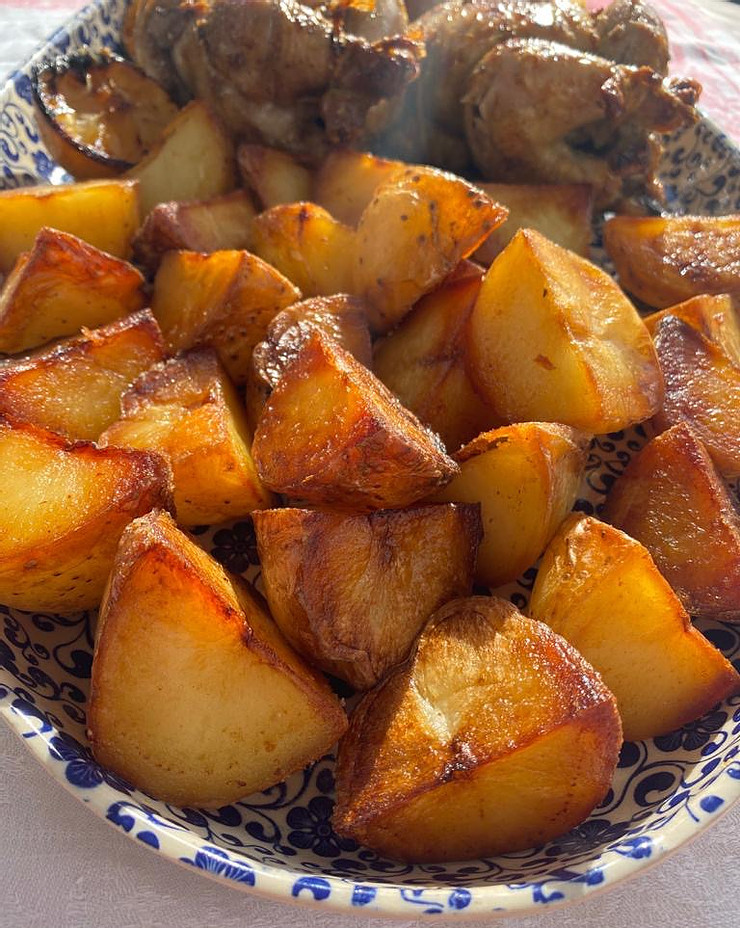
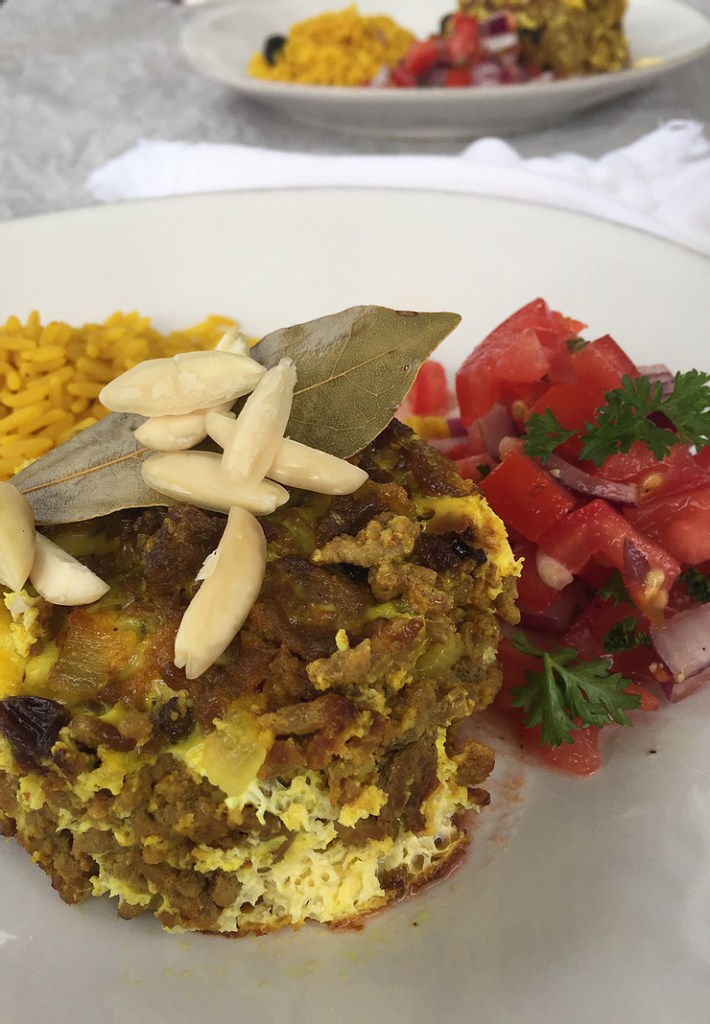
Mushroom Sauce

Mushroom Sauce

There are few things as delicious as a rump steak or a Côte de boeuf that has been perfectly cooked, but believe me, this mushroom sauce elevates what you know as delicious, into pure taste heaven!

Antonio Carluccio, “the godfather of Italian gastronomy” explained the art of cooking mushrooms many years ago when he said that an extremely hot pan boosts the taste of these fungi. I agree completely. The extra hot pan sears the mushrooms, caramelises it and concentrates that incredible, delicious umami yumminess! Do not let the heat scare you … it’s only cooking after all…

200g mushrooms; I use whatever kind I have

30ml butter

30ml olive oil

a small bunch of thyme

1 garlic clove, minced

250ml cream

Clean the mushrooms and slice them.

Heat a saucepan until it is quite hot.

Add the butter and olive oil at the same time and immediately add the mushrooms.

Move the mushrooms around while they sizzle and sing for a good 2 – 3 minutes.

Now, turn the heat down to medium and allow some time for the pan to cool down from the high heat. This is important because you do not want to burn the garlic when you add it to the pan.

Add the garlic to the mushrooms and stir the mixture around for a minute or so.

Add the cream and the thyme and allow the sauce to simmer for 2 minutes. If you cook it for too long it will split!

Season the sauce with salt and pepper and serve warm

Crumpets or Flap Jacks

Crumpets or Flap Jacks

There is a certain tranquility to a Sunday morning… It’s as though everyone in the family wakes up to a more relaxed pace, lingers a bit longer over coffee and breathes in the well deserved break from the usually hectic week at their own unique pace…

Crumpets are the perfect solution for a late breakfast and I love the orange-honey syrup that adds the sweetness to provide that pick-me-up after waking up and the lingering bitterness of the zesty orange

For the crumpets:

62ml sugar

1 egg

125ml milk

15ml vegetable oil

250ml flour

10ml baking powder

1ml salt

Add the sugar and egg to a mixing bowl and beat together with a whisk.

Add half the milk and the vegetable oil to the mixture and mix together to incorporate.

Sift the flour, baking powder and salt together in a separate bowl. 

Add these dry ingredients to the egg mixture and mix through.

Gradually stir in the rest of the milk to form a smooth batter. Stir only until blended.

Heat some oil in a frying pan and fry spoonfuls of the batter over medium heat, until golden. Flip the crumpet and cook on the other side until done.

For the orange-honey syrup:

100ml honey

rind and juice of two oranges

Add the honey to a small saucepan. 

Grate the rind of two oranges into the saucepan and add the juice of both oranges.

Turn the heat onto medium and stir until the orange juice and honey have blended.

Allow the mixture to simmer for about 20 minutes. Take off the heat and allow to cool.

Serve the crumpets with generous amounts of the orange-honey syrup and fresh fruit of your choice.

Gorgonzola and Apple Tart

Gorgonzola and Apple Tart

I love this tart! It is my winter go-to when I want to serve a cheese platter either as a canapé or as a cheese course, but at the same time want something warming and soothing. It also makes for a fabulous lunch, served slightly warm with a crunchy salad on the side.

If blue cheese is not your thing you can easily replace it with goats cheese.

1 quantity store bought puff pastry

8 Granny Smith apples, peeled and cored

100g butter

15ml dark brown sugar

5ml ground cinnamon

200g gorgonzola cheese, or goats cheese

Preheat your oven to 200℃.

Grease or spray a round pie tin of ±26cm in diameter.

Slice the apples into quarters and then half each quarter.

Melt the butter in a large pan over medium heat.

Add the sugar and cinnamon and stir.

Now add the apple slices and cook for about 7 minutes until the apples are softened but still firm. Stir the apple while it cooks so that the butter and sugar coats it. Allow to cool slightly.

Roll out the pastry on a floured surface and line your pie tin.

Break up the gorgonzola and dot the cheese evenly over the uncooked tart base.

Arrange the apple slices on the base as well, drizzle with the buttery juices from the pan and bake for 35 minutes.

Serve slightly warm.

Cauliflower-ricotta Spread

Cauliflower-ricotta Spread

An alternative, nutritious spread in every sense of the word!

1 small cauliflower head, broken into florets

250ml vegetable or chicken stock, a cube will do

150g ricotta cheese

juice of half a lemon; add half of the half and taste before adding more!

salt, pepper, smoked paprika

Pour the stock into a small saucepan, add the florets and bring the liquid to a simmer.

Cook the florets until tender.

Remove the cooked cauliflower from the stock but keep the liquid for now.

Add the cauliflower, ricotta, lemon juice, salt, pepper and a pinch of smoked paprika to a blender.

Add about 50ml of the stock to the blender and blitz the ingredients together until it has a creamy consistency. Add some more stock if you need it.

Taste the mixture and adjust the seasoning and the amount of smoked paprika to your taste.

Makes about 375ml of nutrient packed cauliflower spread.

Perfect Pan-roasted Potatoes

Perfect Pan-roasted Potatoes

These potatoes are somewhere between roasted, fried and crunchy on the one hand, and a heavenly mashed, potato-like pillow of fluffiness on the other, combined into one mouthful of deliciousness. I know, this sounds completely exaggerated and to top it off, it is one of the easiest dishes you will ever cook!

Small waxy potatoes

Salt

Vegetable oil

I use a cast iron pan to cook my potatoes but any heavy bottomed pan will do. 

Wash and dry your potatoes and cut them into quarters.

Pour 0,5 cm of vegetable oil into your pan.

Now sprinkle a generous amount of salt evenly on top of the oil.

Place the potatoes cut-side down into the pan and turn the heat to medium.

Time the potatoes – they have to stay UNTOUCHED in the pan for a full 10 minutes. Do not turn or flip them, even if you are convinced that they’re burning.

Once a full ten minutes have expired you may turn the potatoes onto the other cut-side. Repeat the above process of frying without moving the potatoes around in the pan, but for 5 minutes, not ten.

Once your potatoes are beautifully browned, turn the flame to the lowest setting and cover the pan with a tight fitting lid or aluminium foil. 

Allow to cook for 20 minutes.

Take off the lid and test the potatoes by inserting a sharp knife.

Serve and enjoy immediately.

My Mom’s Apple Tart

My Mom’s Apple Tart

For many years I have thought of this apple tart as “my mom’s apple tart”and I suppose in my frame of reference this will hold true for ever after. My mom was never a keen baker but this was one of the few things she made regularly. To me this apple tart is filled with emotion: it is comforting, filled with love and happy memories and to this day, I believe the one my mother made tasted better than any of the many versions I have since eaten.

For many years I believed it was my mom’s unique recipe but I have since come across this apple tart in many old South African recipe books. I have eaten it at friend’s tea parties, I once had it as a dessert in a restaurant and our Michelin Star chef, Jan-Hendrik van Der Westhuizen, published an almost identical recipe a few months ago.

I cannot decide whether this is a true tart; it might lean towards being a dessert; but what I am certain of is that it is fabulous and definitely makes it onto my list of top 5 eats!

A friend of mine, Elzette le Roux, makes this same apple tart, but she actually cooks the apples from scratch! Believe it or not, this five-star-cook goes through the entire process of peeling, coring and cooking the apples, before she adds it to the batter and of course, hers DOES taste better! But because you don’t know Elzette, I shall offer you “my mom’s” recipe…the quick, convenient one that utilises apples from a friendly tin!

For the batter:

67ml butter

375ml self raising flour

125ml milk

a pinch of salt

3 eggs

375ml sugar

1x 410g tin of pie apples

Preheat your oven to 180℃.

Grease or spray a ceramic oven dish of about 28cm x 18 cm; it makes no difference if your dish is slightly smaller or bigger.

Cream the butter and sugar in a stand mixer fitted with the paddle attachment.

Add the eggs one at a time while mixing continuously, waiting to incorporate the egg before adding the next one.

Add the salt and flour to a separate bowl and pour the milk into a measuring jug. With the mixer running on low speed, alternate adding the flour and milk until everything is incorporated and you have a smooth batter.

Pour half the mixture into the prepared baking dish and spread the pie apples evenly over the surface before topping it with the rest of the batter.

Put the dish into the oven and bake for 45 minutes.

In the meantime, start making the sauce.

For the sauce:

250ml milk

375ml sugar

45ml butter

10ml vanilla

Add all the ingredients for the sauce to a saucepan and turn it on medium heat.

Stir the mixture until the sugar has dissolved and the butter has melted.

Simmer the mixture for about 2 minutes while stirring the whole time.

Take off the heat and wait for the batter to finish cooking in the oven.

Remove the tart from the oven after 45 minutes.

Reheat the sauce and pour the warm sauce over the warm tart.

If it looks as though you have too much sauce, wait a few seconds for it to be absorbed into the sponge and pour over some more. Give the tart time to cool slightly and to soak up all that buttery, sugary yumminess before serving yourself a “tester”…..after all, you are the one that put in the hard work!!

Corn Kernel Bread

Corn Kernel Bread

If you like corn, this rustic little bread is definitely for you. I love the texture the maize meal gives to this bread and the pop of juice when one bites onto a corn kernel. This bread is soft and crumbly and best eaten slightly warm with butter.

500ml maize meal

375ml milk (125ml and 250ml)

5ml salt

50ml butter

3 eggs

10ml baking powder

1x 410g tin of corn kernels, drained


Preheat your oven to 180℃.

Grease and line a small loaf tin. I like to cut the baking paper long enough for it to hang over the edges of the pan, as it makes it easy to lift the bread out of the pan once it’s baked.

Add the maize meal and salt to a mixing bowl.

Add 125ml milk and stir through.

Heat 250ml milk in a small saucepan, stir in the butter until melted and pour the mixture onto the ingredients in the mixing bowl.

Mix well and allow to cool.

Whisk the eggs in a separate bowl.

Add the eggs, baking powder and the drained corn kernels to the cooled mixture and stir until uniformly mixed.

Spoon the mixture into the prepared loaf tin and bake for 40 minutes.

Serve the bread slightly warm with butter.

Spinach Cheesecake

Spinach Cheesecake

Serve this spinach cheesecake as a side dish or as a main course with a salad

1 quantity of my Sour Cream Pastry

For the filling:

500g ricotta cheese

10ml chopped chives

2 eggs

200g bag of baby spinach, blanched, drained thoroughly and chopped

salt and pepper

Sour Cream Pastry shell:

Preheat your oven to 220℃.

Lightly dust a work surface with flour. Roll the pastry to a thickness of 3mm and line the bottom and sides of a greased, loose-bottomed cake tin with the pastry.

Pierce the pastry with the tines of a fork so that the steam can escape while the pastry is cooking.

Now line the pastry case with baking paper and fill it with dried beans or rice in an even layer.

Bake the pastry for 10 minutes, remove from the oven and take out the baking paper and the beans and immediately put it back into the oven for a further 10 minutes. Remove the pastry shell from the oven allow to cool in the cake tin.

For the filling:

Turn down the oven to 180℃.

Add all the ingredients to a mixing bowl and give it a very good mix to evenly blend and combine together.

Spoon into the cooled pastry shell and bake for 35 minutes.

Allow to cool completely before removing from the cake tin.

Dulce de Leche

Dulce de Leche

Dulce de Leche is one of those confections that you want to take with you when you go to bed to read. I know, it’s not one of the most romantic thoughts but believe me, a spoon and a jar of this deliciousness will keep you very happy and content on your own. It is a rich caramel sauce that originated in South America and when translated from Spanish, literally means “sweet milk”.

Authentic Dulce de Leche is made by boiling goats milk and sugar together. It is tricky to make and you literally have to watch it the whole time as it easily catches on the heat.

The closest thing that we in South Africa have to it, is the tinned Caramel Treat or “boiled” condensed milk. I have fond memories from my childhood, eating slightly warm condensed milk, cooked for hours in boiling water. I also have memories of frightening stories where the boiling hot cans exploded and traumatised everyone who was around to witness it! Whether these tales are true or not, I have always felt threatened by the idea of making my own caramel. The other deterring factor is of course the pull-cans which makes it impossible to immerse in a pot of boiling water.

Making this thick, gooey yumminess yourself has the advantage of you being able to control how dark and how runny you want the caramel to be. You can control the consistency to make a delicious light caramel sauce which you can pour onto ice cream and desserts or you can opt for a nutty brown colour and produce a true masterpiece for sandwiching cakes, biscuits or as the Spanish do, spread it on your morning toast! This IS a case of home made being far superior to the convenient tinned version…

1 can condensed milk, or two!

Preheat your oven to 180℃.

Decant the condensed milk into a ceramic baking dish and seal it tightly with aluminium foil.

You now need to cook the condensed milk in a Bain Marie which is a simple water bath:

Place the ceramic dish with the foil into a baking tray and pour enough very hot water into it to reach halfway up the sides of the dish.

Carefully place the baking tray in the oven and bake for 90 minutes before peeking to see what colour and consistency your caramel sauce is. Keep in mind that the mixture will set when cooled and that it will be a lot firmer than what it is while hot. If you want your caramel darker, simply cover the dish and put it back into the oven.

The above photograph is the colour of two tins of condensed milk that has been in the oven for two hours. I like this consistency for sandwiching cakes together as it is easy to spread and does not break the crumb of the cake, but firm enough to hold up.

Once you remove the caramel from the oven, allow it to cool for about 10 minutes before giving it a really good whisk to remove any lumpiness.

Allow to cool completely before decanting it into a glass jar.

The Dulce de Leche can now be stored in the fridge.

Chocolate-mayo Cake

Chocolate-mayo Cake

I’ve always liked the moistness of a chocolate-mayo cake but I found the bite/acidity from the baking powder overwhelming. In this recipe I have replaced the baking powder with bicarbonate of soda and soda water. The cake has retained its moist, soft-crumb texture but is softer on the palette and seem more chocolatey and almost earthy. Give it a try and let me know what you think.

750ml flour

240ml cocoa powder, sifted – yes, do it, it is important!

22,5ml bicarbonate of soda

5 eggs

555ml sugar

7,5ml vanilla

375ml mayonnaise – you need the oil in the mayo, so don’t use a reduced fat mayonnaise

500ml soda water

Preheat your oven to 180℃.

Grease three 22cm loose-bottomed cake tins and line the bottoms with baking paper.

Sift the dry ingredients together and set aside.

Add the eggs, sugar and vanilla to the bowl of a stand mixer.

Beat until the mixture achieves a very light colour.

Turn the mixer down to its lowest setting and add the mayonnaise one spoonful at a time.

Keep the setting on low and add 200ml of the soda water.

Now add the dry ingredients, a spoonful at a time and then finish off by adding the rest of the soda water.

Mix until just incorporated – it is important that all ingredients are incorporated but NOT to over mix!

Divide the cake mixture evenly between the three cake tins and bake for 35 minutes.

Test the cake by inserting a wooden skewer into the centre – it has to come out clean – and remove from the oven if baked.

Cool the cakes on a cooling rack for 15 minutes before removing them from the cake tins.

Sandwich the cakes together with a filling of your choice: Dolce de Leche, chocolate ganache or fruit jam and cream.