Tropical Chocolate Bread

Tropical Chocolate Bread

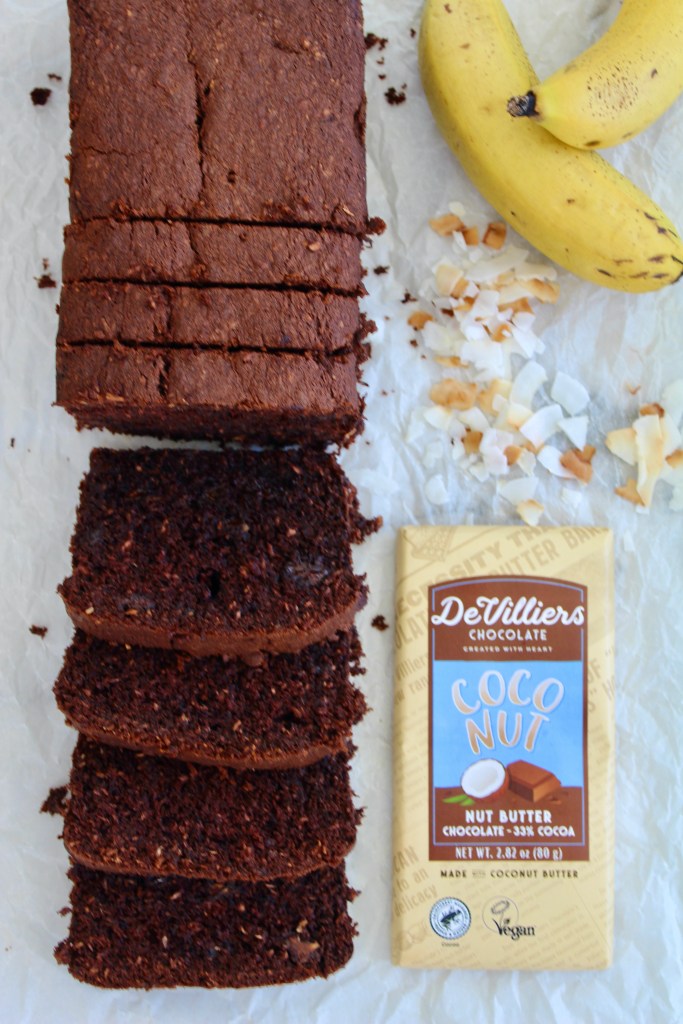
This is a great variation on banana bread and perfect for brunch when served with roasted peaches. Keeps for 2-3 days in an airtight container but it is very good when toasted thereafter.

150g butter
190ml caster sugar
2 eggs
30ml milk
2 ripe bananas, sliced
250ml self-raising flour
5ml bicarbonate of soda
62ml dodo powder, sifted
125ml desiccated coconut
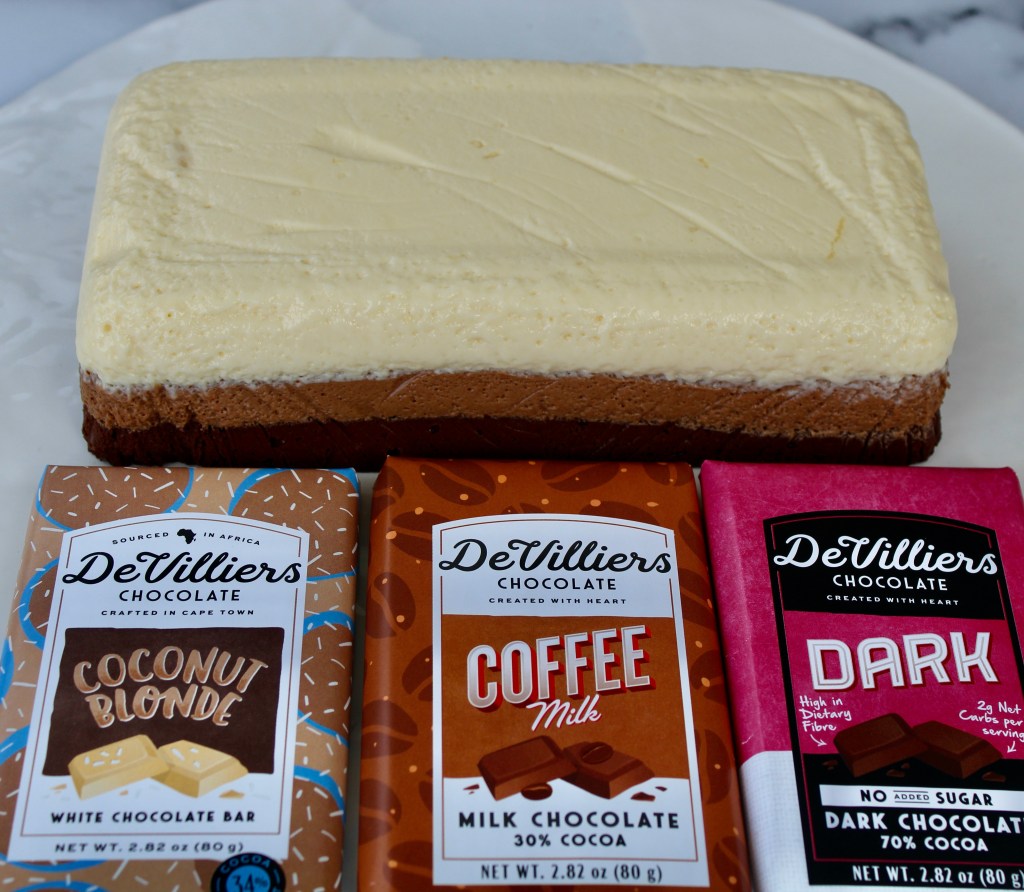
160g De Villiers Cocoa Nut Butter Chocolate, chopped

Preheat your oven to 180℃ and line a 11cm X 25cm X 7cm loaf tin with baking paper.
Add the butter and sugar to the bowl of a stand mixer fitted with the paddle attachment.
Beat on medium-high speed until creamy.
Add the eggs, milk and sliced bananas and mix for another minute.
Sift the flour, bicarbonate of soda and cocoa powder together and stir into the mixture.
Take the bowl from the mixer, add the coconut and chocolate and stir through by hand.
Spoon the mixture into the prepared loaf tin and bake for 1 hour or until a skewer inserted comes out clean.
Turn the bread out onto a wire rack to cool.
Slice to serve.

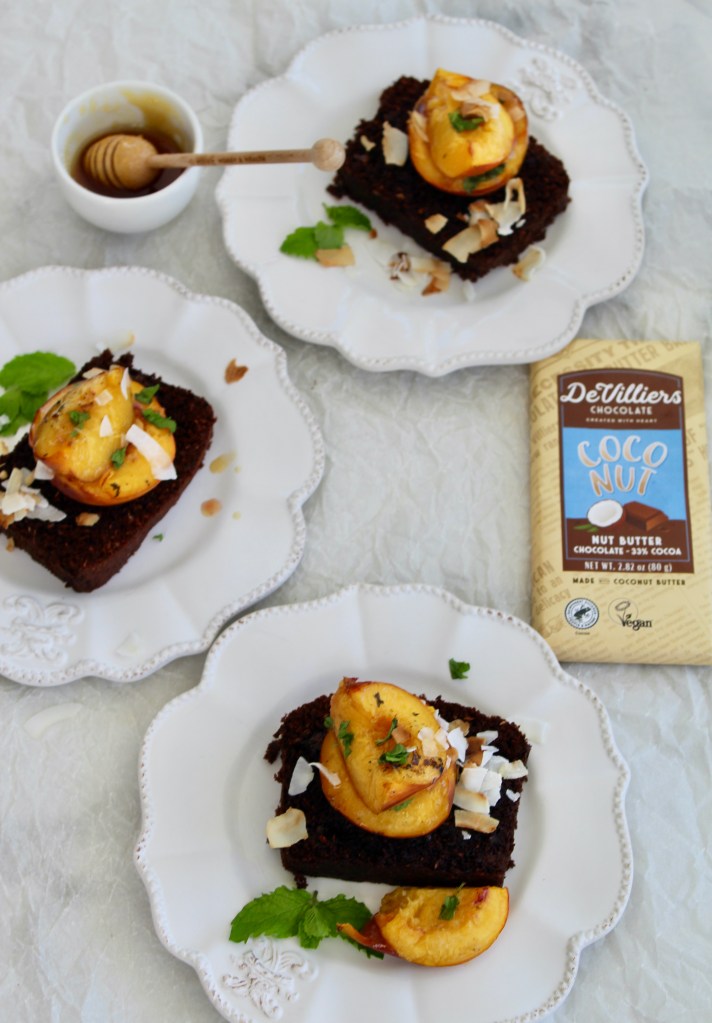
Honey-Roasted Peaches:
6 fresh peaches
15ml butter, cubed
62ml honey

Preheat your oven to 200℃.
Cut the peaches in half and remove the stones.
Place the peach halves on an oven tray and dot the cubed butter over it.
Drizzle over the honey.
Roast in the oven for 15-20 minutes, until caramelised and golden brown.
Serve on a toasted slice of Tropical Chocolate Bread.

Chocolate Calzone

Chocolate Calzone

We made this chocolate calzone one Saturday afternoon when we had leftover pizza dough and it has been a firm favourite from then on. Serve it warm with fresh strawberries and a few basil leaves on the side. This recipe yields 6 – 8 pizzas.

Pizza dough:
15g dry yeast
10ml sugar
800g bread flour
2,5ml salt
60ml olive oil
400ml tepid water

Dissolve the sugar and yeast in a jug with the lukewarm water and stir until the yeast has dissolved. Set aside.
Add the flour and salt to the bowl of a stand mixer fitted with the dough hook.
Add the oil to the flour.
Turn the machine on to its lowest speed and add the yeast mixture. Knead for 2 minutes.
Turn the machine to medium speed and knead for another 6 minutes.
Place the dough in a lightly oiled bowl and cover it with plastic wrap. Leave to stand in a warm place for 90 minutes or until doubled in size.

If you are not baking your pizza in a pizza oven, preheat your oven to 220℃ and spray a baking sheet with cooking spray.
Take the dough from the bowl and release the air from it by gently kneading it by hand for one minute.
Cut the dough into 6 – 8 portions.
Roll each dough ball to a thickness of 5mm and transfer it to the prepared baking sheet.

Assembly of one calzone:
2 x 80g slabs of De Villiers Coco Nut, Nut Butter Chocolate
a handful of cashew nuts

Place the two slabs of chocolate, one atop of the other, on one half of the dough circle and sprinkle over the cashew nuts.
Gently fold the other half of the dough circle over the chocolate and pinch the edges together with your fingers.
Now fold the edge back by 1cm and pinch tightly together.
Bake in the oven for 20 minutes or until done.

Serve the calzone with fresh strawberries and basil leaves.

(The calzone on the photographs was cooked in a pizza oven. )

Chocolate Pistachio Thumbprints

Chocolate Pistachio Thumbprints

125g butter
160ml sugar
1 egg, separated
30ml milk
5ml vanilla
250ml flour
83ml cocoa powder, sifted
1,2ml salt
250ml pistachio, finely chopped
80g nut butter chocolate, chopped
15ml cocoa butter

Preheat your oven to 180℃ and line a baking sheet with baking paper.
Add the butter and sugar to the bowl of a stand mixer fitted with the paddle attachment and cream together.
Add the egg yolk, milk and vanilla and mix together.
Stir in the flour, cocoa powder and salt until combined.
Wrap the dough in plastic wrap and chill in the refrigerator for at least an hour.
Add the egg white to a small bowl and whisk until frothy.
Chop the pistachio finely (I do mine in a food processor) and place it in a shallow bowl.
Scoop up about 15ml of dough and roll it into small balls.
Now roll each ball in the egg white and then in the chopped pistachio.
Place the balls on the prepared baking sheet.
Use the back of a 2,5ml measuring spoon to make an indentation in the centre of each dough ball.
Bake the biscuits for 12 minutes.
Remove the baking sheet from the oven and immediately re-press the indentations you made. Set aside to cool completely.
Add the chocolate and cocoa butter to a heatproof bowl set over a saucepan of simmering water and allow to melt.
Stir every now and then until smooth and glossy.
Remove from the heat and stand the bowl for about 30 minutes.
Spoon the chocolate into the indent in each biscuit and set aside to allow the chocolate to set – preferably overnight.
Makes about 25 biscuits.

Chocolate-Biscuit Meringue

Chocolate-Biscuit Meringue

The recipe makes about 18 meringue biscuits.

4 egg whites, room temperature
220g caster sugar
5ml white vinegar
250ml ladies finger biscuits, chopped (or any other plain biscuit)
250ml almond slivers
160g chocolate of your choice; I used De Villiers Nut Butter with no added sugar

Preheat your oven to 150℃ and line 2 baking trays with baking paper.
Add the egg whites to the bowl of a stand mixer fitted with the whisk attachment and whisk on high speed until medium peaks form.
Add one tablespoon of sugar at a time, with the mixer running. Wait 30 seconds before adding the next tablespoon of sugar and continue until all the sugar has been added.
Whisk on high speed for 2 more minutes.
Add the vinegar and whisk 2 minutes more.
Take the bowl from the mixer and add the biscuits and almonds. Fold through.
Add the chocolate to a heatproof bowl set over a saucepan of simmering water and allow to melt completely.
Spoon a tablespoon of the meringue mixture onto the prepared tray and flatten slightly with the back of a spoon.
Spoon a teaspoon of the melted chocolate on the meringue and swirl it into the top.
Now reduce your oven temperature to 120℃ and place the trays in the oven. Bake for 30 minutes.
Turn off the oven, without opening the door and leave the meringue inside for another 30 minutes.
Remove the trays from the oven and leave the meringue on it until completely cold – another hour or so.

Store the meringue biscuits in an airtight container.


Chocolate Mousse with Caramel Pop Corn

Chocolate Mousse with Caramel Pop Corn

Makes 6 portions mousse and about 10 cups of caramel pop corn.

Chocolate Mousse:
200g dark chocolate, chopped (preferably 70% cocoa solids)
100ml + 300ml cream

Add the chocolate and 100ml of the cream to a heatproof bowl set over a saucepan with barely simmering water.
Allow the chocolate to melt, stirring every now and then until the mixture has amalgamated.
Remove the bowl from the heat and set aside for 10 minutes to cool. Stir the mixture every now and then to help the cooling along.
Add the 300ml cream to the bowl of a stand mixer fitted with the whisk attachment.
Beat the cream until it forms soft peaks when you lift the whisk.
Continue whisking on medium speed while adding a spoonful of the chocolate mixture at a time.
Keep going until you have added all of the chocolate and the mixture forms stiff peaks.
Spoon the mousse into serving bowls/glasses and refrigerate for at least 2 hours.

Caramel Pop Corn:
60ml vegetable oil
83ml popping corn

Add the vegetable oil to a heavy-base saucepan set over medium-high heat.
Add the corn, cover the saucepan with a lid and wait for the corn to pop.
Turn the pop corn out into a large mixing bowl and set aside.

For the caramel:
100g butter
220g brown sugar
170g liquid glucose (or corn syrup or honey)
2,5ml salt
5ml vanilla
2,5ml baking powder

Preheat your oven to 110℃.
Add the butter to a saucepan over medium heat and allow it to melt.
Now add the sugar, glucose and salt and stir together.
Stop stirring as soon as the mixture starts to bubble and allow it to simmer for 4 minutes – WITHOUT STIRRING!
Remove the saucepan from the heat and immediately add the vanilla and baking powder while whisking.
Pour the caramel over the pop corn and mix through – be careful, it is extremely hot!!!
Spread the mixture on 2 oven trays and bake in the oven for 45 minutes, tossing the pop corn every 10 minutes with a wooden spoon.
Remove from the oven and cool completely.
Gently break the pop corn into pieces.

Place a small handful of the caramel pop corn on the chocolate mousse and serve immediately.

The pop corn can be stored for a week in an airtight container.

Gluten-Free Chocolate Cake

Gluten-Free Chocolate Cake

220g best quality dark chocolate (I use De Villiers Chocolate), chopped
125g butter, cubed
5 eggs, separated
190ml sugar
10ml vanilla
2,5ml salt
30ml cocoa powder

Preheat your oven to 170℃ and spray a 22cm loose bottom cake pan with cooking spray. Dust the pan with cocoa powder ensuring the bottom and sides of the pan has an even coating of cocoa powder. Set aside.
Add the chocolate and butter to a heatproof bowl set over a saucepan of simmering water. Stir every now and then until the chocolate has melted completely and the mixture has amalgamated.
Take the bowl from the heat and set aside to cool.
Add the egg whites to the bowl of a stand mixer fitted with the whisk attachment.
Beat the whites on medium until it reaches soft peak stage.
Increase the mixers speed and add the sugar a spoonful at a time.
Beat until medium stiff peaks and set aside.
Add the egg yolks, one at a time, to the chocolate mixture and beat well with a spatula after each addition.
Add the vanilla, salt and cocoa powder and mix together.
Now fold in the egg whites by adding a third of the mixture at a time. Mix/fold until no white streaks are visible.
Scrape the batter into the prepared pan and spread it around evenly.
Bake for 50 minutes. The edges of the cake will pull away from the sides of the pan once it is done.
Cool the cake in the pan before unmoulding it.
Dust with icing sugar and serve.

Chocolate Stout Fruit Cake

Chocolate Stout Fruit Cake

This is fruit cake is dark and rich and incredibly moist and the very best is it does not need time to ripen! You do however need to use a dark chocolate with at least 70% cocoa – I used the Dark Chocolate from De Villiers Chocolates which you can order online.

500ml dark stout beer
800g mixed fruit (raisins, currants, sultanas, cherries, orange peel)
175g butter, softened
200g brown sugar
4 eggs
125g ground almonds
50g cornflour
7,5ml ground cinnamon
5ml allspice
80g dark chocolate (70% cocoa), finely chopped or grated

Pour the stout beer into a saucepan and reduce it to 200ml.
Add the mixed fruit to a ceramic bowl, pour over the stout and set aside to soak overnight.
Preheat your oven to 150℃. Line and lightly spray a 22cm cake pan. Wrap a double layer of baking paper around the outside of the baking tin and secure it with string.
Add the butter and sugar to the bowl of a stand mixer fitted with the paddle attachment and beat on high speed, until light and fluffy.
Turn the speed down and add the eggs one at a time, beating we’ll after each addition and alternating with a spoonful of ground almonds after each addition.
Now add the remaining ground almonds, cornflour and spices and mix together.
Take the bowl from the mixer and stir in the soaked fruit and chocolate.
Scrape the batter into the prepared cake pan and bake for 3 – 4 hours – a cake skewer should come out clean.
Remove the fruit cake from the oven and allow to cool completely in the cake pan.

The fruit cake does not need ripening but keeps really well when wrapped in a layer of baking paper and aluminium foil.

Chocolate Caramel Tart

Chocolate Caramel Tart

Base:
225g chocolate biscuits
150g butter

Filling:
100g butter
200g brown sugar
2 x 385g tins of condensed milk
7,5ml salt

Topping:
83ml cream
160g dark bitter chocolate, chopped

For the base:
Preheat your oven to 160℃ and spray a 23cm loose base tart tin with cooking spray.
Add the biscuits to the bowl of a food processor and process to fine crumbs.
Add the melted butter and mix/blitz until the mixture looks like wet sand.
Spoon the crumb mixture into the tart tin and press it firmly into the base and sides of the tin.
Bake the tart base for 10 minutes.
Remove from the oven and allow to cool.

For the filling:
Add the butter to a saucepan and melt it over medium heat.
Add the sugar and whisk to combine.
Keep stirring the mixture with the whisk until the sugar has melted completely.
Add the condensed milk and keep whisking to incorporate.
Cook the caramel for about 5 minutes, taking that it doesn’t overheat and burn, and then add the salt.
Pour the mixture into the tart case and bake in the oven for 15 minutes.
Take the tart from the oven and set aside to cool slightly.

For the topping:
Add the cream and chocolate to a heatproof bowl set over simmering water.
Stir the mixture every now and then until smooth and completely melted.
Take the bowl from the heat and allow to stand for about 10 minutes. Give it a stir every now and then so that it cools down.
Spoon the chocolate onto the caramel layer and spread it evenly with a spatula.
Refrigerate the tart for 2 hours to set.
Allow the tart to come to room temperature before serving.

Triple Chocolate Mousse

Triple Chocolate Mousse

150g milk chocolate, chopped
45ml boiling water
7,5ml powdered gelatine
3 eggs, separated
375ml whipping cream
150g milk chocolate, chopped
150g dark chocolate, chopped

Line a 22cm x 11cm loaf tin with plastic wrap, leaving enough plastic to make an overhang (so that you can fold it on top of the mousse later on). Tip: wet the loaf tin before lining it – the water will help the plastic “stick” to the the tin.
Add the white chocolate to a heatproof bowl set over a saucepan with simmering water and allow the chocolate to melt. Remove from the heat, give it a good stir and set it aside for about 5 minutes to cool.
Add 15ml of the boiling water to a small cup and sprinkle 2,5ml of the gelatine over. Stir the mixture continuously until the gelatine has dissolved completely – about 2 minutes of constant stirring.
Add the gelatine and one egg yolk to the melted chocolate and stir to combine.
Add 125ml cream to a mixing bowl and beat with electric beaters until soft peaks form.
Add the cream to the chocolate mixture and stir through until combined.
Add one egg white to a clean mixing bowl and beat with an electric whisk until soft peaks form
Fold the egg white into the chocolate mixture with a spatula.
Pour the mixture into the prepared tin and refrigerate for 1 hour or until the white chocolate layer is set.

Repeat the process with the milk chocolate and half of the remaining ingredients.
Pour over the white chocolate mousse and place back in the refrigerator for another hour or until set.

Repeat with the dark chocolate and the remaining ingredients.
Pour over the milk chocolate layer and place in the refrigerator for a minimum of 6 hours.

Serve the mousse with a chocolate sauce or plenty of berries.

Milk Chocolate Brownies

Milk Chocolate Brownies

These brownies are fudgy and chocolatey and all things fabulous and delectable! Easy to make and keeps well in a sealed container for 3 – 4 days.

125g butter, cubed
120g +120g milk chocolate
375ml brown sugar
15ml vanilla
2 eggs
250ml + 62ml flour
15ml cocoa powder
2,5ml salt
1,2ml baking powder

Preheat your oven to 180℃ and line a 20cm X 20cm X 5cm cake tin with baking paper.
Add the butter to a heatproof bowl.
Break the chocolate into pieces and add it to the butter.
Set the bowl over a saucepan with simmering water and allow to melt.
Remove the bowl from the heat and stir the mixture to amalgamate. Set aside, stirring every now and then, to cool until lukewarm.
Add the sugar and vanilla to the chocolate mixture and stir through.
Add the eggs one at a time and beat well with a hand whisk. You want a glossy, smooth mixture.
Sift the flour, cocoa powder, salt and baking powder together and add it to the chocolate mixture. Mix through.
Chop the remaining 120g milk chocolate in to chunks the size of peas.
Stir the chocolate into the brownie mixture.
Scoop the batter into the prepared baking tin and bake for 30 minutes.
Remove from the oven and cool completely before slicing it into 16 squares.
The brownies keep well in a sealed container for 3 – 4 days.