Hot Cross Buns

Hot Cross Buns

Hot cross buns are not difficult to make – if you can bake a bread, which we know everyone can, you can make these. Your family will love you for bringing Easter to them, home made!

200ml milk

55g butter

15g dried yeast (one and a half packets in South African packaging)

450g bread flour

15ml mixed spice

10ml cinnamon

2,5ml nutmeg

55g sugar

1 egg

80g raisins

45ml flour

honey

Warm the milk and 50ml water in a small saucepan. You want the milk to be lukewarm which means you must be able to dip your finger into it without it burning you. If you overheat the milk, simply leave it to stand for a while before adding to the rest of your ingredients. This is important as a too warm mixture will kill the yeast and your efforts!

Melt the butter separately.

Pour the milk into a small bowl and sprinkle the yeast on top. Stir the mixture well and leave aside.

Add the flour , 5ml salt, mixed spice, cinnamon, nutmeg and sugar to a mixing bowl.

Pour the melted butter mixture into the dry ingredients.

Now give the yeast mixture another good stir and pour that in as well.

Beat the egg in a separate bowl and add it to the mixture. Mix with a spatula until you have something resembling a rough dough.

Tip onto a dusted work surface and knead for 10 minutes until the dough is smooth and elastic.

Oil a large mixing bowl and place your dough in it. Cover with a damp tea towel and put it aside to prove. I put mine into a drawer next to my oven where it is warmish and no draughts can get to it, but that’s just me! The dough should double in size and will take about 1 – 2 hours.

Preheat your oven to 190℃ and line a baking tray with baking paper.

Once the dough has doubled in size, dust a work surface and transfer the dough to it.

Knock out the air by kneading the dough for 1 – 2 minutes.

Sprinkle the raisins over it and knead for another 2 minutes. Some of the raisins will come out of the dough while you knead – simply poke them back in.

Divide the dough into 12 equal pieces and roll each into a ball. Place them on the baking sheet with a 1cm space between them to allow for expansion.

Cover the tray with a tea towel and leave for 30 minutes.

Mix the 45ml flour with some water to create a thick paste. This is what you are going to use to create the traditional crosses on your buns. The paste should go into a piping bag but if you don’t have one you can simply pour it into the “corner” of a plastic bag and snip off the tip, thereby creating your own piping bag.

Once the buns have risen and are ready to go into the oven, pipe a steady line across the entire row of buns. Repeat until you have crosses over each one.

Now place into the preheated oven and bake for 20 minutes until golden.

Transfer the baking sheet to a cooling rack and while the buns are hot out of the oven, brush them with runny honey.

Leave to cool and enjoy.

May you and yours have a blessed and peaceful Easter.

Fish Cakes

Fish Cakes

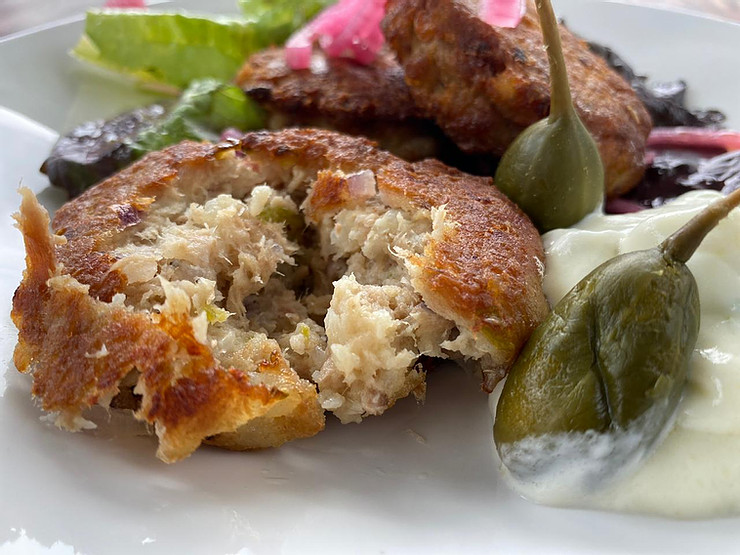
If you have an abundance of fresh fish from which to make fish cakes, you are indeed lucky. I make my fish cakes with canned tuna and because I know what they taste like I refuse to call them second best. They are easy to make, packed with goodness and even the finicky eaters in my family love them. Serve them with the yoghurt dip, some salad, fresh home baked bread and a cold glass of crisp white wine, for a meal fit for a king.

This recipe makes 18 substantial fish cakes which leaves the six of us with 3 each. You can easily half the recipe or you may freeze the cooked fish cakes: pack them in layers between kitchen/wax paper, seal in a plastic bag or container and store in the freezer.

4 cans of tuna, drained

4 potatoes, cooked, peeled and mashed

1 red onion, finely chopped

1 sweet pepper, finely chopped

a handful of herbs, chopped

1 clove of garlic, crushed

2 eggs, lightly beaten

Drain the tuna and add it to a mixing bowl.

Chop the onion, herbs, garlic and sweet pepper and mix with the tuna.

Now add the mashed potato and give the mixture another good mix.

Finally, add the egg, salt and pepper and give the mixture another good stir.

Preheat your oven to 180℃ and generously oil two baking trays.

Scoop two tablespoons of the mixture into your hands and form a thick patty.

Place on the baking sheet. Keep going until you have no mixture left.

You should be left with about 18 patties, depending on the size you make them.

Place the baking trays in the oven and cook for 15-20 minutes before flipping the cakes over. You want both sides of the fish cakes to have a golden, crusty goodness to it, so leave it for a bit longer if necessary.

If you think it needs it, you may add some more oil to the pan, halfway through cooking.

Once the fish cakes are done, remove them from the oven and place them on kitchen paper to get rid of any excess oil.

Yoghurt dip:

250ml plain yoghurt

a handful of chopped cucumber

a handful of chopped caper berries

Mix the chopped cucumber and caper berries into the yoghurt.

Season the mixture with salt. Taste and adjust seasoning.

Serve huge dollops of the dip with the fish cakes.

Cheese Muffins

Cheese Muffins

Sinfully more-ish, these muffins are filled with buttery, garlicky goodness. They are however true muffins and therefore should NOT be over-mixed! The secret to soft muffins are simply incorporating the ingredients versus mixing. Enjoy them as breakfast, brunch or an afternoon filler…

Dry ingredients:

300g flour

7,5ml baking powder

2,5ml bicarbonate of powder

2,5ml salt

Wet ingredients:

1x large egg

250ml milk

60g yoghurt (or you can replace it with sour cream)

85ml vegetable oil

60ml chopped parsley (or any herb/mix of herbs)

1 clove of garlic

Butter and cheese:

50g butter

2 cloves of garlic, crushed

200g cheddar cheese, grated

Preheat your oven to 180℃.

Melt the butter and mix in the garlic. Brush a 12-hole muffin tin with the mixture. Be generous but reserve some of this garlic mixture to brush the tops of the muffins once they are cooked.

Mix the dry ingredients together in a mixing bowl.

Whisk the wet ingredients together in a separate bowl.

Pour the wet ingredients into the dry and mix 8 – 10 times.

Add the cheese and mix as few times as possible – this is simply to incorporate the remaining bits of flour.

Fill the muffing holes to the top and bake for 25 minutes.

Remove from the oven and place on a cooling rack.

Brush each muffin with the butter and garlic mixture while still warm from the oven.

Leave to cool in the muffin tin for 10 minutes before removing.

Chocolate Chip Biscuits

Chocolate Chip Biscuits

A batch of these biscuits never last long…. They are crisp, chocolatey and more-ish! The mixture makes more than a hundred small biscuits and keeps well in a glass container. Easy enough for the kids to make on a rainy day.

400g butter

500ml brown sugar

5ml vanilla essence

2,5ml salt

5x eggs

700g flour

5ml baking powder

500g chocolate chips

Pre-heat your oven to 180℃.

Line two baking sheets with baking paper.

Fit your stand mixer with its paddle attachment. 

Add the butter and sugar to the bowl of your mixer and beat well.

With the mixer running, add one egg at a time, making sure it is well incorporated into the mixture before adding the next one.

Once all the eggs are incorporated, add the vanilla essence and salt.

Measure the flour and baking powder into a separate bowl. Run the mixer on low speed and add one spoonful of the flour mixture at a time, continuing until everything is well blended.

Stir in the chocolate chips.

Scoop a heaped teaspoon of the mixture and place on the baking sheet, flatten slightly by pressing down lightly with your fingers. The biscuit dough should be about 5cm apart as they spread when baking.

Bake the biscuits for 15 minutes, remove from the oven and allow to cool in the pan for a few minutes until cool enough to handle. Cool the biscuits completely on a cooling rack or a clean tea towel. Repeat until you have used up all of the mixture.

Store your biscuits in two glass jars so that you can hide one container…. You will thank me later!

Split Pea Fritters

Split Pea Fritters

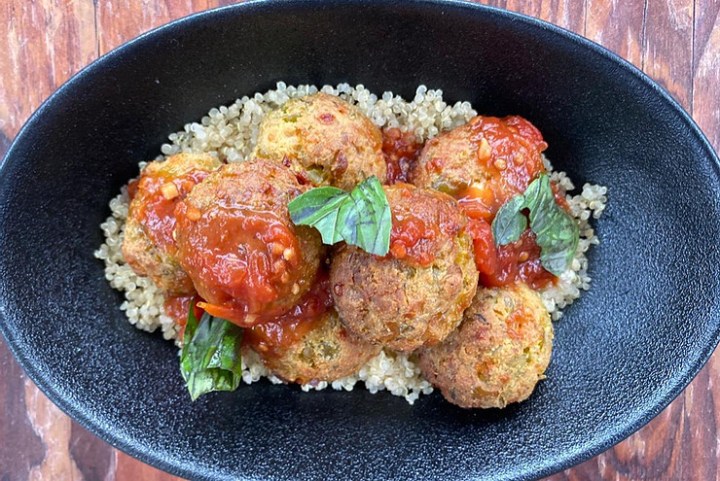
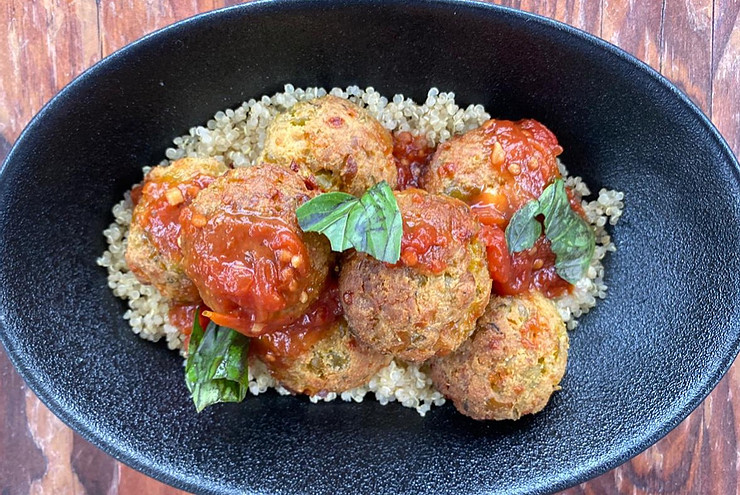
This vegetarian recipe will fool any meat lover and is packed to the brim with nutrition and taste. I prefer making it with dried split peas but lentils and even dried soup mix can be used. My family enjoys them most with a chunky tomato sauce as I serve them on rice, quinoa or couscous. If you don’t feel like making a meal out of them they will be perfect as a snack as well but do add a dip or something saucy on the side.

750ml dried split peas, cooked

3 eggs, lightly beaten

375ml sour cream

180ml grated, hard cheese like pecorino, parmesan

3x cloves of garlic, crushed

90ml parsley, finely chopped

10ml dried thyme

15ml salt

250ml dried bread crumbs

Preheat your oven to 200℃.

Pulse the cooked peas in a food processor but be careful not to make a paste.

Combine the eggs, sour cream, cheese, garlic, parsley, thyme and salt in a separate bowl.

Add the peas to the mixture and mix through.

Stir in the bread crumbs and refrigerate for 30 minutes.

In the meantime line or spray a baking tray.

Roll the split pea mixture into small balls and place on the prepared tray. Brush each ball with some oil.

Bake 25-30 minutes or until golden brown and crispy on the outside.

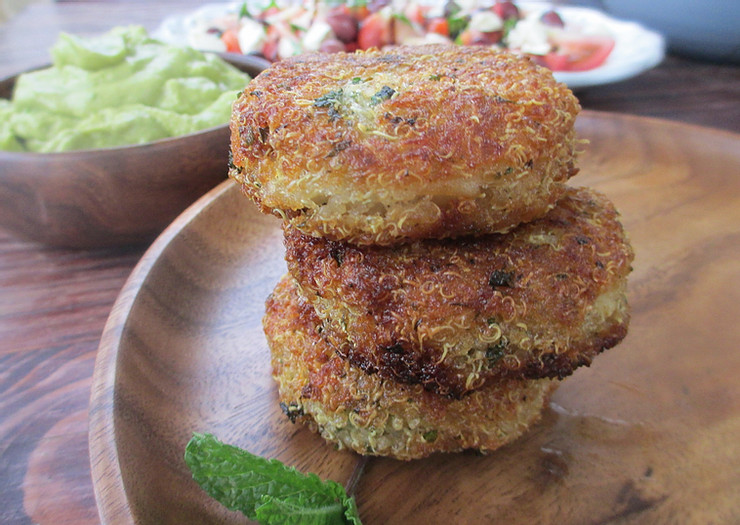
Quinoa and herb fritters with Avocado mayo

Quinoa and herb fritters with Avocado mayo

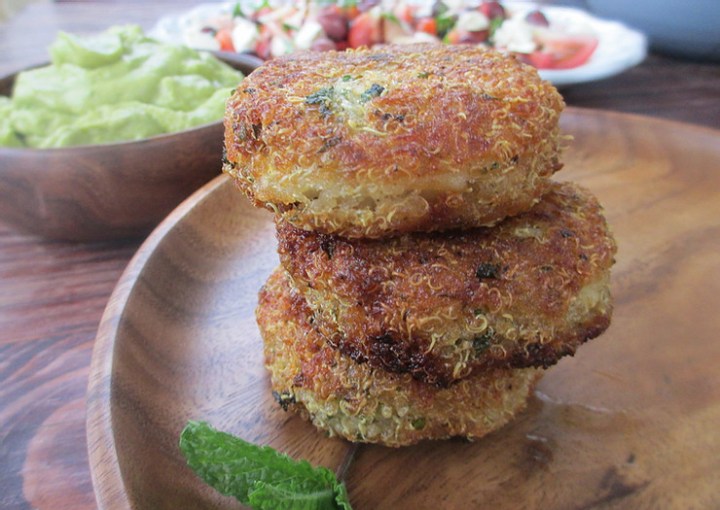
This is a fabulous vegetarian meal: delicious, light and packed with nutrition. Please, please try it!

Fritters:

4x large potatoes, peeled and boiled

300g quinoa, cooked according to instructions

A large handful of fresh parsley, mint or even raw, chopped kale or spinach

Salt and pepper, to taste

Oil to shallow-fry

Combine the cooked quinoa, potatoes and whatever herbs or greens you are using.

Season to taste.

Scoop up enough mixture to shape into patties with a 7cm diameter.

Heat some oil in a pan and fry the patties until golden. Three minutes per side ought to do it.

Avocado mayo:

2x ripe avocados

±125ml olive oil

Scoop the flesh of the avocado into a food processor.

With the engine running, drizzle the olive oil onto the avocado in a trickle.

Incorporate all of the oil and season with salt and pepper.

Serve with the quinoa fritters.

Traditional White Bread

Traditional White Bread

This is a crusty white bread which I bake in a traditional loaf pan. Whenever I want to remind my family that life’s greatest pleasures are hidden in the simple things, this is my go-to. If you don’t have a loaf pan you can shape the dough into a round and bake it on a baking sheet lined with baking paper.

750g white bread flour

10ml salt

10g instant yeast

50ml olive oil

500ml lukewarm water

Add the white bread flour, salt and yeast to a bowl.

Add the olive oil and most of the water. Stir the flour and water to form a dough and add small amounts of the remaining water until the dough looks as though it is coming together. Keep in mind that it is easier to add more water than “taking water out” of your mixture.

Now knead the dough either in the bowl or turn it out onto a work surface. Knead at a steady pace for a good ten minutes. The dough should be smooth and elastic.

Lightly oil a large bowl and place the dough into it. Cover with plastic wrap and place somewhere warm where there is no draft. I usually place mine inside a kitchen drawer next to the oven. Leave to proof for 1-2 hours or literally until it has doubled in size.

Once the dough has risen, turn it out onto a work surface and knead it down. This basically means gently squeezing out the air. Keep squeezing/kneading for a minute or so.

Shape the dough into a rough log shape and gently place into a sprayed/greased loaf tin. Cover the tin with a tea towel and leave to proof for another 20 minutes.

Preheat your oven to 230℃.

Once the loaf has proofed, place it in the oven and bake for 20 minutes.

Without opening the oven door, turn the heat down to 200℃ and bake a further 20 minutes.

Finally, without opening the oven door, turn the heat down to 180℃ and bake for a final 20 minutes.

Remove the bread from the oven and place on a cooling rack. Brush some olive oil over the top and simply stand and admire your handiwork for 10 minutes while still in the tin. After 10-15 minutes you may turn the bread out onto the cooling rack. Loosely cover it with a tea towel and leave to cool or live dangerously, burn your hands and slice a warm crusty slice…Yum!

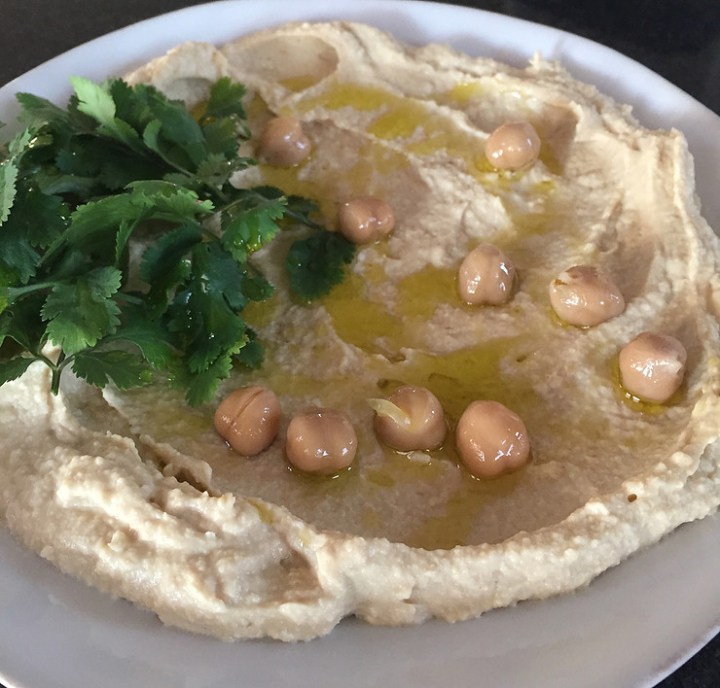
Classic Hummus

Classic Hummus

Hummus is made with chickpeas (which has nothing to do with chicken!), tahini, garlic, lemon and salt. Chickpeas are one of the earliest cultivated legumes known and were recently listed as one of the future 50 foods in the world based on their high nutritional value, relative low environmental impact, flavour, accessibility and affordability.

I love making hummus and keeping it in the fridge as a dip for cucumber sticks or simply spread thickly on a slice of bread or cracker. This recipe is the classic hummus, easy to prepare and takes an entire 5 minutes out of your day! I make mine with a stick blender but you may use a food processor if you prefer. It is important to taste the mixture as you add the different ingredients so that you can adjust it to your liking.

1x 400g can chickpeas

60ml Tahini paste

2 cloves of garlic

juice of 1 lemon

5ml salt

Drain the chickpeas and place in a food processor.

Add the Tahini paste, garlic and lemon juice and blend until smooth and the mixture comes together. I like my hummus to have a slight texture to it but if you want yours completely smooth you can add one or two ice cubes to the mixture and blend again. The ice/water makes for a very smooth, silky spread.

Scrape down the mixture, add half the salt and blitz again.Taste.

Add the rest of the salt if you like. If the mixture lacks punch, add some more lemon juice. Keep going until you have a mixture that makes your tastebuds sing!

Keep covered in the refrigerator for up to four days if you can make it last that long.

Enjoy!

PS: If you don’t have Tahini you can make the hummus without it. The Tahini does add a wonderful nutty background taste but without, is almost just as good…