This is another throw-together, rather than a recipe, but a real winner as it is quick to make and delivers on flavour!
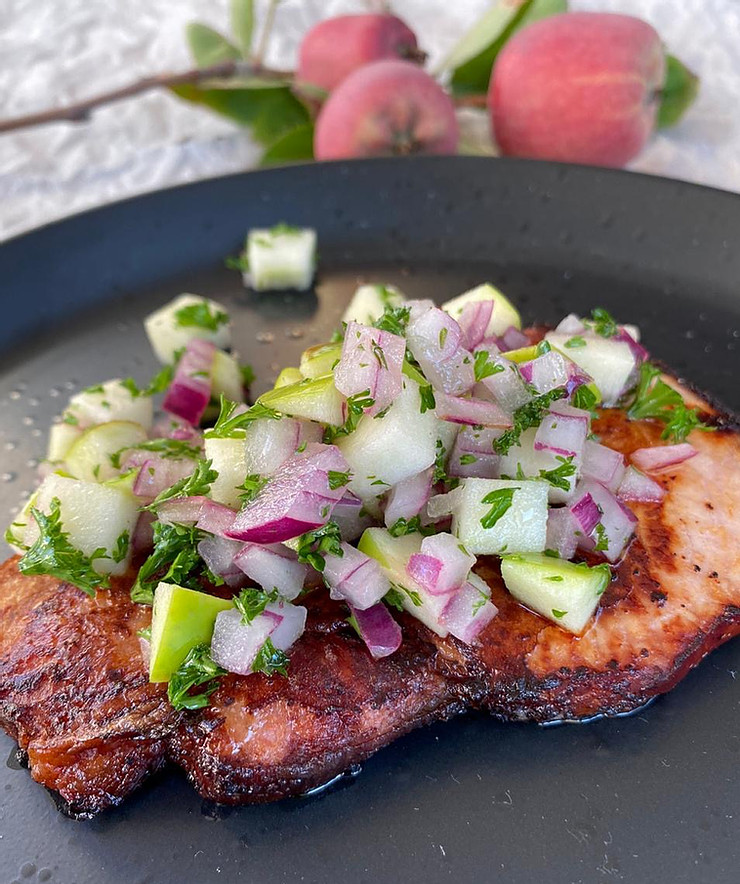
Pork chops
Vodka
Butter or olive oil
Red onion
Granny Smith apples
Fresh herbs
Lemon juice.
Preheat your oven to 180℃
Put a heavy bottomed pan that can go into the oven (no plastic handles) onto high heat. Once it has warmed up, add a knob of butter and allow it to melt. Add the pork chops to the pan and let the meat brown. Flip the chops after about 2 minutes and fry the other side to a delicious golden, caramelised state.
Now, add a good glug of vodka to deglaze the pan. Loosen all the little burnt bits with a wooden spoon so that it can add flavour to the vodka and develop into a sauce. You want enough liquid from the vodka to prevent the chops from going dry but at the same time you do not want to steam the chops or worse, make a soup!!
Season the chops with salt and put the pan into the oven for 15 minutes so that the meat can cook through. If you have thick chops you might want to go towards 20 minutes.
In the meantime make the salsa:
Chop more or less equal amounts of red onion and apple and add it to a small bowl. Chop a small handful of herbs and add to the apple and onion. Now squeeze some lemon juice on top and season with salt and pepper.
Give the salsa a good mix-through and spoon generous amounts onto the warm pork chops. Serve with buttery mashed potato and a beetroot salad.